Can You Make Bread Without Bread Flour?

Rustic homemade bread with flour alternatives on a cutting board.

Introduction

Have you ever wanted to bake bread but found yourself without bread flour? Don’t worry—you’re not alone! Bread flour is a common ingredient in baking, but it’s not the only option. Whether you ran out or are experimenting with alternatives, I’ve got good news: you can make delicious bread without it. The results might surprise you!

This guide will walk you through everything you need to know, from why certain flours are used to discovering the best substitutes. Grab your apron, and let’s dive in!

“Running out of specialty flour is just an opportunity to get creative in the kitchen. Who knows? You might discover a new favorite recipe!”

“Running out of bread flour is just an opportunity to get creative in the kitchen. Who knows? You might discover a new favorite recipe!”

Why Bread Flour Is Typically Used in Baking?

Bread flour has a special role in baking. But why is it the go-to option for so many bread recipes? The secret lies in its high protein content, which directly affects gluten development. Gluten gives bread its stretchy, chewy texture—the hallmark of a good loaf.

When you knead dough made with bread flour, the gluten forms a network that traps air bubbles. This is what makes your bread rise tall and have that perfect crumb structure.

So, does this mean you can’t make good bread without it? Absolutely not! You just need to adjust your approach.

The Growing Popularity of Flour Alternatives

With dietary trends shifting and creative cooking on the rise, alternative flours are having a moment. Many people are exploring options like whole wheat, oat, almond, and even gluten-free flours. These alternatives bring unique flavors and textures to your bread, and some even offer added health benefits.

Why stick to tradition when you can experiment? Flour alternatives are like a treasure chest—you never know what you’ll uncover.

Curious about healthier cooking options? You might enjoy exploring how restaurants make omelettes so fluffy, a guide that offers insights into crafting better textures in your recipes.

“Baking without bread flour is like taking a scenic route. The destination is still delicious, but the journey is far more interesting. 🌟”

Understanding Bread Flour vs. Other Flours

Let’s take a closer look at what sets bread flour apart and how other types of flour measure up.

What Makes Bread Flour Unique?

Bread flour typically has a protein content of 12-14%, which is higher than all-purpose flour. This high protein level creates strong gluten bonds, perfect for achieving that airy, chewy bread texture. Think of it like the muscle of flours—it works harder and delivers results.

How All-Purpose Flour Differs

All-purpose flour is the jack-of-all-trades in the kitchen. It has a lower protein content (8-11%), making it more versatile but less specialized for bread baking. While it doesn’t develop as much gluten, it’s still a great option for softer breads, like sandwich loaves or flatbreads.

Gluten and Protein Content: The Key Differences

Protein is the unsung hero of bread-making. The higher the protein, the more gluten—and the more gluten, the better the bread structure. However, not all breads need a lot of structure. Soft rolls and quick breads, for instance, can thrive with less gluten.

Substitutes for Bread Flour

Alternative flours in bowls on a kitchen counter.

Now that you know the basics, let’s explore some fantastic substitutes for bread flour. These options are pantry-friendly and easy to use.

All-Purpose Flour: A Versatile Alternative

All-purpose flour is the most common substitute for bread flour. It’s available everywhere and produces decent results for most bread recipes. To mimic bread flour, you can add a tablespoon of wheat gluten to each cup of all-purpose flour. This boosts the protein content and helps achieve better gluten formation.

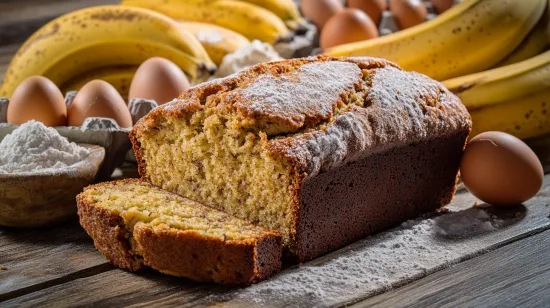
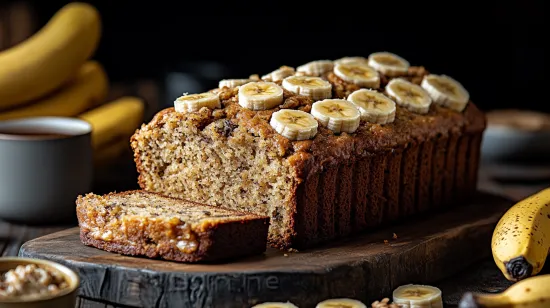
Looking to try something equally versatile? Check out this ultimate banana bread recipe using just two bananas for another simple but satisfying baking project.

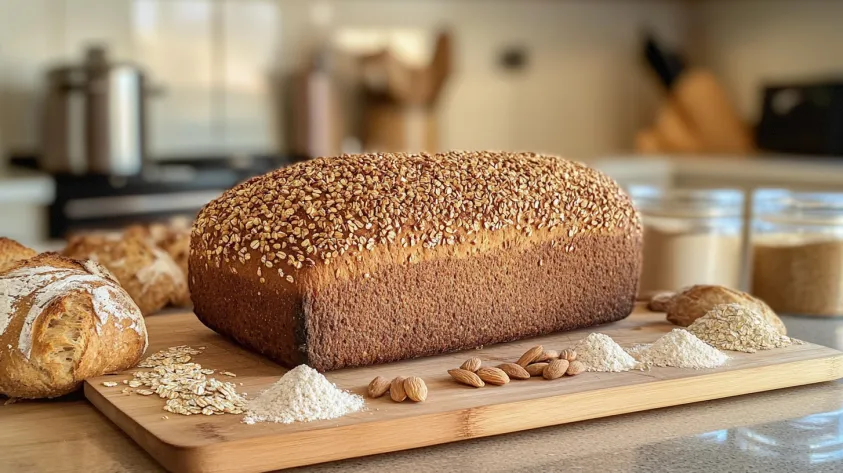
Whole Wheat Flour: Healthier but Denser

Whole wheat flour is an excellent choice if you’re looking for a healthier option. It’s rich in fiber and nutrients, but it does make bread denser. To balance this, try mixing it with all-purpose flour. For example, use a 50/50 ratio of whole wheat and all-purpose flour for lighter results.

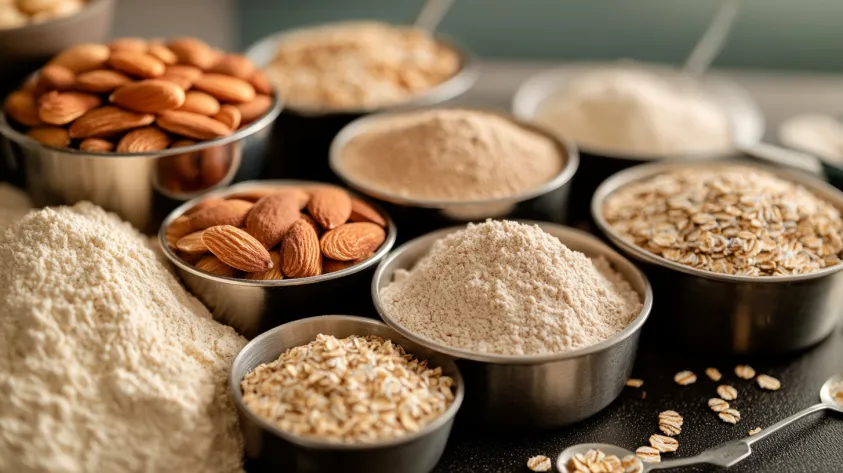
Gluten-Free Options: Almond, Oat, and Coconut Flour

If you’re gluten-intolerant or just want to try something different, gluten-free flours are a game-changer. Almond flour adds a nutty flavor, oat flour gives a mild sweetness, and coconut flour creates a unique texture. Keep in mind that gluten-free flours often require extra binding agents, like eggs or xanthan gum.

“Gluten-free flours are like the wildcards of baking. They’re unconventional, but with a little patience, they shine. 🌈”

Spelt and Rye Flour: Ancient Grain Alternatives

Spelt and rye flours are perfect for rustic, hearty breads. They have a lower gluten content than bread flour but add depth and complexity to the flavor. These flours work best in recipes that don’t need a lot of rise, like artisan loaves or flatbreads.

Step-by-Step Guide to Making Bread Without Bread Flour

No-knead bread in a Dutch oven with a golden crust.

Ready to make bread without bread flour? Let’s go step by step so you can nail the process. Whether you’re using all-purpose flour, whole wheat, or gluten-free options, these tips will ensure your bread comes out perfectly.

Adjusting Your Recipe for Flour Substitutes

Switching flours isn’t just about swapping one for another—it’s about balance. Here’s how to adjust your recipe:

  1. Measure Carefully: Different flours absorb water differently. Start by using slightly less water than your recipe calls for, then add more if needed.
  2. Mix Slowly: Some flours, like whole wheat, need more time to hydrate. Let your dough rest for 10-15 minutes after mixing to allow the flour to absorb moisture fully.
  3. Add Gluten Boosters: If you’re using all-purpose flour, adding a tablespoon of vital wheat gluten per cup can replicate the texture of bread flour.

“Think of your dough as a living thing—it needs patience, care, and just the right environment to thrive. ❤️”

Tips for Mixing and Kneading Non-Traditional Dough

When working with alternative flours, the kneading process might feel a bit different. Here are some pro tips:

  • Be Gentle: Over-kneading can make gluten-free or whole wheat dough tough. Aim for a smooth but slightly sticky consistency.
  • Hydration Matters: Dough made with whole wheat or oat flour can dry out quickly. Keep a small bowl of water nearby to wet your hands while kneading.
  • Stretch and Fold: For artisan-style loaves, use the stretch-and-fold method instead of traditional kneading. This technique helps develop gluten without overworking the dough.

Baking Techniques for Perfect Texture

Now comes the fun part—baking your bread! Alternative flours can behave differently in the oven, so follow these techniques for success:

  1. Preheat Thoroughly: Ensure your oven is fully preheated. Consistent heat is crucial for a good rise.
  2. Use Steam: Place a pan of water in the oven or spray the inside with water before baking. Steam helps create a crispy crust and keeps the bread moist.
  3. Check for Doneness: Bread made without bread flour may take slightly longer to bake. Tap the bottom of the loaf—if it sounds hollow, it’s done.

“Baking bread is like painting a masterpiece—it’s all about timing, precision, and a little creativity. 🎨”

Common Problems and Their Solutions

Even seasoned bakers run into hiccups. Here’s how to troubleshoot some common issues when baking without bread flour.

Why Is My Bread Too Dense?

A dense loaf is often a sign of insufficient gluten development or hydration. Here’s how to fix it:

  • Hydrate Properly: Add a bit more water to your dough. Wet dough might be sticky, but it leads to better crumb structure.
  • Let It Rest: Allow your dough to rise for longer. Alternative flours can take more time to develop structure.

How to Achieve a Good Rise Without Bread Flour

Struggling to get your bread to rise? Try these tips:

  • Use Fresh Yeast: Check the expiration date on your yeast—it loses potency over time.
  • Warm Environment: Dough rises best at warm temperatures. Cover your bowl and place it in a warm, draft-free spot.
  • Add Gluten: For all-purpose flour, a small amount of vital wheat gluten can make all the difference.

Troubleshooting Texture Issues

Bread made with alternative flours can sometimes feel crumbly or gummy. Here’s how to avoid that:

  • Don’t Overbake: Keep an eye on your bread to prevent it from drying out. Use a thermometer to check—bread is done at around 190°F (88°C) internally.
  • Experiment with Ratios: If your bread feels too crumbly, try mixing flours. A blend of all-purpose and whole wheat often works well.

Benefits of Using Alternative Flours

Switching from bread flour isn’t just about convenience—it can also open the door to new flavors and nutritional benefits.

Health Advantages of Whole Grain and Gluten-Free Flours

Alternative flours often pack more nutrients than refined bread flour. Whole wheat, for example, is rich in fiber, while almond and coconut flours are great for low-carb diets. By experimenting with these flours, you’re not just making bread—you’re boosting your health.

For more tips on balancing nutrition with flavor, explore the Mexican omelette recipe for a unique and healthy breakfast option.

Unique Flavors and Textures from Alternative Flours

Every flour has its own personality. Rye adds an earthy taste, oat flour brings subtle sweetness, and almond flour creates a soft, cake-like texture. Think of your flour choice as seasoning—it’s what makes your bread uniquely yours.

“Why stick to one flavor when you can create a whole symphony? Flour alternatives are like spices for your bread-making journey. 🌾”

Let’s dive into some tried-and-true recipes that work beautifully without bread flour. These recipes are versatile, beginner-friendly, and guaranteed to satisfy your bread cravings.

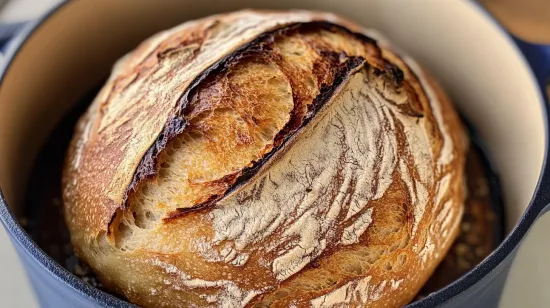
No-Knead Bread with All-Purpose Flour

This recipe is perfect for anyone who wants homemade bread without the hassle of kneading.

Ingredients:

  • 3 cups all-purpose flour
  • 1 ½ teaspoons salt
  • ½ teaspoon instant yeast
  • 1 ½ cups warm water

Instructions:

  1. Combine all ingredients in a large mixing bowl until a shaggy dough forms.
  2. Cover with plastic wrap and let it rise for 12-18 hours at room temperature.
  3. Preheat your oven to 450°F (230°C). Place a Dutch oven inside to heat up.
  4. Transfer the dough to the hot Dutch oven, cover, and bake for 30 minutes. Remove the lid and bake for an additional 15 minutes.

Result: A crusty, artisan-style loaf that’s soft and chewy on the inside.

Rustic Whole Wheat Bread Recipe

For those seeking a healthier option, this whole wheat bread is a winner.

Ingredients:

  • 2 cups whole wheat flour
  • 1 cup all-purpose flour
  • 1 tablespoon honey
  • 2 teaspoons salt
  • 1 packet active dry yeast
  • 1 ¼ cups warm water

Instructions:

  1. Dissolve yeast and honey in warm water; let it sit until foamy.
  2. Combine flours and salt in a mixing bowl. Gradually add the yeast mixture, kneading until a smooth dough forms.
  3. Let the dough rise for 1 hour, then shape into a loaf and place in a greased pan.
  4. Bake at 375°F (190°C) for 30-35 minutes.

Result: A hearty, flavorful loaf perfect for sandwiches or toast.

Gluten-Free Sandwich Bread Recipe

Gluten-free bread can be tricky, but this recipe makes it simple.

Ingredients:

  • 2 ½ cups gluten-free flour blend
  • 2 teaspoons baking powder
  • 1 teaspoon xanthan gum
  • 1 ½ teaspoons salt
  • 1 ½ cups warm water
  • 2 eggs (or flax eggs)
  • 2 tablespoons olive oil

Instructions:

  1. Whisk dry ingredients together in a large bowl.
  2. Add water, eggs, and olive oil, mixing until a smooth batter forms.
  3. Pour the batter into a greased loaf pan and let it rise for 30 minutes.
  4. Bake at 375°F (190°C) for 40-45 minutes.

Result: A soft, gluten-free bread perfect for sandwiches and spreads.

Storing and Preserving Bread Made Without Bread Flour

Once you’ve baked your masterpiece, you’ll want to keep it fresh for as long as possible. Here’s how:

Best Practices for Keeping Bread Fresh

  1. Room Temperature: Wrap your bread in a clean kitchen towel or store it in a bread box. Avoid plastic bags—they trap moisture and can make the bread soggy.
  2. Refrigeration: Not recommended unless your kitchen is very humid. The fridge can dry out bread quickly.

Freezing and Reheating Tips

Freezing is a great way to extend the life of your bread.

  • Freeze Whole Loaves: Wrap the bread tightly in plastic wrap, then foil, and freeze for up to 3 months.
  • Freeze Slices: Pre-slice your bread and store slices in a freezer bag for easy access.
  • Reheat: Warm the bread in the oven at 300°F (150°C) for 10-15 minutes to restore its texture.

“Freezing bread is like hitting the pause button on freshness. Your loaf stays ready for whenever you need it! ❄️”

Frequently Asked Questions

Still have questions? Let’s tackle some common concerns about making bread without bread flour.

Can I Use Cake or Pastry Flour for Bread?

Yes, but with caution. Cake and pastry flours are low in protein, which means they produce less gluten. While they work for softer breads like brioche, they’re not ideal for chewy, structured loaves.

How Do I Improve the Texture of Non-Traditional Bread?

To improve texture:

  • Add a tablespoon of vital wheat gluten to flours with low protein content.
  • Use eggs or other binding agents for gluten-free recipes.
  • Don’t skip resting and rising times—they help develop structure.

Is Bread Without Bread Flour Suitable for Beginners?

Absolutely! Making bread without bread flour is a great way to learn about baking fundamentals. The process teaches you how different flours behave and encourages creativity in the kitchen.

Conclusion

Why Experimenting with Flour Alternatives Is Worth It

Baking without bread flour isn’t just a workaround—it’s an adventure. Whether you’re using all-purpose flour, whole wheat, or gluten-free blends, you’ll discover new flavors, textures, and techniques that elevate your baking game.

“Don’t let the absence of bread flour stop you. In baking, there’s always a way, and the results are always delicious.”

Final Thoughts on Making Bread Without Bread Flour

Bread-making is an art and a science, but above all, it’s about enjoying the process. So next time you find yourself without bread flour, don’t stress—experiment! Who knows? You might create a recipe so good you’ll never go back to traditional bread flour again.

Happy baking! 🍞

Are Pasta and Beans Good? An In-Depth Analysis

Pasta and beans dish with fresh herbs and grated cheese.

When it comes to comfort food, pasta and beans often make the list. But are they actually good for you? Let’s dive into this classic combo and see what makes it a popular choice. Spoiler alert: They might just be the ultimate power duo your meals have been missing!

Introduction:

The Popularity of Pasta and Beans

Steaming bowl of Italian pasta e fagioli with white beans and parsley

This classic pairing is like old friends—simple, reliable, and satisfying. Whether it’s a steaming bowl of pasta e fagioli (Italian for “pasta and beans”) or a hearty chili, this combo has earned its spot on dinner tables worldwide. Why is it so loved? It’s affordable, filling, and incredibly versatile.

Historical Significance of Pasta and Beans

Did you know that pasta and beans have been around for centuries? This pairing originated in humble kitchens, where people needed to create nourishing meals from whatever was available. In places like Italy and Mexico, these dishes became staples—not just for their taste, but because they’re packed with energy and nutrients.

Pasta and beans: a simple dish with a rich history that keeps bringing people together.

Nutritional Value of Pasta

Macronutrients in Pasta

Let’s talk carbs for a second. Pasta is primarily made of carbohydrates, which are your body’s main energy source. Think of it like fuel for your car—without carbs, your body might stall. But not all carbs are created equal. Whole-grain pasta is a superstar here. It’s loaded with fiber, which keeps your tummy happy and your energy levels steady.

Micronutrients in Pasta

But wait, there’s more! Pasta isn’t just about carbs. It’s also got a little bit of protein and some key micronutrients like iron and B vitamins. These vitamins are essential for keeping your energy up and your brain sharp. So, if anyone tells you pasta is just empty calories, you can confidently say, “Not so fast!”

Nutritional Value of Beans

Protein Power in Beans

Assorted beans in bowls showcasing their variety and nutrition.

Beans are basically nature’s little protein-packed powerhouses. They’re an excellent plant-based protein source, which makes them perfect for vegetarians, vegans, or anyone trying to eat less meat. Plus, the protein in beans helps repair muscles, build tissues, and keep you feeling full longer.

Vitamins and Minerals in Beans

Beans are also bursting with vitamins and minerals like potassium, magnesium, and folate. Folate is especially important because it helps your body produce and maintain new cells. And let’s not forget the fiber! Beans are loaded with it, which is great for your digestion.

Think of beans as the Swiss Army knife of nutrition—they do a little bit of everything!

Combining Pasta and Beans: A Nutritional Match

Amino Acid Profile and Protein Completeness

Here’s where it gets interesting. Pasta and beans are like puzzle pieces—they fit together perfectly. Beans are rich in lysine, an essential amino acid that pasta lacks. When you combine the two, you get a complete protein, meaning your body gets all the essential amino acids it needs. How cool is that?

Energy and Satiety Benefits

This combo isn’t just tasty; it’s super satisfying. The carbs in pasta give you quick energy, while the protein and fiber in beans keep you full for hours. It’s like having the best of both worlds. Whether you’re prepping for a long day or recovering from a workout, pasta and beans have your back.

Are Pasta and Beans Good for Weight Management?

High Fiber Content: A Key to Fullness

Ever feel like you’re hungry an hour after eating? That’s where fiber comes in. Both pasta (especially the whole-grain kind) and beans are high in fiber, which slows down digestion and keeps you feeling full longer. It’s like having a built-in hunger shield.

Caloric Considerations and Portion Control

Of course, too much of a good thing can be… well, too much. Pasta and beans are nutrient-dense, but they’re also calorie-dense. The trick is portion control. A balanced plate with a mix of pasta, beans, and some veggies can keep you on track without sacrificing flavor.

Potential Health Benefits of Pasta and Beans

Cardiovascular Health

Did you know that beans can help lower cholesterol? Pair that with whole-grain pasta, and you’ve got a meal that’s heart-healthy and delicious. Eating this combo regularly can reduce your risk of heart disease. Talk about a win-win!

Blood Sugar Regulation

Beans have a low glycemic index, meaning they don’t cause huge spikes in blood sugar. Combine that with whole-grain pasta, and you’ve got a meal that’s friendly for people managing diabetes or anyone looking to maintain steady energy levels throughout the day.

Gut Health and Digestion

Your gut is like a garden, and fiber is the fertilizer. The high fiber content in both pasta and beans promotes a healthy gut by feeding the good bacteria in your digestive system. A happy gut equals a happy you!

Common Problems When Eating Pasta and Beans

Digestive Issues

Let’s be real—beans have a bit of a reputation, don’t they? For some people, eating beans can lead to gas or bloating. This happens because beans contain complex sugars that your digestive system struggles to break down. The result? Let’s just say it’s not always pretty.

Pasta, on the other hand, might cause issues for people who are sensitive to gluten. Gluten intolerance or celiac disease can lead to bloating, cramps, or worse if regular pasta is consumed.

Gluten Intolerance and Celiac Disease

If you’ve ever felt uncomfortable after eating pasta, gluten might be the culprit. Gluten is a protein found in wheat, and while some people tolerate it just fine, others can’t. For people with celiac disease, even a tiny bit of gluten can trigger serious digestive problems.

Beans contain a sugar called raffinose, which can be tough for your gut to digest. When bacteria in your gut get to work on it, they produce gas. It’s completely normal, but it can be uncomfortable—or downright embarrassing.

Beans, beans, they’re good for your heart… but sometimes they come with a side of awkward moments!

Solutions to Common Problems

Cooking Techniques to Reduce Bean Side Effects

So, how do you enjoy beans without the uncomfortable aftermath? The trick is in the prep. Soaking beans overnight and rinsing them thoroughly can help reduce those pesky sugars that cause gas. You can also try adding spices like cumin or ginger while cooking—they’re known to aid digestion.

Choosing Gluten-Free Pasta Options

For those who can’t handle gluten, the pasta aisle has options! Gluten-free pasta made from rice, quinoa, or chickpeas can give you the same great taste and texture without the side effects. Bonus: some of these options are even higher in protein and fiber.

Portion and Pairing Strategies

If you’re worried about overeating, try balancing your plate. Pair a smaller portion of pasta and beans with a big helping of veggies or a fresh salad. This way, you’ll get all the benefits of pasta and beans without overdoing it.

Italian Pasta e Fagioli

Pasta e fagioli served with crusty bread on a table

Let’s start in Italy, the land of pasta. Pasta e Fagioli, or “pasta and beans,” is a classic comfort dish. It’s hearty, flavorful, and surprisingly simple. With ingredients like olive oil, garlic, tomato, and rosemary, this dish brings out the best in both pasta and beans.

Fun fact: Pasta e Fagioli was originally a “poor man’s dish,” but today, it’s a staple in Italian households—and for good reason!

Mexican Frijoles con Fideos

In Mexico, beans and pasta come together in Frijoles con Fideos. This dish often features thin noodles, pinto beans, and a spicy tomato-based sauce. It’s a budget-friendly meal that’s packed with flavor and nutrients.

Mediterranean-Inspired Salads

Who says pasta and beans have to be served hot? In the Mediterranean, they’re often paired in cold salads with ingredients like cucumbers, cherry tomatoes, and feta cheese. Drizzle on some olive oil and lemon juice, and you’ve got a refreshing, healthy dish.

Pasta and Beans for Special Diets

Vegan and Vegetarian Diets

Pasta and beans are a dream team for vegans and vegetarians. Together, they provide a complete protein source, which can sometimes be tricky to find in plant-based diets. Add some veggies, and you’ve got a meal that’s as colorful as it is nutritious.

Low-Carb and Keto Adjustments

If you’re following a low-carb or keto diet, traditional pasta might not fit the bill. But don’t worry—zucchini noodles (aka zoodles) or shirataki noodles can step in. Pair them with beans sparingly to keep your carbs in check while still enjoying the dish.

Are Pasta and Beans Sustainable?

Environmental Impact of Beans

Beans are a sustainability superstar. They require less water and energy to grow compared to many other protein sources, like beef. Plus, they enrich the soil with nitrogen, making them great for the environment.

Pasta’s Role in a Sustainable Diet

Pasta also has a relatively low environmental footprint, especially when made with minimal processing. Combine it with beans, and you’ve got a meal that’s not just good for you but good for the planet.

Eating pasta and beans is like giving Mother Earth a little hug.

Frequently Asked Questions (FAQs)

Can You Eat Pasta and Beans Every Day?

Absolutely, but with a little planning. Eating pasta and beans daily can provide you with essential nutrients, but variety is key to a balanced diet. Mix it up with different types of pasta (like whole-grain or gluten-free) and experiment with various beans (black beans, chickpeas, lentils). And don’t forget to add some veggies or lean proteins for a complete, balanced meal.

Are Canned Beans as Healthy as Dried Beans?

Good news—canned beans are just as nutritious as dried beans! They’re a lifesaver when you’re short on time. Just make sure to rinse them thoroughly to reduce sodium. If you’re using dried beans, soak them overnight to make them easier to cook and digest. Either way, beans pack a nutritional punch.

How Do You Store Leftover Pasta and Beans?

Leftovers? Lucky you! Store your pasta and beans in an airtight container in the fridge, and they’ll last for about three to four days. If you want to keep them longer, freeze individual portions. Just reheat and enjoy—a quick and easy meal is always a win.

Pro tip: Add a splash of olive oil before storing to keep your pasta from sticking together.

Conclusion

The Verdict on Pasta and Beans

Pasta and beans are more than a tasty meal—they’re a nutritional powerhouse and a sustainable choice. From boosting energy to improving digestion, this duo checks all the boxes for a balanced diet. Whether you’re exploring new recipes or adapting traditional ones, pasta and beans prove that simplicity can be incredibly satisfying.

For more inspiration, check out The Ultimate Banana Bread Recipe Using Just 2 Bananas for another budget-friendly, wholesome option.

“Pasta and beans: proof that simple, affordable food can be the ultimate comfort.”

Final Tips for Enjoying Pasta and Beans

  • Experiment with spices and herbs to create unique flavors.
  • Balance your plate with plenty of vegetables.
  • Try different types of pasta and beans for variety and extra nutrients.

And most importantly, enjoy every bite! Food isn’t just about nutrition—it’s about connection, comfort, and a little bit of joy in every meal. So grab a fork, dig in, and savor the magic of pasta and beans.

“Pasta and beans are proof that the simplest things in life can also be the most satisfying.”

Thanks for following along on this deep dive into pasta and beans. Now, it’s your turn to hit the kitchen and create your own masterpiece. Bon appétit! 🍝

Do Italians Put Peas in Pasta? The Truth Revealed

When it comes to Italian cuisine, everyone has strong opinions. From the correct way to make carbonara to whether pineapple belongs on pizza, there’s no shortage of debates. One such question that sparks curiosity is: Do Italians put peas in pasta? Let’s dive deep into this flavorful mystery and uncover the traditions, reasons, and recipes behind it.

A bowl of Pasta e Piselli with Parmesan cheese and parsley.

Introduction:

Why This Question Exists

Italian cuisine is often seen as sacred, with strict rules and time-honored traditions. While some see peas in pasta as a delightful addition, others view it as a deviation from authenticity. The divide often boils down to regional variations and personal preferences.

Understanding Italian Food Traditions

Italian cooking values simplicity—turning a few ingredients into something magical. When peas are added to pasta, they can either enhance the dish or challenge tradition, depending on the perspective.

Fresh peas with pasta, garlic, and olive oil in a rustic Italian kitchen.

“In Italy, food is love, and every ingredient tells a story. Peas just happen to be part of some delicious ones.”

History of Peas in Italian Cuisine:

The Origins of Peas in Italian Dishes

Peas have been part of European cuisine for centuries, introduced from the Middle East. In rural Italy, they became a staple ingredient, often grown in family gardens for their affordability and flavor.

Traditional Italian Recipes Featuring Peas

Pasta e Piselli stands out as a quintessential example of “cucina povera,” a style focused on transforming simple, inexpensive ingredients into comforting dishes. This combination of pasta, peas, onions, and a light broth is a beloved classic.

“Peas may be small, but in Italian cuisine, they pack a big punch of flavor.”

Peas in Pasta: A Regional Perspective

Northern Italy: Creamy Pasta with Peas

In Northern regions, peas are paired with cream sauces and pancetta, creating indulgent yet balanced dishes. The cream complements the sweetness of the peas, adding richness to the meal.

Southern Italy: Simple and Rustic Combinations

Southern Italian recipes often emphasize rustic simplicity, using olive oil, garlic, and peas to create lighter dishes. This approach celebrates the fresh, natural flavors of each ingredient.

Regional Variations and Modern Adaptations

While traditional recipes hold a special place in Italian cuisine, modern chefs love to experiment. Today, you’ll find pasta and peas with everything from lemon zest to exotic spices. These adaptations show how versatile this humble combination can be.

Why Italians Love Peas in Pasta:

The Flavor Profile: Sweetness Meets Savory

Peas provide a subtle sweetness that balances the savory flavors of cheese, garlic, and olive oil. This contrast makes dishes more vibrant and enjoyable.

Nutritional Benefits of Adding Peas

Peas are nutrient-rich, offering vitamins, fiber, and plant-based protein. Including them in your pasta not only enhances flavor but also boosts health benefits.

The Versatility of Peas in Pasta Dishes

Whether in creamy sauces or light, olive oil-based recipes, peas adapt beautifully to various styles, making them a favorite addition for many cooks.

“Peas are like the supporting actors of Italian cuisine. They might not always take center stage, but they make the whole dish shine.” 🌱

Pasta e Piselli: A Classic Comfort Food

Creamy Pasta e Piselli on a plate with wine in the background.

This simple yet hearty dish is a staple in Italian households. With pasta, peas, onions, and broth, it’s quick, budget-friendly, and delicious.

Here’s why this dish is beloved:

  • Quick and easy: It takes less than 30 minutes to prepare.
  • Budget-friendly: Most of the ingredients are pantry staples.
  • Wholesome: It’s filling without being overly heavy.

If you haven’t tried it yet, you’re missing out on one of Italy’s best-kept secrets.

Peas with Carbonara: A Contemporary Twist

While traditional carbonara purists might cringe, adding peas to this classic dish has become a popular modern twist. The sweet peas provide a contrast to the salty pancetta and creamy sauce, creating a balanced and flavorful meal. It’s a great way to sneak in some veggies without compromising on taste.

“Think of peas in carbonara as the surprise guest who turns a good party into a great one!”

Risotto with Peas: A Cousin to Pasta Dishes

Although not technically pasta, risotto with peas deserves a mention here. This creamy rice dish often features peas as a key ingredient, showcasing their versatility. Like pasta, risotto allows peas to shine as they blend beautifully with cheese and broth for a rich, satisfying meal.

The Debate: Traditionalists vs Modernists

Arguments Against Adding Peas

Not everyone is on board with peas in pasta. Some traditionalists argue that it deviates from the classic recipes that define Italian cuisine. They believe that pasta should be pure, unadulterated by additional ingredients like peas.

Here are a few common arguments:

  • “It’s not authentic!” Some feel peas disrupt the traditional flavor profile of pasta dishes.
  • “Too sweet for pasta.” Critics say the sweetness of peas doesn’t belong in a savory dish.
  • “Unnecessary addition.” Purists argue that pasta is perfect on its own without extras.

While these opinions are valid, it’s important to remember that food evolves over time. What’s considered “authentic” today might have been unconventional a century ago.

How Modern Chefs Are Embracing Peas in Pasta

Modern chefs see peas as an opportunity rather than a problem. They’re using peas to add color, flavor, and nutrition to their creations. From Michelin-starred restaurants to home kitchens, peas are proving their worth as a versatile ingredient.

Here are some innovative ways chefs are incorporating peas:

  • Blending them into creamy sauces for a vibrant green color.
  • Pairing them with truffle oil for a luxurious touch.
  • Adding them to pasta salads for a pop of sweetness and texture.

“Food traditions are like recipes—they’re meant to be passed down, but also adapted for new tastes and times.”

Want more creativity in your kitchen? Try ideas from Salmon Rice Bowl Recipe for pairing unique ingredients with staples.

Common Problems and Solutions When Cooking Pasta with Peas:

Why Does the Pasta Turn Mushy?

Nobody likes mushy pasta. If your pasta is turning into a sticky mess, it’s likely because it’s overcooked. Here’s how to avoid this common problem:

  • Cook the pasta until it’s al dente (firm to the bite).
  • Rinse it briefly under cold water if you’re not adding it to the sauce immediately.

Remember, pasta will continue to cook slightly when mixed with the sauce, so it’s better to undercook it a bit.

How to Avoid Overcooking Peas

Peas are delicate, and overcooking them can make them lose their vibrant color and texture. To keep them just right:

  • Add frozen peas directly to the sauce in the last few minutes of cooking.
  • For fresh peas, blanch them in boiling water for 2-3 minutes, then transfer to ice water to stop the cooking process.

This way, your peas will stay bright green and perfectly tender.

Balancing Flavors for a Perfect Dish

Balancing flavors is the key to a great pasta dish. If your pasta feels bland, here’s what you can do:

  • Add a pinch of salt or Parmesan cheese to enhance the flavors.
  • Use a splash of pasta water to bind the sauce to the pasta.
  • Finish with a drizzle of olive oil or a squeeze of lemon for a fresh, zesty touch.

“Cooking is like a dance—each ingredient needs to find its rhythm for the dish to shine.” 🎵

About Peas in Italian Pasta

Is Pasta with Peas Authentic Italian?

Yes, pasta with peas is an authentic Italian dish, especially in the form of Pasta e Piselli. It’s a classic example of cucina povera, where simple, affordable ingredients are transformed into hearty meals. While not every Italian region includes peas in pasta dishes, it remains a staple in many traditional households.

What Other Vegetables Pair Well with Pasta?

If you’re looking to expand your pasta repertoire, peas aren’t the only vegetables that work well. Here are a few other options:

  • Zucchini: Sliced thin and sautéed with olive oil and garlic.
  • Spinach: Wilts beautifully into creamy sauces.
  • Cherry Tomatoes: Add a burst of sweetness and color.
  • Broccoli: Pairs perfectly with garlic and Parmesan.

Vegetables like these bring variety, nutrition, and vibrant flavors to your pasta dishes.

Conclusion: The Final Verdict on Peas in Pasta

Embracing Tradition While Exploring Creativity

Peas in pasta are a celebrated part of Italian culinary tradition, especially in dishes like Pasta e Piselli. While not every region uses peas, their inclusion adds flavor, color, and nutrition. Whether you’re sticking to classic recipes or experimenting with modern variations, peas can elevate your pasta dishes.

“Food connects us to our roots, but it also invites us to grow. Celebrate tradition, and don’t be afraid to infuse it with your personal touch.” 🌟

“Tradition is the foundation of Italian cooking, but creativity keeps it alive.” 🍝

Why Peas in Pasta Can Be Your New Favorite Dish

If you’ve never tried pasta with peas, now’s the time. It’s quick, budget-friendly, and incredibly versatile. Plus, it’s a great way to sneak some extra veggies into your meals. Give it a try—you might just find yourself making it a regular part of your dinner rotation.

Final Thoughts

Pasta and peas is more than just a dish; it’s a testament to the beauty of simplicity in Italian cooking. Whether you’re a traditionalist or a modernist, there’s a version of this dish for everyone. So grab your ingredients, head to the kitchen, and start cooking. Who knows? You might just discover your new go-to comfort food.

“Food connects us to our roots, but it also invites us to grow. Celebrate tradition, and don’t be afraid to innovate!” ❤️

The Ultimate Guide to Making Pasta and Peas Recipe

Creamy pasta with peas garnished with Parmesan and herbs.

Making a comforting bowl of pasta and peas might seem simple, but it’s an art that has been perfected over generations. In this guide, we’ll take you step-by-step through the process of creating this delicious dish, ensuring it’s not just good, but unforgettable. Whether you’re a beginner or a seasoned chef, this recipe has something for everyone. Let’s dive in!

Introduction:

A Brief History of Pasta and Peas

Pasta and peas ingredients on a marble countertop.

Pasta and peas have been a staple in Italian kitchens for centuries. This dish, known as “Pasta e Piselli” in Italian, originated as a humble meal created with pantry staples. Peas were often grown in small family gardens, and pasta was an affordable, filling option. Together, they formed a dish that was not only budget-friendly but also packed with flavor.

Why This Recipe Is a Staple in Italian Cuisine

Why has pasta and peas stood the test of time? It’s simple! This recipe is versatile, easy to make, and incredibly satisfying. Plus, it’s a one-pot wonder, meaning less cleanup for you. What’s not to love?

“Pasta and peas is more than a recipe; it’s a connection to tradition and family.”

Ingredients for Pasta and Peas Recipe:

Key Ingredients and Their Importance

For the perfect pasta and peas dish, here’s what you’ll need:

  • Pasta: Short pasta like ditalini or shells works best as they hold the sauce well.
  • Peas: Fresh, frozen, or even canned peas can be used.
  • Onions: For a sweet and savory base.
  • Garlic: Adds a punch of flavor.
  • Olive Oil: Brings richness and depth.
  • Parmesan Cheese: For a salty, nutty finish.
  • Vegetable or Chicken Broth: Enhances the overall taste.

Each ingredient plays a critical role. Skipping or substituting them might change the taste, but sometimes that’s how new favorites are born!

Optional Ingredients for Extra Flavor

Want to take things up a notch? Consider adding:

  • Pancetta or bacon for a smoky flavor.
  • Fresh herbs like parsley or basil.
  • A dash of cream for a richer texture.

Substitutions for Common Dietary Restrictions

Don’t eat dairy? Use nutritional yeast instead of Parmesan. Gluten intolerant? Swap regular pasta for gluten-free options. With a bit of creativity, this dish can fit any diet.

Step-by-Step Instructions:

Preparing the Ingredients

The first step to culinary success? Prepping like a pro. Chop your onions finely, mince the garlic, and measure out your broth and peas. If you’re using fresh peas, give them a quick rinse.

“Good preparation is the secret to cooking without stress.”

For Creative Inspiration: Consider pairing your pasta with grilled vegetables, a smoky complement to the creamy pasta.

Cooking the Pasta Perfectly

Here’s where many people go wrong—cooking pasta. Follow these tips:

  1. Bring a large pot of water to a boil. Add a generous amount of salt (it should taste like the sea).
  2. Add your pasta and cook until al dente (firm to the bite).
  3. Reserve a cup of pasta water before draining. This starchy liquid is pure gold for your sauce.

Combining Pasta with Peas: The Secret Sauce

Skillet of creamy pasta and peas being stirred.

Now, it’s time to bring everything together:

  1. In a large skillet, heat olive oil over medium heat. Add onions and garlic, cooking until fragrant.
  2. Stir in your peas and broth, letting them simmer until the peas are tender.
  3. Toss the cooked pasta into the skillet, mixing well.
  4. Add a splash of reserved pasta water to create a silky sauce. Sprinkle in Parmesan cheese and stir until it melts.

And voilà! Your pasta and peas are ready to serve.

Tips and Tricks for the Perfect Pasta and Peas:

Common Mistakes and How to Avoid Them

  1. Overcooking the peas: No one likes mushy peas. Keep an eye on them!
  2. Undersalting the pasta water: This is your only chance to season the pasta itself.
  3. Forgetting the pasta water: It’s the glue that binds the sauce and pasta together.

How to Get the Right Texture and Flavor

The secret to a perfect dish lies in balance. The pasta should be creamy but not soupy, the peas tender but not mushy, and the flavors well-rounded. Taste as you go—that’s how pros do it.

“Cooking is like painting. Every ingredient is a color, and you’re creating a masterpiece.”

Variations of the Pasta and Peas Recipe

Traditional Variations from Different Regions

While the classic pasta and peas recipe is delicious on its own, different regions in Italy have put their unique spin on it:

  • Neapolitan Style: In Naples, they often add pancetta for a smoky twist and use smaller pasta like tubetti.
  • Venetian Style: In Venice, the dish might include a splash of white wine and fresh parsley for a refreshing flavor.
  • Roman Style: Romans love to add a touch of Pecorino Romano cheese instead of Parmesan for a sharper taste.

These regional variations remind us how adaptable this recipe can be, offering endless possibilities to explore.

Modern Twists and Creative Additions

Feeling adventurous? Modern cooks have introduced creative additions to this timeless dish:

  • Lemon Zest: A sprinkle of lemon zest brightens up the flavors.
  • Spices: A pinch of chili flakes adds some heat, while nutmeg gives it a warm, earthy touch.
  • Vegetarian Protein: Toss in some chickpeas or tofu for added protein.

The best part about pasta and peas? It’s a blank canvas for your culinary imagination. Don’t be afraid to experiment!

Nutritional Benefits of Pasta and Peas

Health Benefits of Key Ingredients

Pasta and peas aren’t just comforting—they’re also packed with nutrients:

  • Peas: These little green gems are a great source of vitamins A, C, and K. They’re also high in fiber and protein, making them a healthy addition to any meal.
  • Pasta: When eaten in moderation, pasta provides essential carbohydrates for energy.
  • Olive Oil: Rich in healthy fats, olive oil is good for your heart and overall health.

By combining these ingredients, you’re creating a meal that’s both satisfying and nutritious.

How to Make It More Balanced and Nutritious

Want to up the health factor? Here are a few tips:

  1. Use whole-grain pasta for more fiber and nutrients.
  2. Add a handful of spinach or kale for extra greens.
  3. Cut back on cheese and use nutritional yeast for a dairy-free option.

Healthy eating doesn’t have to be boring. With small tweaks, you can make pasta and peas a guilt-free indulgence.

Pairing Ideas: What Goes Well with Pasta and Peas

While pasta and peas can easily stand alone, pairing it with the right sides can elevate the meal:

  • Garlic Bread: A slice of warm, buttery garlic bread is always a winner.
  • Simple Salad: A crisp salad with a light vinaigrette adds freshness.
  • Grilled Vegetables: Zucchini, eggplant, or bell peppers bring a smoky complement to the dish.

These sides don’t just fill out the meal—they also add layers of flavor and texture.

Best Drinks to Serve

What’s the best way to wash down a plate of pasta and peas? Here are a few options:

  • White Wine: A crisp Pinot Grigio or Sauvignon Blanc pairs beautifully with the light flavors of this dish.
  • Sparkling Water with Lemon: For a non-alcoholic option, this refreshing drink cleanses your palate.
  • Iced Tea: A chilled glass of unsweetened iced tea balances the richness of the pasta.

Choosing the right drink can turn an ordinary dinner into a special occasion.

Common Problems When Making Pasta and Peas

Why Is My Pasta Too Dry or Watery?

This is a common issue, but it’s easy to fix:

  • Too Dry: Add a bit more reserved pasta water to loosen up the sauce.
  • Too Watery: Let the dish simmer for a few extra minutes to reduce excess liquid.

Solving Issues with Overcooked Peas

No one wants mushy peas. If you’ve overcooked them, try adding a handful of fresh peas at the end to restore some texture.

How to Fix Bland Tasting Pasta

Bland pasta can ruin the dish, but here’s how to fix it:

  • Add a pinch of salt and a splash of olive oil.
  • Sprinkle in extra Parmesan or Pecorino cheese for more flavor.
  • Toss in a few chili flakes or herbs to give it a kick.

“Cooking isn’t about perfection; it’s about finding solutions and making it delicious.”

FAQs About Pasta and Peas Recipe:

Can I Use Frozen Peas?

Absolutely! Frozen peas are a fantastic option because they’re convenient and retain their sweetness. Just make sure to thaw them slightly before adding them to the dish.

What’s the Best Pasta Type for This Recipe?

Short pasta like ditalini, shells, or elbow macaroni works best. These shapes trap the sauce and peas perfectly, giving you a burst of flavor in every bite.

Conclusion: Why You Should Try This Recipe

Final Thoughts and Encouragement

Pasta and peas is more than just a recipe—it’s a culinary hug. It’s simple, comforting, and full of flavor. Whether you’re cooking for a family dinner or just for yourself, this dish is bound to become a favorite.

Call to Action: Share Your Experience

Have you tried making pasta and peas? Did you add your own twist? Let us know in the comments or share your pictures online! We’d love to see your creations.

The Ultimate Guide to Making Pasta and Peas Recipe (Continued)

Tips and Tricks for the Perfect Pasta and Peas

Common Mistakes and How to Avoid Them

No one wants their pasta and peas to fall flat, so let’s avoid some common pitfalls:

  1. Skipping the Pasta Water: This is your secret weapon for creating a creamy sauce without adding cream. Don’t throw it away!
  2. Overloading with Cheese: While Parmesan adds great flavor, too much can overpower the delicate sweetness of the peas. Balance is key.
  3. Undercooking the Pasta: Always aim for al dente. Overcooked pasta can turn mushy when combined with the sauce.

When in doubt, taste as you go. Trust your instincts!

“Cooking is all about intuition and tasting along the way. Let your palate guide you!”

How to Get the Right Texture and Flavor

If you want the perfect balance of creamy pasta, tender peas, and rich flavor, follow these steps:

  • Cook in layers: Sauté the onions and garlic first to build a flavorful base.
  • Use fresh ingredients: Fresh peas and quality olive oil can make a world of difference.
  • Finish with finesse: A drizzle of olive oil and a sprinkle of Parmesan at the end adds a professional touch.

Why Pasta and Peas Is Perfect for Every Occasion

Quick and Easy Weeknight Dinner

Sometimes, after a long day, you just need something quick and comforting. Pasta and peas is the answer. It’s ready in under 30 minutes, leaving you more time to relax.

A Budget-Friendly Meal

Pasta and peas is a recipe that doesn’t break the bank. With just a few pantry staples, you can whip up a meal that feels indulgent without being expensive.

A Dish That Brings People Together

Food has a magical way of connecting people. Whether it’s a quiet dinner at home or a lively family gathering, pasta and peas is a dish that warms hearts as much as it fills stomachs.

“Pasta and peas is more than food—it’s a memory in the making.”

Why You’ll Love Making This Recipe

  1. Minimal Cleanup: It’s a one-pot wonder, so you’re not left with a mountain of dishes.
  2. Customizable: You can adjust the ingredients to suit your taste or dietary needs.
  3. Foolproof: Even if you’re new to cooking, this recipe is straightforward and forgiving.

Share Your Pasta and Peas Journey

Now that you’re equipped with everything you need to know, it’s time to get cooking! Try the recipe, add your own twist, and make it your own. Don’t forget to share your creations and experiences. Who knows? Your version might inspire someone else.

Final Words

Pasta and peas is more than just a meal—it’s a celebration of simplicity and flavor. Whether you’re recreating a taste of Italy or just looking for comfort food, this dish delivers every time. So grab your ingredients, roll up your sleeves, and let the magic happen.

“Food is the universal language of love, and pasta and peas speak volumes.” ❤️

Low-carb smoked salmon poke bowl with mixed greens and vegetables.

Can You Make a Poke Bowl with Smoked Salmon?

Colorful smoked salmon poke bowl with rice and vegetables.

Poke bowls are all the rage, and for good reason. They’re colorful, customizable, and oh-so-delicious. But what if you’re not in the mood for raw fish? Or maybe you just want to try something new? Enter smoked salmon—a bold, flavorful twist on the classic poke bowl. But can you really use smoked salmon in a poke bowl? Spoiler alert: Yes, you absolutely can! Let’s dive into why it works, how to make it, and how to solve common challenges along the way.

Introduction: The Rising Trend of Poke Bowls:

If you’ve been on Instagram lately, you’ve probably seen a poke bowl or two. These vibrant, Instagram-worthy bowls are packed with fresh ingredients, making them both delicious and nutritious. Traditionally, poke bowls feature raw fish like ahi tuna or salmon, but the beauty of this dish is its versatility. And that’s where smoked salmon comes into play.

What Is a Poke Bowl?

Origins of the Poke Bowl

The word “poke” (pronounced poh-kay) means “to slice” in Hawaiian. Historically, poke bowls were simple dishes made by Hawaiian fishermen. They’d take freshly caught fish, cut it into bite-sized pieces, and season it with sea salt, seaweed, and kukui nuts. Over time, the dish evolved, blending with Japanese cuisine to include soy sauce, sesame oil, and rice.

“Poke bowls are a celebration of fresh, flavorful ingredients—a true taste of the islands in every bite! 🌴🍣”

Traditional Ingredients and Variations

A classic poke bowl typically includes:

  • Fresh raw fish (like tuna or salmon)
  • Steamed white rice
  • Toppings like seaweed, avocado, and pickled ginger
  • Sauces like soy or spicy mayo

But the magic of a poke bowl is how easily it can adapt to different tastes. From quinoa bases to tofu toppings, poke bowls are as customizable as your imagination allows.

Why Smoked Salmon Works in a Poke Bowl:

Thinly sliced smoked salmon on a wooden board with garnishes.

You might be wondering, “Can smoked salmon really replace raw fish in a poke bowl?” Absolutely. Let’s explore why.

Flavor Profile of Smoked Salmon

Smoked salmon has a rich, savory taste that pairs beautifully with the mild sweetness of rice and the tangy kick of traditional poke sauces. Its smoky flavor adds a depth that raw fish doesn’t provide, making it a unique and satisfying alternative.

Texture Contrasts in Poke Bowls

One of the reasons poke bowls are so beloved is the variety of textures in each bite. Smoked salmon, with its tender, silky texture, complements the chewiness of rice and the crunch of fresh vegetables like cucumber or radish.

Nutritional Benefits of Smoked Salmon

Smoked salmon isn’t just tasty—it’s healthy too! It’s packed with protein, omega-3 fatty acids, and essential vitamins like B12 and D. These nutrients support heart health, brain function, and overall wellness.

“Smoked salmon doesn’t just taste amazing—it’s like a little powerhouse of nutrients wrapped in smoky goodness. 🐟✨”

How to Make a Poke Bowl with Smoked Salmon:

Step-by-step preparation of a smoked salmon poke bowl.

Now that we’ve established why smoked salmon works, let’s get into the fun part: making your own poke bowl!

Essential Ingredients for a Smoked Salmon Poke Bowl

Here’s what you’ll need to get started:

  • Base: White rice, brown rice, or quinoa
  • Protein: Cold-smoked or hot-smoked salmon
  • Vegetables: Avocado, cucumber, shredded carrots, edamame
  • Toppings: Sesame seeds, green onions, seaweed
  • Sauces: Soy sauce, sesame oil, spicy mayo

Step-by-Step Preparation Guide

  1. Prepare the base. Cook your rice or quinoa and let it cool slightly.
  2. Slice the smoked salmon. Cut it into bite-sized strips or chunks.
  3. Assemble the vegetables. Slice and dice your veggies for easy layering.
  4. Build your bowl. Start with the rice, add your smoked salmon, layer the veggies, and finish with your favorite toppings.
  5. Drizzle the sauce. Add a generous drizzle of soy sauce, spicy mayo, or any sauce of your choice.

Tips for Perfect Presentation

  • Use a shallow bowl to layer the ingredients beautifully.
  • Add a pop of color with vibrant toppings like pickled radish or purple cabbage.
  • Sprinkle sesame seeds or crushed nori for an authentic touch.

“Presentation is half the fun with poke bowls. Make it colorful, make it vibrant, and don’t forget to snap a picture before you dig in! 📸🍴”

Low-carb smoked salmon poke bowl with mixed greens and vegetables.

One of the best things about poke bowls is their versatility. You can get creative and customize your bowl to match your cravings or dietary preferences. Here are some popular variations featuring smoked salmon.

Smoked Salmon and Avocado Bowl

This variation is a match made in heaven. The creamy texture of avocado pairs beautifully with the smoky richness of salmon. Add sliced cucumber, a sprinkle of sesame seeds, and a drizzle of lemon-soy dressing for a light and refreshing meal.

Asian-Inspired Smoked Salmon Poke

For a more traditional twist, combine smoked salmon with ingredients like pickled ginger, edamame, shredded nori, and spicy mayo. Top it with a mix of black and white sesame seeds for that authentic Asian flavor.

Low-Carb Smoked Salmon Poke Bowl

Watching your carbs? Swap out the rice for a bed of greens like spinach or kale. Add crunchy toppings like shredded carrots or cabbage, and finish with a tangy sesame-ginger dressing. This low-carb version is as satisfying as the original!

“Whether you’re in the mood for something creamy, traditional, or low-carb, there’s a smoked salmon poke bowl variation for everyone. 🥗🐟”

Common Problems When Making a Poke Bowl with Smoked Salmon:

Even though poke bowls are pretty straightforward to make, there are a few common challenges. Don’t worry—we’ve got solutions to keep your smoked salmon poke bowl flawless.

Preventing Overpowering Flavors

Smoked salmon has a bold flavor, so it’s essential to balance it with lighter ingredients. Avoid overly salty toppings or sauces like soy sauce if your smoked salmon is already quite salty. Instead, use a splash of lemon juice or a light sesame dressing to add freshness.

Choosing the Right Type of Rice or Base

The base is crucial for a good poke bowl. Sticky sushi rice is ideal for a traditional bowl, but if you’re looking for a healthier option, go for brown rice or quinoa. Always cook your base until it’s tender but not mushy.

“The right base sets the stage for your smoked salmon poke bowl. Choose wisely, and the rest will follow! 🍚✨”

Storing Leftover Ingredients Safely

Smoked salmon is delicate, so it’s important to store leftovers properly. Keep it in an airtight container in the fridge and consume it within two days. Rice and other toppings should also be stored separately to maintain their texture and freshness.

How to Customize Your Smoked Salmon Poke Bowl:

Customizing your poke bowl is where the real fun begins. It’s all about mixing and matching flavors, textures, and colors to create your perfect bowl.

Adding Crunchy Textures and Toppings

Crunch is key to a great poke bowl. Try adding:

  • Crispy fried onions
  • Toasted sesame seeds
  • Tempura flakes
  • Chopped nuts

These toppings not only add texture but also elevate the overall flavor profile of your bowl.

Incorporating Unique Sauces and Dressings

A good sauce can make or break your poke bowl. Experiment with:

  • Ponzu sauce: For a citrusy tang
  • Spicy mayo: For a creamy kick
  • Wasabi soy sauce: For a bold and spicy twist

“Don’t be afraid to experiment with sauces. They’re like the cherry on top of your poke bowl—small but impactful!”

Using Different Bases: Rice, Greens, or Quinoa

Why stick to just rice? Switch things up with:

  • Mixed greens for a lighter, salad-like base
  • Quinoa for a protein-packed alternative
  • Cauliflower rice for a low-carb option

Each base brings its own unique texture and flavor, giving you endless possibilities.

Benefits of Smoked Salmon Poke Bowls:

Smoked salmon poke bowls aren’t just delicious—they’re packed with benefits that make them a great addition to your meal rotation.

A High-Protein, Low-Calorie Meal Option

Smoked salmon is an excellent source of protein without being heavy on calories. Paired with nutrient-dense toppings and a healthy base, it creates a meal that’s filling without weighing you down.

Perfect for Meal Prepping and Busy Lifestyles

Got a hectic schedule? Poke bowls are your new best friend. Prep your ingredients ahead of time, store them separately, and assemble a fresh bowl in minutes whenever you’re hungry.

A Versatile Dish for All Dietary Preferences

Whether you’re gluten-free, keto, or just trying to eat more veggies, smoked salmon poke bowls can adapt to any diet. Swap the base, change the toppings, or adjust the sauces to suit your needs.

“A poke bowl isn’t just a meal—it’s a lifestyle. Healthy, delicious, and endlessly customizable. 🐟🍲”

Real-Life Testimonials and Stories:

Sometimes, the best way to appreciate a dish is by hearing how it fits into people’s lives. Smoked salmon poke bowls have won the hearts of food lovers, athletes, and busy professionals alike.

Why Foodies Love Smoked Salmon Poke Bowls

Food enthusiasts are always on the hunt for dishes that are visually stunning and packed with flavor. Jenna, a self-proclaimed foodie, says, “Smoked salmon poke bowls are my go-to meal. They’re so easy to customize, and they look as good as they taste. I love experimenting with different toppings!”

With endless combinations of vegetables, sauces, and garnishes, it’s no surprise that smoked salmon poke bowls have become a favorite for those who love to play with their food. 🎨🍣

Athletes’ Choice for a Quick, Nutritious Meal

Athletes often need meals that are quick to prepare but rich in nutrients. Marco, a marathon runner, shares, “After a long run, I whip up a smoked salmon poke bowl. It’s got everything I need—protein, carbs, and healthy fats. Plus, it’s ready in minutes.”

The balance of protein from the salmon and energy-boosting carbs from the rice makes it the perfect post-workout meal.

Conclusion: Is Smoked Salmon the Perfect Poke Bowl Protein?

So, can you make a poke bowl with smoked salmon? Absolutely! Smoked salmon brings a rich, smoky flavor and tender texture that elevates the classic poke bowl. It’s versatile, nutritious, and perfect for anyone looking to switch up their poke game. Whether you’re in the mood for a creamy avocado pairing, an Asian-inspired twist, or a low-carb alternative, smoked salmon has got you covered.

Next time you’re craving a poke bowl but want to try something new, reach for smoked salmon. Trust us—you won’t regret it.

“Smoked salmon poke bowls are proof that you can have it all—flavor, nutrition, and endless customization options. 🐟✨”

FAQs About Smoked Salmon Poke Bowls:

Can I Use Hot-Smoked Salmon Instead of Cold-Smoked?

Yes, you can! Hot-smoked salmon has a firmer texture and a more intense smoky flavor, which can add a unique twist to your poke bowl. Just make sure to adjust your toppings and sauces to balance the boldness.

What Are the Best Vegetables for a Poke Bowl?

The best vegetables are those that add a mix of textures and flavors. Popular choices include:

  • Creamy: Avocado
  • Crunchy: Cucumber, radish, shredded carrots
  • Tangy: Pickled ginger or pickled onions

Mix and match to find your perfect combo!

How Do I Store a Smoked Salmon Poke Bowl for Later?

To keep your poke bowl fresh, store the ingredients separately in airtight containers:

  • Smoked salmon: Refrigerate and consume within 2 days.
  • Rice: Store in the fridge and reheat with a splash of water.
  • Toppings: Keep vegetables fresh by storing them in a separate container.

Assemble the bowl just before serving to maintain the best texture and flavor.

“FAQs are a lifesaver for first-timers. Got questions about your poke bowl? We’ve got answers! 🍣💡”

Teriyaki salmon served on jasmine rice with sesame seeds.

Why Do Salmon and Rice Go So Well Together?

Perfectly plated salmon fillet with jasmine rice and vegetables

There’s something magical about the pairing of salmon and rice. It’s simple, satisfying, and shows up in cuisines worldwide. But why does this combo work so well? Whether you’re enjoying sushi, teriyaki bowls, or a hearty wild rice pilaf with grilled salmon, there’s a deeper reason behind this culinary match made in heaven. Let’s dig into the flavors, history, and nutritional harmony of salmon and rice to uncover the secret.

Introduction: The Perfect Pairing of Salmon and Rice:

Have you ever wondered why some foods just click? Like peanut butter and jelly or milk and cookies, salmon and rice seem destined to be together. Their flavors and textures complement each other so beautifully that it’s almost like nature intended them to be paired. But it’s not just about taste; there’s science, tradition, and even health benefits behind this iconic duo.

So, why do salmon and rice go so well together? Let’s break it down step by step, and you’ll never look at this meal the same way again.

The History of Salmon and Rice as a Dish:

Culinary Traditions Around the World

Salmon and rice have deep roots in various global cuisines. Think about sushi in Japan, teriyaki salmon bowls in the U.S., or Scandinavian salmon dishes served with rye-based rice alternatives. This pairing is no accident—it’s a tradition built on the accessibility of both ingredients.

In Japan, rice is a staple, and salmon, being widely available, became a natural topping for sushi or donburi bowls. In Nordic countries, salmon is a key protein, often paired with grains like barley or wild rice to create hearty meals. The versatility of rice makes it an ideal partner for the rich, flavorful salmon, bridging gaps between cultures.

The Evolution of Salmon and Rice Recipes

While the traditional pairing dates back centuries, modern versions have taken this combo to the next level. Think sushi burritos, poke bowls, or grilled salmon over truffle-infused risotto. These variations prove that salmon and rice aren’t just stuck in the past—they evolve with the times, blending into fusion cuisines and contemporary diets.

“The versatility of salmon and rice keeps it timeless. Whether you prefer classic sushi or trendy poke bowls, this pairing always delivers.”

Nutritional Harmony Between Salmon and Rice:

Grilled salmon served on brown rice with fresh vegetables.

The Protein Power of Salmon

Let’s talk nutrition. Salmon is a powerhouse when it comes to protein. It’s not just any protein—it’s high-quality, complete protein that your body uses to build muscles, repair tissues, and keep you energized. One serving of salmon gives you about 25 grams of protein, making it perfect for active lifestyles.

Rice: A Versatile Carbohydrate

Rice might seem like a simple side dish, but it plays a critical role in this pairing. As a carbohydrate, it provides the energy your body needs to function throughout the day. Whether you choose white rice, brown rice, or even black rice, it serves as the perfect base to soak up salmon’s flavors.

But here’s the best part: rice complements salmon’s protein with just the right amount of carbs to keep you full and satisfied.

The Perfect Balance of Macronutrients

When you put salmon and rice together, it’s like a nutritional dream team. You get protein, healthy fats (thanks to salmon’s omega-3s), and energy-boosting carbs. This balance makes it a fantastic meal for anyone looking to maintain a healthy diet, fuel a workout, or simply enjoy a guilt-free dinner.

“Salmon and rice aren’t just delicious—they’re a nutritional powerhouse that fuels your body and satisfies your cravings. 🥗”

The Science Behind the Flavor Pairing:

Umami: The Secret to Their Compatibility

Here’s where it gets fascinating. Salmon is rich in umami, the savory taste that makes food irresistible. Rice, while neutral, absorbs salmon’s umami flavors, creating a harmonious taste profile. Add a splash of soy sauce or a sprinkle of seaweed, and you’re amplifying the umami experience even more.

Texture Contrasts: Soft Rice Meets Tender Salmon

Texture plays a big role in why salmon and rice work so well together. Think about it—flaky, tender salmon on top of soft, fluffy rice. The contrast is subtle yet satisfying, giving each bite a perfect balance of textures. It’s like a culinary dance where both partners shine.

How Fatty Acids in Salmon Enhance Rice’s Taste

Salmon’s healthy fats do more than keep your heart happy—they also enhance the flavors of rice. These fats coat each grain, making the rice taste richer and more indulgent. It’s a flavor boost that happens naturally, no extra ingredients required.

Teriyaki salmon served on jasmine rice with sesame seeds.

Sushi: The Classic Pairing

If there’s one dish that proves the magic of salmon and rice, it’s sushi. From simple nigiri to elaborate rolls, this Japanese staple showcases the pairing at its finest. The rice’s slightly sweet tang from vinegar complements the buttery richness of raw salmon, creating a bite that’s unforgettable.

Teriyaki Salmon Over Rice

For those who prefer cooked salmon, teriyaki bowls are a game-changer. The savory-sweet glaze of teriyaki sauce adds an extra layer of flavor to grilled or baked salmon, while the rice serves as the perfect base to soak up all that delicious sauce.

Grilled Salmon with Wild Rice Pilaf

Looking for something hearty? Wild rice pilaf with grilled salmon is a rustic, wholesome option. The nutty, chewy texture of wild rice pairs beautifully with the smoky, charred flavors of grilled salmon. Add some roasted vegetables on the side, and you’ve got a meal fit for a feast.

Common Problems When Pairing Salmon and Rice:

Even though salmon and rice are an unbeatable combo, a few common issues can arise when preparing them. But don’t worry—we’ve got solutions to make sure your meal is always a hit.

Overcooking Salmon: How to Avoid It

Dry, overcooked salmon is a tragedy! It loses its buttery texture and rich flavor, making it less enjoyable. The secret to perfectly cooked salmon is timing and temperature. Use a food thermometer to check for an internal temperature of 145°F (63°C). Whether you’re baking, grilling, or pan-searing, keep an eye on the clock to avoid overcooking.

Choosing the Right Type of Rice

Not all rice is created equal. If you choose the wrong type, it could throw off the balance of the dish. For sushi or Asian-inspired dishes, short-grain rice is ideal because it’s sticky and absorbs flavors well. For heartier meals, opt for wild rice or brown rice for added texture and nutrients.

“Experiment with different types of rice to find the one that best complements your salmon. The options are endless!”

Pairing Sauces Without Overpowering Flavors

Sauces can make or break the pairing. A sauce that’s too strong, like a heavy cream-based one, might overpower the delicate flavor of salmon. Instead, go for lighter options like soy sauce, lemon-dill sauce, or a teriyaki glaze. These sauces enhance the dish without stealing the spotlight.

How to Enhance the Salmon and Rice Experience:

If you already love salmon and rice, why not make it even better? With a few simple additions and tweaks, you can elevate this dish to gourmet levels.

Adding Vegetables for a Complete Meal

A well-rounded meal isn’t just about protein and carbs—veggies are essential. Add steamed broccoli, sautéed spinach, or roasted asparagus to your salmon and rice bowl. Not only do they add color, but they also provide fiber and extra nutrients. Think of it as giving your plate a colorful makeover! 🥦

Using Herbs and Spices to Elevate Flavors

Don’t underestimate the power of herbs and spices. Fresh dill, parsley, or cilantro can brighten up the flavors of salmon. Sprinkle turmeric or paprika on the rice for a subtle kick. These little additions take your dish from good to extraordinary.

Choosing the Right Cooking Techniques

The way you cook your salmon and rice matters. Baking salmon gives it a soft, buttery texture, while grilling adds a smoky flavor. For rice, cooking it in broth instead of water infuses it with extra flavor. Try experimenting to find the method you love most.

“Cooking is like art—small tweaks can transform a simple dish into a masterpiece.”

Benefits of Eating Salmon and Rice Together:

Why is salmon and rice such a powerful duo? Beyond taste, this pairing is packed with benefits that make it a favorite for people of all lifestyles.

Boosts Energy and Stamina

Salmon’s protein and healthy fats, combined with rice’s slow-digesting carbs, provide a steady stream of energy. It’s the perfect meal to keep you fueled during busy days or intense workouts.

Supports Weight Management and Health Goals

If you’re trying to manage your weight, salmon and rice can help. Salmon keeps you full longer, reducing the urge to snack. Pair it with whole-grain rice for added fiber, which aids digestion and promotes satiety.

A Convenient Meal for Meal Prepping

Meal prepping is all the rage, and for good reason—it saves time and keeps you on track with your diet. Salmon and rice are ideal for meal prep. They store well, reheat easily, and maintain their flavor throughout the week.

“A bowl of salmon and rice isn’t just food—it’s fuel for your body and a step toward your health goals. 🍚🐟”

Real-Life Testimonials and Stories:

Sometimes, the best way to appreciate a meal is through the stories of those who love it. Let’s hear why people keep coming back to salmon and rice.

Why Families Love This Combo

For busy families, salmon and rice are a lifesaver. Mary, a mother of three, says, “It’s quick, healthy, and everyone loves it. I can’t go wrong with a teriyaki salmon bowl on a weeknight.”

Athletes’ Favorite Post-Workout Meal

Athletes swear by salmon and rice as their go-to meal. Alex, a professional swimmer, shares, “After a tough training session, nothing beats a plate of grilled salmon with brown rice. It’s the perfect recovery meal.”

These real-life stories show just how versatile and loved this dish is, no matter your lifestyle.

Conclusion: The Enduring Appeal of Salmon and Rice

So, why do salmon and rice go so well together? The answer lies in their perfect balance of flavors, textures, and nutritional benefits. Whether you’re enjoying sushi, a teriyaki bowl, or grilled salmon with wild rice, this pairing is timeless and versatile.

Next time you’re looking for a meal that’s as healthy as it is delicious, remember this classic duo. It’s not just a dish—it’s an experience.

FAQs About Salmon and Rice Pairing:

Can I Use Other Types of Fish Instead of Salmon?

Yes, you can! Tuna, trout, or cod work well with rice. However, salmon’s rich flavor and healthy fats make it a standout choice.

What’s the Best Rice to Pair with Salmon?

It depends on the dish! Short-grain rice is great for sushi, while brown or wild rice adds a nutty flavor to heartier meals.

How Often Should I Include This Dish in My Diet?

Salmon is packed with omega-3s, so aim to enjoy it 2-3 times a week as part of a balanced diet.

“Salmon and rice: a classic pairing that never gets old. It’s delicious, nutritious, and perfect for any occasion.”

Sushi-inspired salmon bowl with fresh toppings and spicy mayo.

Is Salmon Over Rice Healthy?

Grilled salmon over brown rice garnished with sesame seeds and vegetables.

If you’ve been wondering, “Is salmon over rice healthy?” you’re not alone. This question pops up often because people want meals that are both delicious and nutritious. The short answer? Yes, it’s healthy, but there are details to unpack.

Salmon brings incredible benefits to the table. Rich in omega-3 fatty acids, high-quality protein, and essential vitamins, it’s a superstar ingredient. When paired with rice, particularly whole-grain options like brown rice, it creates a balanced meal that supports heart health, brain function, and sustained energy levels. So, is salmon over rice healthy enough to include regularly in your diet? Absolutely, when prepared thoughtfully.

Many variations of this meal ensure it fits your preferences, whether you’re looking for low-carb options, sushi-inspired flavors, or classic grilled salmon with steamed rice. As we explore the recipe and benefits, you’ll see why the answer to “Is salmon over rice healthy?” is a resounding yes. Let’s dive deeper!

Introduction: The Rising Popularity of Salmon Over Rice

Imagine a bowl of perfectly cooked salmon on a bed of fluffy rice. Add a splash of soy sauce, maybe a sprinkle of sesame seeds, and voilà – you’ve got yourself a trendy, Instagram-worthy meal! But it’s not just a pretty dish. This combination is everywhere because it promises both taste and health. So, let’s break it down and see what makes it tick.

Nutritional Profile of Salmon:

Salmon fillet being seasoned with herbs and spices for cooking.

Key Nutrients Found in Salmon

Salmon is like the superhero of the seafood world. It’s packed with nutrients that your body loves. For starters, it’s an excellent source of high-quality protein. Every bite helps build and repair your muscles. But that’s not all.

Salmon is also loaded with omega-3 fatty acids. These are the good fats that your brain and heart adore. They help reduce inflammation, improve brain function, and even boost your mood. Who doesn’t want that?

Benefits of Omega-3 Fatty Acids

Why are omega-3s such a big deal? Think of them as oil for your car’s engine – they keep things running smoothly. They lower bad cholesterol, reduce your risk of heart disease, and even support mental health. Feeling stressed? Your salmon might just be the chill pill you need.

“Omega-3 fatty acids are essential for maintaining a healthy heart and brain – and salmon is one of the richest sources of them!”

Protein Content and Its Role in Health

Protein is your body’s building block. It helps repair tissues, supports growth, and keeps you feeling full. A single serving of salmon provides about 25 grams of protein. That’s like giving your body a power-up every time you eat it. 🍣

Nutritional Profile of Rice:

Rice might seem like a simple side dish, but it plays an important role in this duo. The type of rice you choose can make or break your meal’s nutritional value.

White Rice vs. Brown Rice: Which is Better?

Here’s the deal: white rice is processed and stripped of some nutrients, while brown rice is whole-grain and packed with fiber. Fiber helps your digestion and keeps you full longer. So, if you’re aiming for a healthier option, brown rice wins this battle. But hey, everything in moderation, right?

Carbohydrates and Energy Levels

Rice is primarily made of carbohydrates, which are your body’s main energy source. Feeling sluggish? A bowl of rice can recharge your batteries. Just don’t overdo it – balance is key.

Micronutrients in Different Types of Rice

Rice isn’t just about carbs. It contains B vitamins, magnesium, and selenium, especially if you go for the less-processed varieties. These nutrients help your body produce energy and fight off illnesses.

“Brown rice is a nutrient-dense choice that pairs wonderfully with salmon for a meal that satisfies both your taste buds and your health goals.”

Combining Salmon and Rice: Nutritional Synergy:

Now here’s where the magic happens. When you pair salmon with rice, you get a meal that’s not only delicious but also nutritionally balanced.

The Balance of Macronutrients

Salmon provides protein and healthy fats, while rice gives you carbs for energy. Together, they create a well-rounded meal that keeps you full and energized. It’s like having a balanced team – everyone plays their part. This is another reason why answering “Is salmon over rice healthy?” is such a no-brainer.

Enhancing the Meal with Vegetables and Spices

Want to take it up a notch? Add some steamed broccoli, carrots, or spinach. Sprinkle some turmeric or paprika for a flavor boost and extra health benefits. Think of it as dressing up your meal for a fancy party.

Common Health Concerns about Salmon Over Rice:

Even though this combo is a nutritional powerhouse, it’s not without its questions. Let’s tackle a few.

Is Mercury in Salmon a Risk?

Mercury levels in seafood are a common concern. The good news? Salmon, especially wild-caught varieties, is low in mercury. That means you can enjoy it without worry – just don’t eat it every single day.

Are Carbohydrates in Rice Bad for Weight Loss?

Rice gets a bad rap when it comes to weight loss. But here’s the truth: carbs aren’t the enemy. Portion control is your best friend. Stick to one cup of rice per serving, and you’ll be golden.

Portion Sizes: Striking the Right Balance

Overeating, even healthy food, can be a problem. A good rule of thumb? Fill half your plate with veggies, a quarter with salmon, and a quarter with rice. Simple and effective.

“Healthy eating is all about balance. Enjoy your salmon over rice, but remember: moderation is key!”

Benefits of Including Salmon Over Rice in Your Diet:

So, what happens when you make salmon over rice a regular part of your meals? Let’s explore the fantastic benefits this dish offers.

Supports Heart Health

Eating salmon is like giving your heart a big hug. Thanks to its omega-3 fatty acids, salmon reduces bad cholesterol and lowers your risk of heart disease. Pairing it with rice, especially brown rice, adds fiber, which helps regulate blood pressure. Together, they’re a dream team for cardiovascular health.

“A bowl of salmon over rice isn’t just tasty – it’s a heart-friendly choice you can feel good about.”

Aids in Muscle Growth and Recovery

If you’re into fitness or simply want to stay strong, this dish has your back. Salmon’s protein content repairs muscles after a workout, while rice replenishes your energy stores. It’s like a one-two punch for recovery. 💪

A Nutrient-Dense Option for Meal Prep

Let’s face it – we’re all busy. But meal prepping salmon over rice is a game-changer. It stores well, reheats beautifully, and keeps you fueled throughout the week. Plus, you can switch up the flavors with different spices and sauces to keep things exciting.

Sushi-inspired salmon bowl with fresh toppings and spicy mayo.

One of the best things about this dish is its versatility. You can tweak it to fit your taste buds or dietary preferences. Here are some creative takes to inspire your next meal.

Sushi-Inspired Salmon Bowls

Love sushi but don’t have the time (or budget) to hit a sushi bar? Try a sushi-inspired salmon bowl. Use sushi rice, add avocado, cucumber, and pickled ginger, then drizzle with soy sauce or spicy mayo. It’s like sushi in a bowl – no rolling required!

Grilled Salmon with Wild Rice

Grilled salmon adds a smoky, charred flavor that’s hard to beat. Pair it with nutty wild rice for a gourmet twist. Throw in some roasted asparagus or a lemon wedge, and you’ve got a restaurant-quality meal at home.

Teriyaki Salmon with Jasmine Rice

For those who crave something sweet and savory, teriyaki salmon is the way to go. Jasmine rice’s floral aroma complements the sticky teriyaki glaze perfectly. Top it with sesame seeds and green onions for that extra flair. 🍽️

How to Make Salmon Over Rice Healthier:

Want to take this already healthy meal to the next level? Here are some tips to make salmon over rice even better for your body and taste buds.

Choosing Sustainable and Fresh Ingredients

Freshness matters! Opt for wild-caught salmon when possible – it’s lower in contaminants and better for the environment. For rice, go for whole-grain options like brown or black rice for more nutrients and fiber.

Opting for Whole Grains Over Refined Rice

Refined white rice is fine in moderation, but whole grains are the MVP when it comes to nutrition. Brown rice, quinoa, or even farro can add more fiber and minerals to your plate. Think of it as upgrading your meal from a sedan to a luxury SUV.

“Small swaps, like using brown rice instead of white, can make a big difference in your overall health.”

Incorporating Anti-Inflammatory Spices

Want to spice things up? Add turmeric, garlic, or ginger to your salmon or rice. These spices not only boost flavor but also fight inflammation in your body. It’s like giving your meal a health boost with every sprinkle.

Step-by-Step Recipe for a Healthy Salmon Over Rice Bowl:

Let’s bring everything together with a recipe you can try at home. It’s simple, healthy, and oh-so-satisfying.

Ingredients and Prep Tips

Here’s what you’ll need:

  • Salmon fillets (wild-caught if possible)
  • Brown rice or any whole-grain rice
  • Vegetables: Broccoli, carrots, or spinach
  • Seasonings: Salt, pepper, garlic powder, turmeric
  • Sauce: Soy sauce or teriyaki glaze
  • Garnish: Green onions, sesame seeds

Pro tip: Marinate the salmon for at least 15 minutes to infuse it with flavor.

Cooking Instructions for Perfect Salmon

  1. Preheat your oven to 375°F (190°C) or fire up your grill.
  2. Season the salmon with salt, pepper, and your favorite spices.
  3. Cook the salmon for 12-15 minutes in the oven or grill for 8-10 minutes until it flakes easily with a fork.

Assembly and Presentation Ideas

  1. Cook the rice according to package instructions. If you’re using brown rice, remember it takes a bit longer.
  2. Steam or roast your vegetables until tender.
  3. Assemble your bowl: start with rice, layer the veggies, and top it off with your perfectly cooked salmon.
  4. Drizzle with your sauce of choice and garnish with sesame seeds and green onions. Enjoy!

“Cooking doesn’t have to be complicated – this salmon over rice recipe is proof that simple can be spectacular.”

Real-Life Testimonials and Success Stories:

Sometimes, the best way to understand a dish’s impact is by hearing real stories. Let’s explore how salmon over rice has transformed meals, health, and lifestyles for many.

Weight Loss Journeys with Salmon Over Rice

Meet Sarah, a busy mom of two who struggled with weight loss. She swapped her regular takeout meals for homemade salmon over brown rice. Within a few weeks, she noticed a difference—not just on the scale but also in her energy levels.

“It’s not just about losing weight,” Sarah says, “I feel stronger and more focused. Salmon over rice has become my go-to meal.”

Her story isn’t unique. This meal’s balance of protein and carbs keeps hunger in check while providing essential nutrients. It’s a win-win!

Improved Energy Levels and Wellness Reports

Then there’s Michael, a college student juggling studies and sports. He started meal-prepping grilled salmon with jasmine rice, and the results were amazing.

“I used to feel sluggish by midday,” Michael shares. “Now, I have the energy to power through classes and practice. This meal changed the game for me.”

The omega-3s in salmon and the slow-releasing carbs in rice work together to keep you fueled and focused. It’s the perfect combo for busy lifestyles.

Common Problems and Solutions:

Even with a meal as simple and rewarding as salmon over rice, things can sometimes go wrong. Don’t worry—we’ve got solutions for the most common issues.

Overcooked Salmon: How to Avoid It

Dry salmon is the worst, right? The trick is timing. Always keep an eye on your salmon while it’s cooking. If it flakes easily with a fork, it’s done. For extra precision, use a food thermometer. The internal temperature should reach 145°F (63°C) for perfectly cooked salmon.

Bland Rice: Enhancing Flavor Without Extra Calories

Plain rice can be boring. Spice it up! Cook your rice in low-sodium chicken broth instead of water, or add a bay leaf and a dash of garlic powder for extra flavor. A squeeze of lemon over the final dish can also brighten things up.

“Cooking is all about experimenting. Don’t be afraid to add herbs or spices to make your dish uniquely yours!”

Storing Leftovers Safely

What if you have leftovers? Store your salmon and rice in separate airtight containers in the fridge. This prevents the rice from getting soggy. Reheat in the microwave or on the stove, adding a splash of water to keep the rice moist.

Conclusion: Is Salmon Over Rice a Healthy Choice for You?

Absolutely! Salmon over rice is not just a meal—it’s a lifestyle choice that promotes health, balance, and convenience. With its rich nutritional profile and endless customization options, it’s a dish that fits into almost any diet. Whether you’re looking to lose weight, boost your energy, or simply eat better, this meal has got you covered.

So, next time you’re wondering what to cook, remember this: a bowl of salmon over rice isn’t just food—it’s fuel for your body and soul. 🍴✨

FAQs about Salmon Over Rice:

Let’s wrap up with some common questions people have about this dish.

Can I Substitute Quinoa for Rice?

Absolutely! Quinoa is a fantastic substitute. It’s higher in protein and provides a slightly nutty flavor that pairs beautifully with salmon.

How Often Should I Eat Salmon Over Rice?

Moderation is key. Aim to include salmon in your diet 2-3 times a week to enjoy its health benefits without overloading on certain nutrients like omega-3s.

What Are the Best Sauces to Pair with This Dish?

Soy sauce, teriyaki glaze, lemon-dill sauce, or even a spicy sriracha mayo work wonders. Choose one that matches your taste and dietary goals.

“Healthy eating doesn’t have to be boring or complicated. With salmon over rice, you get the best of both worlds – amazing taste and excellent nutrition. Bon appétit!” 🍣

Assembled salmon rice bowl recipe with salmon, rice, avocado, cucumber, and sesame seeds.

Salmon Rice Bowl Recipe

Salmon rice bowl recipe with fresh avocado, cucumber, and sesame seeds.

magine a meal that’s as nourishing as it is delightful—perfect for busy days. That’s exactly what the salmon rice bowl recipe offers!. That’s exactly what the salmon rice bowl offers! 🍣🍚 Whether you’re a fan of seafood or someone exploring new dishes, this recipe promises to be a crowd-pleaser. Let’s dive in and explore this amazing dish in detail!

Introduction:

You might wonder, “What makes this salmon rice bowl recipe so special?” It’s the perfect harmony of taste, texture, and nutrition. It’s the kind of meal that feels indulgent but is actually quite healthy. The combination of tender salmon, fluffy rice, and a medley of fresh toppings is like a symphony in your mouth. 🎶

What Makes Salmon Rice Bowls Special?

There’s something magical about the way all the components come together. The savory salmon pairs beautifully with the comforting rice, while the toppings—be it avocado, sesame seeds, or a drizzle of soy sauce—add layers of flavor and texture. Plus, it’s super versatile! You can tweak it to match your mood or whatever’s in your fridge.

The Health Benefits of Salmon and Rice

Let’s not forget the health perks! Salmon is a powerhouse of omega-3 fatty acids, which are great for your heart and brain. Rice, especially brown or wild rice, provides a steady source of energy. Together, they form a balanced meal that keeps you full and happy. 🧠💪

“A salmon rice bowl isn’t just food; it’s fuel for both body and soul.”

Ingredients for the Perfect Salmon Rice Bowl

Ingredients for a salmon rice bowl recipe including salmon fillets, rice, avocado, cucumber, sesame seeds, and soy sauce.

Now that we’ve set the stage, let’s talk ingredients. The beauty of this dish lies in its simplicity. Here’s what you’ll need:

IngredientQuantity
Salmon fillets2 (about 6 oz each)
Cooked rice2 cups
Soy sauce2 tbsp
Sesame oil1 tbsp
Avocado (sliced)1
Cucumber (sliced)½ cup
Green onions (chopped)2 tbsp
Sesame seeds1 tsp
Optional toppingsPickled ginger, chili flakes, seaweed strips

Choosing the Right Salmon: Fresh vs. Frozen

Fresh or frozen? That’s the age-old debate. Fresh salmon is always a treat, but frozen works just as well if thawed properly. Pro tip: Look for wild-caught salmon for its superior taste and nutritional value.

Types of Rice Suitable for the Recipe

While white rice is classic, don’t hesitate to experiment with jasmine, brown, or sushi rice. Each variety brings its unique flavor and texture. Brown rice is a healthier option, but if you’re after that melt-in-your-mouth experience, go for sushi rice.

Essential Toppings and Add-ons

This is where the fun begins! Think creamy avocado, crunchy cucumber, or the zing of pickled ginger. Toppings can transform your salmon rice bowl from basic to extraordinary. Feeling adventurous? Sprinkle some furikake or drizzle spicy mayo for an extra kick.

For tips on creating perfectly fluffy rice, check out how restaurants make omelettes so fluffy—it’s all about technique and moisture balance.

Step-by-Step Instructions for Making Salmon Rice Bowl

Ready to create magic with this delicious salmon rice bowl recipe? Follow these steps for a wholesome, flavor-packed meal.

Preparing the Salmon: Cooking Methods and Tips

Pan-seared salmon fillets for a salmon rice bowl recipe.
  1. Season the salmon: Rub your salmon fillets with a mix of soy sauce, sesame oil, and a pinch of salt. Let it marinate for 10–15 minutes.
  2. Cook to perfection: Pan-sear the salmon in a hot skillet for 3–4 minutes per side until golden brown and flaky. Alternatively, bake it in the oven at 375°F for about 12–15 minutes.
  3. Pro tip: Don’t overcook! A perfectly cooked salmon should flake easily but still retain its moisture.

Cooking the Rice to Perfection

  1. Rinse and cook: Rinse your rice until the water runs clear. Cook it according to package instructions, adding a splash of vinegar for sushi rice or a pinch of salt for added flavor.
  2. Fluff it up: Once cooked, fluff the rice with a fork and keep it warm.

“The secret to a good rice bowl lies in perfectly cooked rice—it’s the foundation of every bite.”

For unique seasoning inspirations, explore this crab omelette recipe that incorporates bold flavors.

Assembling the Bowl: Layering for Maximum Flavor

Assembled salmon rice bowl recipe with salmon, rice, avocado, cucumber, and sesame seeds.
  1. Start with the base: Scoop a generous amount of rice into your bowl.
  2. Add the star: Place your cooked salmon fillet on top.
  3. Layer the magic: Add your choice of toppings—avocado, cucumber, green onions, and sesame seeds.
  4. Finish strong: Drizzle with soy sauce or your favorite dressing. A sprinkle of sesame seeds adds a final touch of elegance.

Adding the Final Touch: Sauces and Garnishes

While soy sauce is the go-to, you can also use teriyaki sauce, spicy mayo, or even a splash of lime juice. Garnishes like seaweed strips or chili flakes can elevate the flavor profile.

While the classic salmon rice bowl is a masterpiece, there’s always room to explore new flavors. Here are some popular variations you might love:

Spicy Salmon Rice Bowl

If you’re a fan of heat, this variation is perfect for you. Mix your cooked salmon with sriracha, mayo, and a dash of soy sauce for a creamy, spicy topping. Add sliced jalapeños or chili flakes to crank up the heat! 🌶️🔥

Teriyaki Salmon Rice Bowl

Sweet and savory lovers, this one’s for you. Brush your salmon with teriyaki sauce while it cooks, and drizzle extra sauce over the bowl. Pair it with steamed broccoli and carrots for a wholesome twist.

Keto-Friendly Salmon Rice Bowl

Looking to cut carbs? Swap the rice with cauliflower rice. Top with plenty of avocado and a dollop of garlic aioli for a low-carb, high-flavor meal that’s keto-approved. 🥑

Common Problems and Solutions

Even the most seasoned cooks encounter hiccups in the kitchen. Don’t worry; we’ve got solutions to common salmon rice bowl challenges.

Overcooked or Dry Salmon: How to Fix It

Dry salmon can be a buzzkill. To avoid this, keep a close eye while cooking and use a meat thermometer (internal temp should be 145°F). If it’s already overcooked, flake it and mix it with a bit of soy sauce or sesame oil to restore moisture.

Sticky or Undercooked Rice: Tips to Avoid Mistakes

Sticky rice can feel mushy, while undercooked rice is just disappointing. To avoid this:

  • Rinse rice thoroughly before cooking to remove excess starch.
  • Follow the exact water-to-rice ratio and cooking times.
  • If it’s too sticky, fluff it with a fork and spread it out to cool slightly.

Balancing Flavors: Solving Bland or Overpowering Bowls

Does your bowl feel flat or overwhelming? Balance is key:

  • Add acid (like lime juice) for brightness.
  • Use sesame seeds or a pinch of sugar to balance overly salty flavors.
  • Taste as you go when adding sauces to avoid overloading any one flavor.

“Every bowl tells a story. The secret to a great one is finding harmony between all the elements.”

Nutritional Breakdown of Salmon Rice Bowl

Eating tasty food is great, but knowing it’s good for you too? Even better. Here’s a quick nutrition breakdown for a standard salmon rice bowl (per serving):

NutrientAmount
Calories~450
Protein35g
Carbohydrates40g
Fats18g
Omega-3 Fatty Acids~1.5g
Fiber3g

💡 Note: These values can vary depending on your choice of ingredients.

Pairing Ideas: Drinks and Side Dishes

What goes well with a salmon rice bowl? Let’s explore some pairing ideas to complete your meal.

Complementary Side Dishes for a Balanced Meal

  • Miso soup: Its umami-rich flavor pairs beautifully with salmon.
  • Edamame: Lightly salted, these make a great crunchy side.
  • Seaweed salad: Adds a refreshing and tangy element to your bowl.

Best Beverages to Serve with Salmon Rice Bowls

  • Green tea: A classic choice, light and soothing.
  • Sparkling water with lime: Simple, yet refreshing.
  • White wine: If you’re feeling fancy, a chilled Sauvignon Blanc complements the salmon perfectly. 🍷

Tips for Meal Prepping and Storing Leftovers

Got leftovers? Or maybe you want to prep your bowls for the week? Here’s how to do it right:

Storing and Reheating for Maximum Freshness

  1. Storage tips: Keep cooked salmon and rice in separate airtight containers to avoid sogginess. Refrigerate for up to 3 days.
  2. Reheating: Use a microwave for the rice, adding a splash of water to keep it moist. For salmon, reheat in a skillet to retain its crispiness.

Meal Prep Hacks to Save Time

  • Cook rice in bulk: Divide it into portions for easy assembly during the week.
  • Pre-chop veggies: Store them in airtight containers to maintain freshness.
  • Marinate salmon in advance: Let it sit in the fridge overnight to enhance flavor.

“A little prep today means a stress-free, delicious meal tomorrow.”

Conclusion: Why You Should Try This Recipe Today

So, why wait? A salmon rice bowl is more than just a meal—it’s an experience. It’s versatile, healthy, and oh-so-satisfying. Whether you’re making it for a quick lunch or a cozy dinner, it’s a recipe that will leave you feeling like a kitchen rockstar. ⭐

Whether for lunch or dinner, this salmon rice bowl recipe is quick, healthy, and satisfying—perfect for any occasion.

With its balance of taste, health benefits, and ease, the salmon rice bowl recipe is a must-try. It’s a versatile dish that adapts to your preferences and elevates everyday meals. Explore more meal inspirations like the ultimate steak quesadilla recipe for an extra layer of culinary creativity.

“Food is love made visible, and a salmon rice bowl is the perfect way to share that love.”

Banana bread with chocolate chips and walnuts on a serving board with a dusting of cinnamon.

What Can I Use If I Don’t Have Enough Bananas for Banana Bread?

Banana bread with chocolate chips and walnuts on a serving board with a dusting of cinnamon.

Banana bread is a classic comfort food, loved for its moist texture and rich flavor. But what happens when you don’t have enough bananas? Don’t worry—you can still whip up a delicious loaf by using the best banana substitutes for banana bread. Whether it’s applesauce, yogurt, or pumpkin puree, there are plenty of creative alternatives to save your recipe without compromising on taste or texture. Let’s explore your options and ensure your banana bread dreams stay alive!

Introduction:

Before we tackle substitutes, let’s take a moment to appreciate why banana bread is so special. At its core, it’s a simple recipe with bananas as the star of the show. Bananas aren’t just for flavor; they bring moisture, natural sweetness, and that unmistakable texture.

Banana bread is forgiving. It’s the friendliest recipe in the baking world. But even friendly recipes need the right balance of ingredients to work well.

Why Bananas Are Essential for Banana Bread:

The role bananas play in banana bread recipes makes finding the right banana substitutes for banana bread so important.

The Role of Bananas in Texture and Flavor

Bananas aren’t just there for their taste (though we love that, don’t we?). They play a bigger role than you might think. First, they keep the bread soft and moist. Without them, your loaf might turn out dense and dry. And let’s not forget that sweet, fruity kick they add—it’s like sunshine in a loaf.

But what if you don’t have enough bananas? That’s where the challenge begins. Thankfully, there are plenty of clever ways to work around this without sacrificing too much of what makes banana bread amazing.

Best Substitutes for Bananas in Banana Bread:

When searching for the perfect banana substitutes for banana bread, it’s essential to choose ingredients that mimic moisture and sweetness.

Using Applesauce as a Banana Replacement

Applesauce is the MVP of baking substitutes. Why? Because it’s sweet, moist, and super easy to find. Use 1/2 cup of applesauce for every banana you’re missing. Just like that, your banana bread is back on track.

For more breakfast inspiration, check out how restaurants make omelettes so fluffy.

“Applesauce is like the Swiss Army knife of baking—it can save almost any recipe. 🍎”

Substituting with Mashed Sweet Potatoes or Pumpkin

Sweet potatoes and pumpkin are excellent swaps if you want something a bit richer. They’re naturally sweet and bring a creamy texture to your batter. Use 1/2 cup of mashed sweet potato or pumpkin puree for each banana.

Plus, they add a subtle autumn vibe to your bread. Who doesn’t love a little pumpkin-spiced magic?

Greek Yogurt or Sour Cream as a Moisture Enhancer

No bananas? No problem! Greek yogurt or sour cream can step in to keep your bread moist. Use 1/4 cup of yogurt or sour cream per banana you’re replacing. Bonus: they give your loaf a slight tangy flavor, which can be a nice twist.

Nut Butter: A Unique Flavor and Texture Option

Want to take your banana bread to the next level? Try adding nut butter, like peanut or almond butter. Use 2-3 tablespoons of nut butter for every missing banana. Not only will your bread stay moist, but it’ll also have a rich, nutty flavor that’s simply irresistible.

“Nut butter doesn’t just replace bananas—it reinvents banana bread entirely. 🥜✨”

How to Use Other Fruits Like Pears or Avocado

Got some overripe pears or an avocado sitting around? These can work wonders in banana bread. Mash them up and use them just like bananas. Pears bring a mellow sweetness, while avocados keep things creamy and green (literally!).

Adjusting the Recipe When Substituting Bananas:

Replacing bananas isn’t as simple as swapping one ingredient for another. You need to make a few tweaks to keep your bread balanced.

Balancing Sweetness with Alternative Ingredients

Bananas are naturally sweet, so if you’re using something less sweet (like avocado), consider adding a bit more sugar, honey, or maple syrup to your batter. Start with an extra tablespoon and adjust to taste.

Modifying Wet-to-Dry Ratios in the Batter

Substitutes like applesauce or yogurt add moisture, but not as much as bananas. If your batter feels too dry, add a splash of milk or a bit more of your chosen substitute until the consistency looks right.

Creative Twists to Banana Bread Without Bananas:

Freshly baked banana bread loaf on a table with bananas and ingredients.

Let’s face it, swapping out bananas opens up a world of possibilities. You’re no longer bound to the classic flavor. Now’s the time to get adventurous and add your personal touch to this beloved recipe. Ready? Let’s explore some creative twists you can try!

Chocolate Chip and Nut Variations

Who doesn’t love chocolate? Adding chocolate chips to your banana bread is a no-brainer. They melt into gooey pockets of sweetness that take each bite to a whole new level. Pair them with walnuts or pecans for a crunchy contrast.

Pro Tip: If you’re using less sweet substitutes like avocado, chocolate chips can help balance the flavor. Go ahead, sprinkle in an extra handful. Your taste buds will thank you!

“Adding chocolate chips is like upgrading your loaf to VIP status. 🍫✨”

Adding Spices for Extra Flavor

Spices are your best friends when you’re missing bananas. A pinch of cinnamon, nutmeg, or even cardamom can elevate your banana bread into something extraordinary. Feeling bold? Add some ginger or a dash of allspice for a warm, aromatic twist.

Why not think outside the box? Imagine a chai-spiced banana bread. Sounds fancy, right? But it’s ridiculously easy to make!

Addressing Common Problems with Banana Substitutes:

No recipe is perfect, and substituting bananas can come with its fair share of challenges. But don’t worry—we’ve got solutions to the most common issues you might face.

Why Your Bread Might Turn Out Too Dry

Dry bread is a bummer, but it’s an easy fix. If your loaf is turning out too dry, you probably need more moisture in your batter. Try adding an extra tablespoon of your chosen substitute or a splash of milk.

Quick Fix: Brush your baked loaf with a simple syrup (equal parts sugar and water) while it’s still warm. This adds moisture and a touch of sweetness.

Fixing Bread That Doesn’t Rise Properly

Ever cut into your banana bread only to find it dense and flat? That’s usually because the batter wasn’t balanced. Too much moisture or too heavy of a substitute can weigh your bread down.

The Fix: Make sure your leavening agents (baking powder or soda) are fresh. And don’t overmix your batter—gentle stirring is all you need.

Managing Flavor Changes with Substitutes

Substitutes like pumpkin or avocado can change the flavor profile of your bread. While that’s not a bad thing, you might miss the classic banana taste. Adding vanilla extract, a touch of almond extract, or even a banana-flavored essence can bring back some of that familiar vibe.

“When life gives you substitutes, tweak the flavor until it feels like home again. 🌟”

Expert Tips for Perfect Banana Bread Every Time:

Now that you know how to handle banana shortages, let’s talk pro tips. These little nuggets of wisdom will help you nail your banana bread every single time.

Choosing the Right Substitute for Your Needs

Not all substitutes are created equal. If you’re going for a fruity flavor, applesauce or pears are your best bet. For creaminess, avocado or yogurt work wonders. And for a rich, nutty twist, nut butters are the way to go.

Baking Times and Temperature Adjustments

Different substitutes can slightly affect baking times. For example, bread made with applesauce might bake a bit faster than the traditional recipe. Keep an eye on your loaf around the 45-minute mark and test it with a toothpick. If it comes out clean, you’re good to go.

Bonus: Presentation Matters

Who says banana bread can’t be Instagram-worthy? Sprinkle some rolled oats, chocolate chips, or chopped nuts on top of your batter before baking. It adds a touch of crunch and makes your loaf look like it came straight out of a bakery. 📸✨

Frequently Asked Questions About Banana Substitutes:

Let’s wrap up this part with some quick FAQs to clear up any lingering doubts you might have.

Can I Use Frozen or Overripe Bananas?

Absolutely! In fact, frozen or overripe bananas are ideal for banana bread because they’re sweeter and easier to mash. Just make sure to thaw frozen bananas and drain any excess liquid before using them.

What Happens If I Use No Bananas at All?

No bananas? No problem! Your bread will still turn out delicious—it just won’t have that signature banana flavor. Think of it as a blank canvas to get creative with spices, nuts, and other add-ins.

Conclusion: Delicious Banana Bread Without the Bananas

A loaf of banana bread with a slice cut out, showing moist texture, paired with coffee and flowers on a rustic table.

So, there you have it—banana bread without bananas is not only possible but opens the door to endless creativity in the kitchen. Whether you’re using applesauce, yogurt, nut butter, or even sweet potatoes, the result is still a moist, flavorful loaf that feels like a warm hug in food form.

Encouragement to Experiment with Substitutes

Don’t be afraid to think outside the box. Baking is as much about creativity as it is about following a recipe. Missing bananas isn’t the end of your banana bread journey; it’s just the beginning of a new one. Who knows? You might discover a version of banana bread that’s even better than the original.

“Cooking is like life—when things don’t go as planned, adapt, and make something amazing! 💡”

Final Thoughts on Banana Bread Creativity

Banana bread is one of those recipes that can adapt to your pantry and your mood. Whether you’re swapping bananas for applesauce, adding a handful of chocolate chips, or sprinkling in some cinnamon, the possibilities are endless. And the best part? No two loaves are ever the same.

For a recipe using just two bananas, visit The Ultimate Banana Bread Recipe.

Happy baking! 🍞✨

Bonus: Share Your Creations!

If you try one of these substitutes or come up with your own twist, share it with your friends and family—or even online! Add a hashtag like #BananaBreadTwist and let the world see your delicious creation. Who knows, you might inspire someone else to get creative in the kitchen.

Thank you for reading! Now, grab your apron and start baking your own unique version of banana bread. Happy baking! 🧑‍🍳💛

Banana bread batter in a loaf pan, prepared for baking in the oven.

The Ultimate Banana Bread Recipe Using Just 2 Bananas

Moist banana bread made with two bananas, sliced on a wooden board with fresh bananas.

Interdiction:

Who doesn’t love a warm slice of banana bread? Especially when it’s made with this simple banana bread recipe with 2 bananas! 🍌 It’s comforting, sweet, and perfect for breakfast or as a snack. But let’s face it, sometimes you only have two bananas lying around, and you’re wondering, “Can I make banana bread with just two bananas?” The answer is YES, and I’m here to show you how to make it absolutely delicious.

This recipe is perfect for when you want something quick, easy, and satisfying. Plus, it’s beginner-friendly. Even if you’ve never baked before, you’ll find this guide simple to follow. Ready to dive in? Let’s go!

Why Use Only Two Bananas for Banana Bread?

You might think more bananas mean more flavor, but that’s not always true. Two bananas are the sweet spot for a balanced flavor and texture. Here’s why:

  1. Perfect Moistness: Too many bananas can make your bread overly wet and dense. Two bananas give just the right amount of moisture.
  2. Balanced Sweetness: Two ripe bananas offer enough natural sweetness without overpowering the other flavors.
  3. Easy to Work With: Using fewer bananas means the batter is easier to mix and bake evenly.

For tips on achieving consistent textures in baked goods, check out our guide on how do restaurants make omelettes so fluffy.

“Sometimes, less is more—especially when it comes to banana bread.”

The Science of Moist Banana Bread

Ever wondered why some banana bread recipes turn out too dry while others are mushy? It’s all about balance. Bananas are packed with moisture, but when you use too many, it can throw off the ratio of wet to dry ingredients.

The secret is to:

  • Use two medium-sized ripe bananas.
  • Combine them with ingredients that retain moisture, like eggs and oil.

Perfecting the Flavor with Two Bananas

Bananas are the star of this show, but a little help from other ingredients can elevate the flavor:

  • Vanilla extract: Adds warmth and depth.
  • Cinnamon or nutmeg: For a cozy, spiced undertone.
  • Brown sugar: Enhances the natural sweetness of bananas.

🍯 Pro Tip: Add a drizzle of honey to the batter for a hint of extra sweetness!

Ingredients for Banana Bread with Two Bananas:

Ingredients for banana bread recipe with two bananas on a wooden table.

You don’t need a fancy list of ingredients. Most of these are probably already in your kitchen!

Basic Ingredients You Need

  • 2 medium-sized ripe bananas (mashed)
  • 1/3 cup melted butter (unsalted)
  • 3/4 cup sugar (white or brown)
  • 1 large egg (room temperature)
  • 1 teaspoon vanilla extract
  • 1 teaspoon baking soda
  • 1/4 teaspoon salt
  • 1 1/2 cups all-purpose flour

Optional Add-Ons to Elevate Your Recipe

Want to make your banana bread unforgettable? Try these add-ons:

  • Chopped nuts (walnuts or pecans) for a crunchy texture.
  • Chocolate chips for a sweet surprise in every bite.
  • Dried fruits like raisins or cranberries for a chewy twist.

“The beauty of banana bread is its versatility—make it yours!”


Step-by-Step Guide to Making Banana Bread:

Making banana bread with this banana bread recipe with 2 bananas is more than just following a recipe—it’s an art form. Whether you’re a baking newbie or a seasoned pro, these detailed steps will guide you through the process effortlessly.

Step 1: Preparing Your Ingredients and Tools

Preparation is key to baking success. Before you start mixing, make sure you’ve got everything ready to go.

  1. Gather Your Ingredients:
    • Measure everything out to save time and avoid mistakes. Trust me, nothing’s worse than realizing halfway through that you’re out of vanilla extract!
  2. Prepare Your Bananas:
    • Use a fork to mash the two ripe bananas in a bowl. Aim for a smooth, lump-free texture for even mixing.
  3. Preheat Your Oven:
    • Set it to 350°F (175°C). A properly preheated oven ensures your bread bakes evenly.
  4. Grease Your Pan:
    • Use butter or non-stick spray to coat your loaf pan. You can also line it with parchment paper for easier cleanup.

🍌 “Banana bread is like a warm hug—so don’t rush the prep. It’s worth it!”

Step 2: Mixing Wet and Dry Ingredients

The secret to a perfect banana bread batter lies in using this simple banana bread recipe with 2 bananas. Mix it just right—not too much, not too little.

  1. Mix the Wet Ingredients:
    • In a large bowl, whisk together the mashed bananas, melted butter, sugar, egg, and vanilla extract. Keep mixing until it’s smooth and creamy.
  2. Combine the Dry Ingredients:
    • In a separate bowl, sift the flour, baking soda, and salt together. Sifting helps prevent clumps and ensures an even rise.
  3. Bring It All Together:
    • Gradually add the dry mixture to the wet mixture. Use a spatula or wooden spoon to fold the ingredients together gently. Overmixing can lead to dense bread, so stop as soon as you see no streaks of flour.

For another comforting breakfast option, consider trying our recipe for a Mexican omelette.

🥄 “Think of mixing as a gentle conversation between the ingredients—they should blend, not argue!”

Banana bread batter in a loaf pan, prepared for baking in the oven.

Step 3: Baking the Perfect Banana Bread

Now comes the fun part—watching your banana bread come to life in the oven!

  1. Pour the Batter into the Pan:
    • Evenly distribute the batter in your greased loaf pan. Use a spatula to smooth the top.
  2. Bake with Care:
    • Place the pan on the center rack and bake for 50–60 minutes. Check it after 50 minutes by inserting a toothpick into the center. If it comes out clean, it’s done!
  3. Cool Before Serving:
    • Let the bread cool in the pan for about 10 minutes, then transfer it to a wire rack. Cutting it while it’s too hot can make it crumbly.

🍞 “Patience is the hardest part of baking, but your first warm slice will be worth the wait!”

Common Problems and Their Solutions:

Even seasoned bakers face hiccups now and then. Here’s how to troubleshoot some common banana bread issues:

Why Is My Banana Bread Too Dry?

Dry banana bread usually means there wasn’t enough moisture in the batter. Here’s how to fix it next time:

  • Use fully ripe bananas—they’re softer and more flavorful.
  • Don’t skimp on the butter or egg; these add essential moisture.
  • Measure your flour correctly. Too much flour can dry out the batter, so spoon it into the measuring cup and level it off.

Why Didn’t My Banana Bread Rise?

Flat banana bread is often the result of old baking soda or overmixing. For better results:

  • Check the expiration date on your baking soda.
  • Mix the batter gently to avoid knocking out the air bubbles.

How to Fix a Gummy Texture

If your bread turns out gummy in the center, it might not have baked long enough. Here’s what to do:

  • Always test with a toothpick before taking it out of the oven.
  • If the top starts browning too quickly, cover it loosely with aluminum foil and continue baking.

🔥 “Baking is a science—small adjustments make a big difference!”

Pro Tips for the Best Banana Bread:

Want to take your banana bread to the next level? Try these expert tips:

How to Achieve a Crispy Top

For a golden, crispy crust:

  • Sprinkle a little sugar on top of the batter before baking. It caramelizes beautifully in the oven.
  • Use the broil setting for the last 1–2 minutes of baking, but watch it closely!

For more cooking tips and techniques, visit our guide on how to make Jay Fai’s crab omelette.

Storage and Freezing Tips

Banana bread is best enjoyed fresh, but it stores well too:

  • At Room Temperature: Wrap it in plastic wrap or store it in an airtight container for up to 3 days.
  • In the Freezer: Slice the bread and wrap each piece individually. Store in a freezer-safe bag for up to 3 months.

🧊 “Frozen banana bread is like a time capsule of deliciousness—ready whenever you are!”


FAQs About Banana Bread with Two Bananas:

You’ve got questions, and I’ve got answers! Here are some of the most common questions about making banana bread with two bananas.

Can I Use Overripe Bananas?

Absolutely! Overripe bananas are the secret weapon for flavorful banana bread. The browner and spottier the bananas, the sweeter and more aromatic your bread will be.

🍌 “Think of overripe bananas as nature’s candy—they’re perfect for baking!”

If your bananas aren’t ripe yet, try this trick: Place them in the oven at 300°F (150°C) for about 15–20 minutes. The heat will soften and sweeten them, making them ready for baking.

Can I Make This Recipe Gluten-Free?

Yes, you can! Simply swap the all-purpose flour with a 1:1 gluten-free flour blend. These blends are specifically designed for baking and will give you a similar texture to traditional banana bread.

🌾 “Gluten-free banana bread? Easy peasy. Everyone deserves a slice!”

What’s the Best Oil to Use if I Don’t Have Butter?

If you’re out of butter or want a dairy-free option, you can use:

  • Vegetable oil or canola oil for a neutral flavor.
  • Coconut oil for a hint of tropical sweetness.

Just use the same amount as the butter called for in the recipe—about 1/3 cup.

Can I Add More Bananas?

If you have extra bananas, save them for another loaf or try making banana muffins. Adding more than two bananas can make the bread too dense or wet. Stick to two for the best texture and balance.

Conclusion: Bake, Enjoy, and Share!

This banana bread recipe with 2 bananas proves that you don’t need a kitchen full of ingredients to bake something amazing. Whether you’re enjoying it warm with a pat of butter, sharing it with friends over coffee, or saving a slice for a midnight snack, banana bread never disappoints. 🍞✨

Here’s a quick recap of why this recipe works so well:

  • Simple Ingredients: Just two bananas and a handful of pantry staples.
  • Beginner-Friendly Steps: Perfect for first-time bakers.
  • Customizable Add-Ons: Make it your own with nuts, chocolate, or spices.

“Baking is love made visible—and banana bread is the perfect way to show it.”

So what are you waiting for? Preheat that oven, grab those bananas, and get baking. Don’t forget to share your creation and spread the banana bread love! ❤️

Bonus: A Quick Two-Banana Muffin Variation

Want a portable version of this recipe? Turn it into muffins!

  1. Follow the same batter instructions.
  2. Pour the batter into a greased or lined muffin tin.
  3. Bake at 350°F (175°C) for 20–25 minutes.
  4. Let cool and enjoy!

🧁 “Muffins are like banana bread’s fun-sized cousin—perfect for breakfast on the go!”