Quesadilla platter with sides like avocado, tortilla chips, and salsa.

What Is the Best Melting Cheese for Quesadillas?

Golden quesadilla on a skillet with melted cheese and fresh garnish.

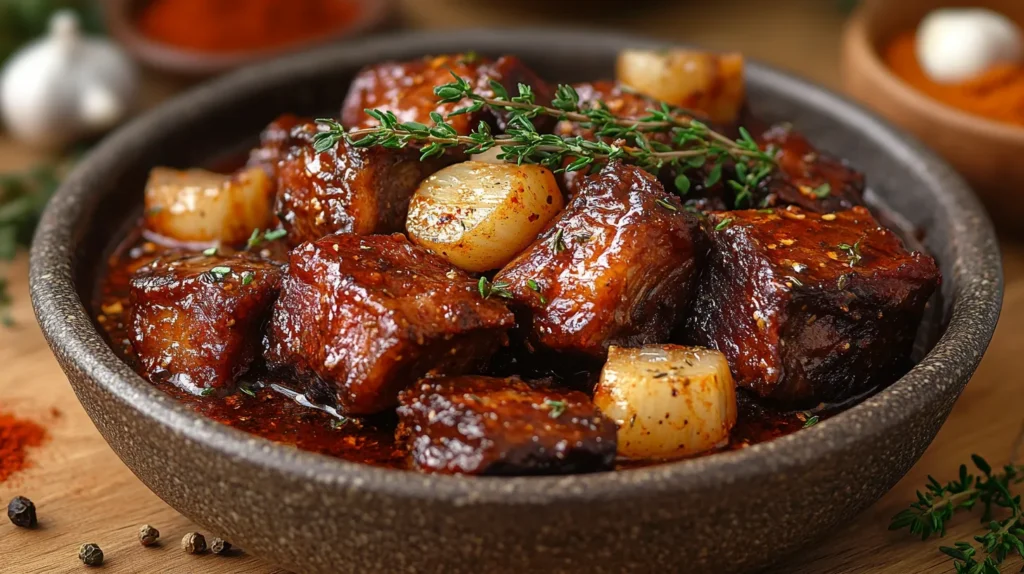
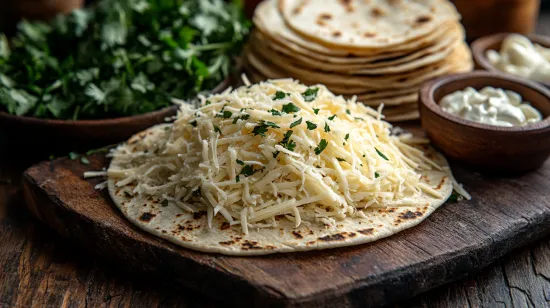
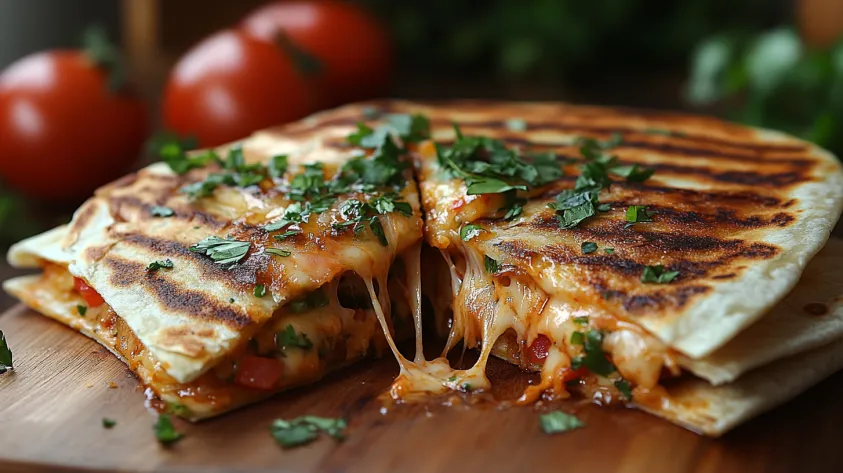
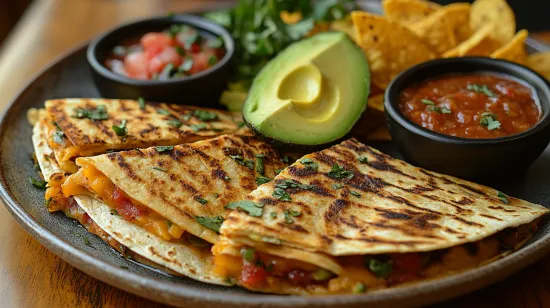
Quesadillas are a game-changer in the world of quick and delicious meals. Think about it—soft tortillas filled with gooey, melty cheese. Sounds perfect, right? But here’s the catch: not every cheese is created equal when it comes to making that satisfying stretch and creaminess. So, what really is the best melting cheese for quesadillas for quesadillas? Let’s dig in!

Introduction:

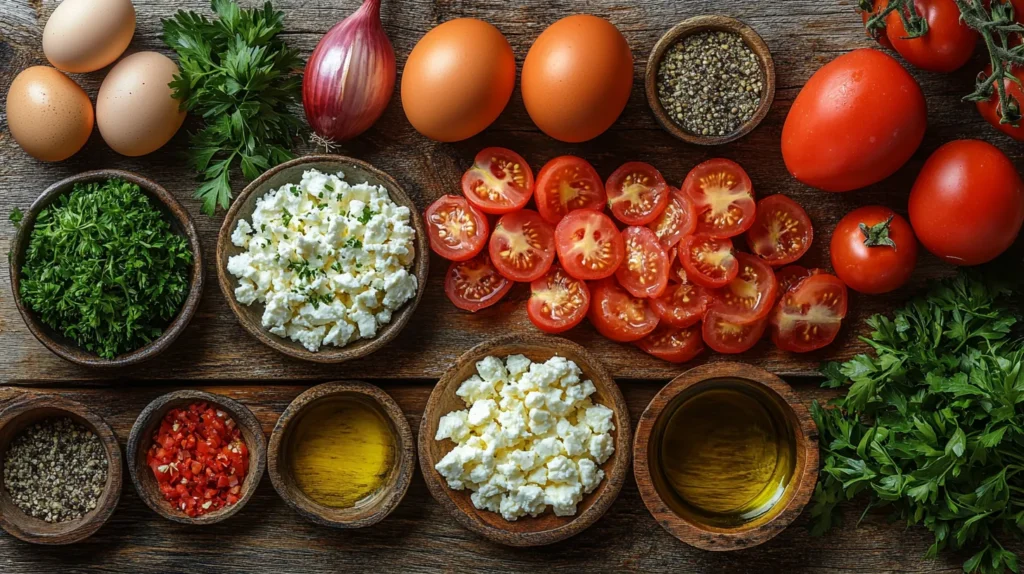
First, let’s start with the basics. best melting cheese for quesadillas are a Mexican classic made by grilling or frying a tortilla stuffed with cheese and often other fillings. The cheese, though, is the star of the show. Why? Because its melting properties can make or break your quesadilla game.

Quesadillas are all about the cheese, and choosing the best melting cheese for quesadillas can turn a good dish into a masterpiece.

What Makes a Cheese Ideal for Quesadillas?

A cheese fit for quesadillas needs two main things:

  1. Perfect melting: It should turn into that ooey-gooey texture we all crave.
  2. Flavor harmony: The taste shouldn’t overpower the tortilla or other ingredients—it should complement them.

Some cheeses melt like a dream, while others are stubborn and clump up instead of getting gooey. And let’s face it, no one wants to bite into a quesadilla and get a dry, grainy surprise.

The Importance of Melting Properties in Cheese 🧑‍🍳

The way a cheese melts depends on its moisture, fat content, and how it’s processed. High-moisture cheeses like mozzarella or Oaxaca are fantastic for creating that stretchy, Instagram-worthy pull. Meanwhile, aged cheeses like Parmesan might add flavor but don’t melt as well. So, if you want the perfect quesadilla, you’ve got to pick the right cheese. Let’s dive into the best options!

Top Cheeses for Quesadillas 🎉

When it comes to the best melting cheese for quesadillas, options like mozzarella and Monterey Jack shine due to their creamy, stretchy textures.

Mozzarella: A Classic Choice for Stretchy Melt

Shredded Oaxaca, Monterey Jack, and mozzarella cheeses for quesadillas.

Mozzarella isn’t just for pizza! Its high moisture and mild flavor make it an excellent choice for quesadillas. If you’re someone who loves that satisfying cheese pull, mozzarella is your go-to. It’s like the superhero of melting cheeses—reliable and oh-so-stretchy.

“Mozzarella is like that dependable friend who always shows up when you need them—soft, stretchy, and comforting.”

Monterey Jack: The King of Creamy Texture 👑

Monterey Jack is practically made for quesadillas. It’s creamy, mild, and melts like butter on a warm tortilla. Plus, it has just enough richness to elevate your quesadilla without stealing the spotlight.

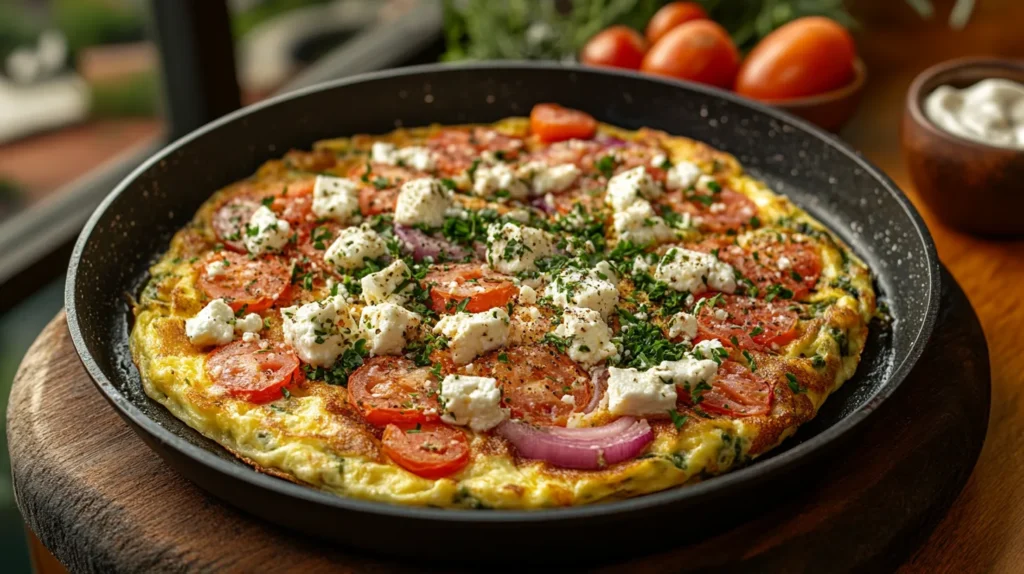
Oaxaca Cheese: An Authentic Mexican Favorite

If you’re after an authentic experience, Oaxaca cheese is the way to go. This Mexican cheese is similar to mozzarella but with a slightly saltier kick. It’s perfect for making traditional quesadillas that taste just like abuela used to make.

Cheddar: Balancing Flavor and Melting Ability

Cheddar brings a sharp, tangy flavor to the mix. While it doesn’t stretch as much as mozzarella, it melts beautifully and adds a rich depth of flavor. For the best results, opt for a mild or medium cheddar.

Pepper Jack: Adding a Spicy Kick 🌶️

Feeling adventurous? Pepper Jack cheese spices things up with bits of jalapeño and chili. It melts smoothly and adds a fiery twist to your quesadilla. If you like your food with a little heat, this one’s for you!

Stay tuned for Part 2, where we’ll dive into blending cheeses, common melting problems, and how to fix them! 🧀

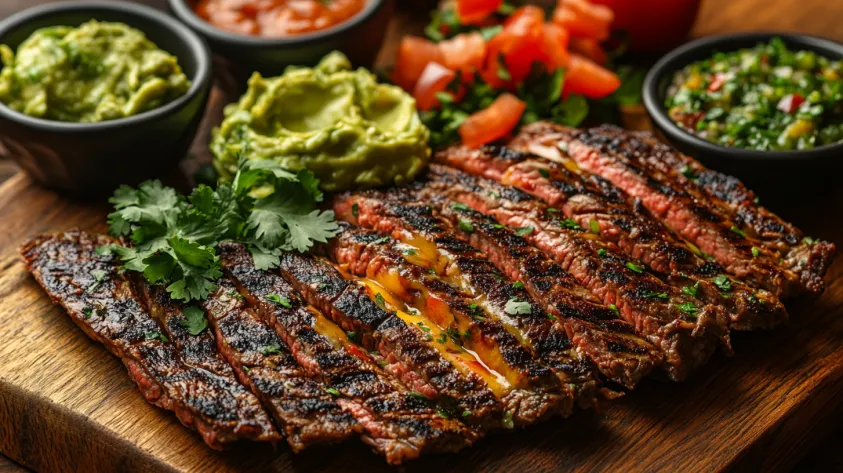
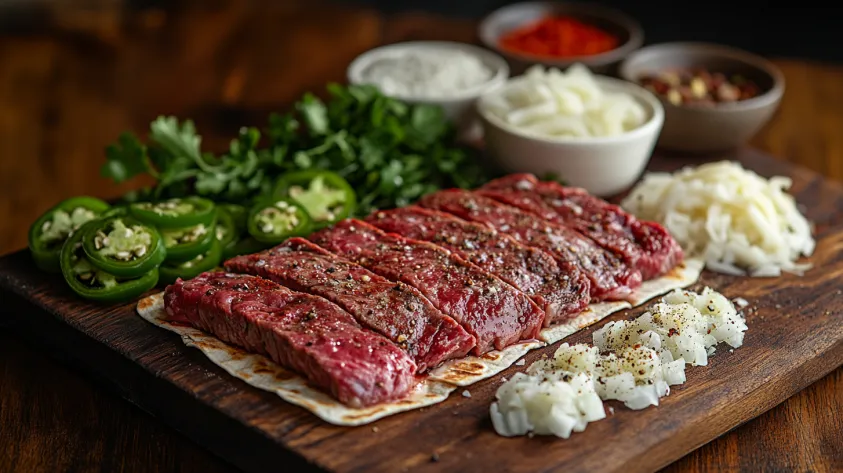
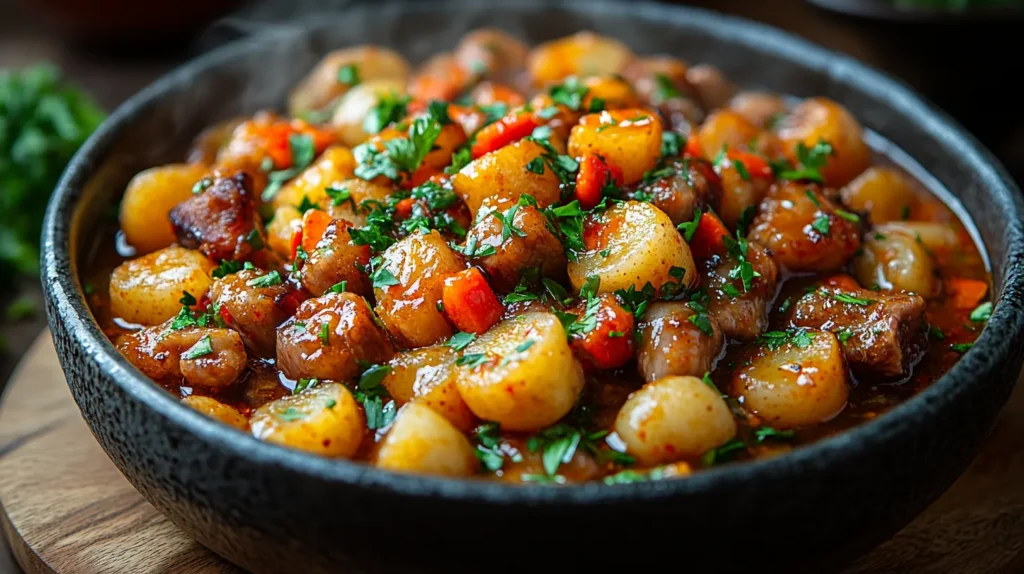
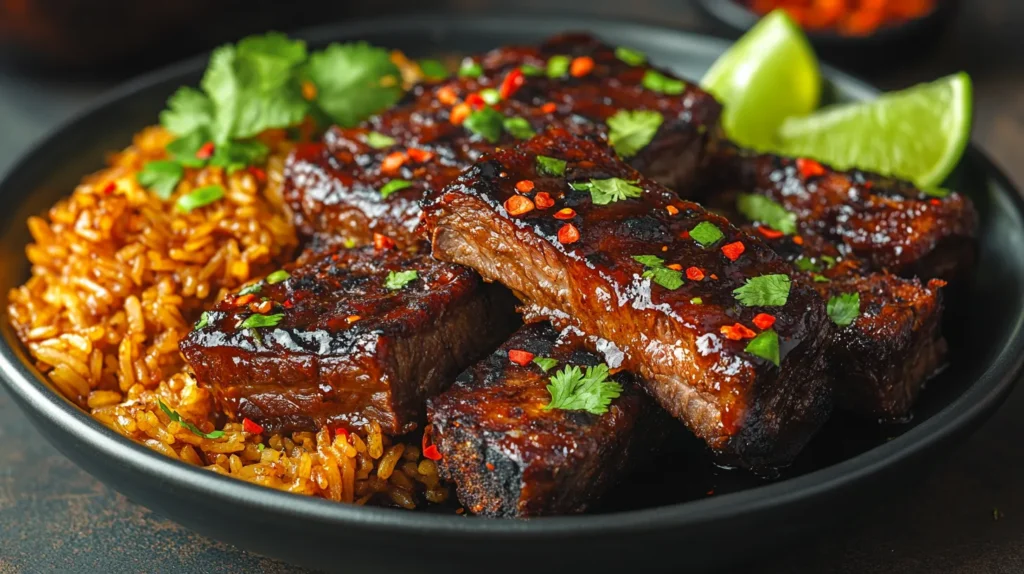
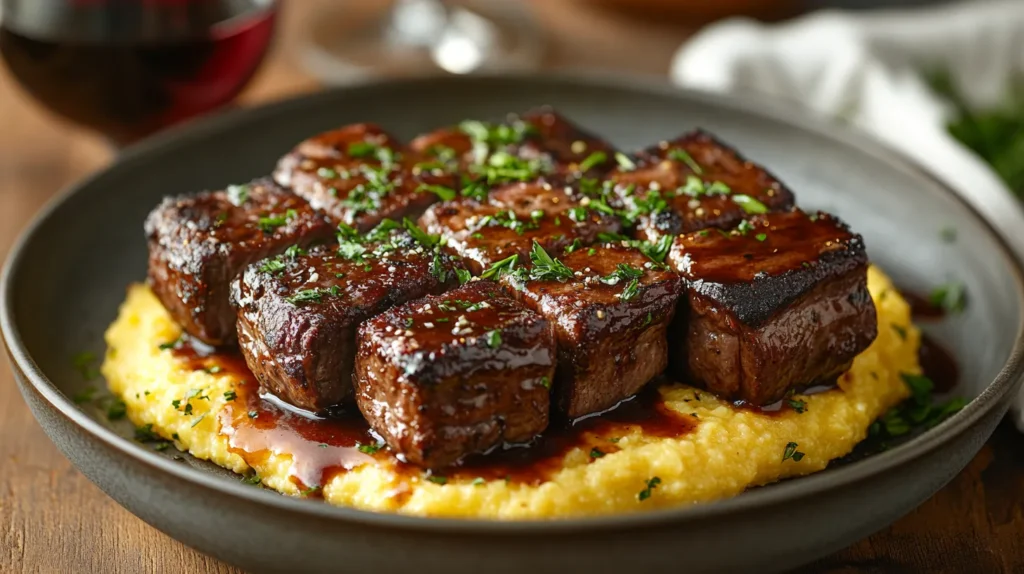
Pair your cheese selections with the right protein by exploring What Kind of Steak is Good for Quesadillas?.

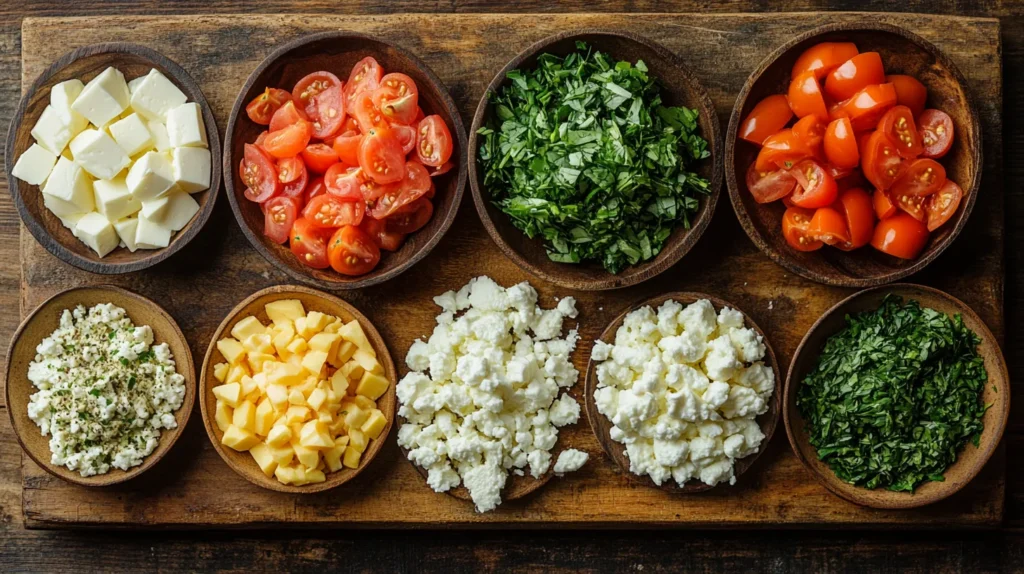
Blending Cheeses for Optimal Flavor and Texture 🧀✨

When blending cheeses, combining Monterey Jack and mozzarella creates the best melting cheese for quesadillas that balances flavor and texture.

Quesadilla being pulled apart with melted cheese stretching

Here are some tried-and-true blends that elevate your quesadilla game:

  1. Mozzarella + Cheddar: This duo is perfect if you want the stretchy pull of mozzarella with the tangy flavor of cheddar.
  2. Monterey Jack + Pepper Jack: A creamy base with a spicy kick—ideal for those who love a little heat.
  3. Oaxaca + Queso Asadero: For an authentic Mexican vibe, this combo delivers traditional flavors with a silky melt.

“Blending cheeses is like mixing colors on a palette—each one adds its own touch, creating a masterpiece of flavor.”

Experimenting with Ratios and Proportions

Feel free to experiment! Start with a 50/50 ratio of your chosen cheeses and adjust based on your taste. Want more stretch? Add extra mozzarella. Prefer bold flavors? Dial up the cheddar or Pepper Jack. The beauty of blending is that there’s no wrong answer—just endless possibilities. 🎨

Common Problems with Melting Cheese in Quesadillas 🔧

To avoid cheese disasters, always select the best melting cheese for quesadillas, such as Oaxaca or Pepper Jack, for consistent results.

Cheese Not Melting Properly: Causes and Solutions

Sometimes, your cheese refuses to melt. It just sits there, sad and unmelted. Why does this happen?

Causes:

  • Using low-moisture or aged cheeses (e.g., Parmesan, feta).
  • Cooking at a heat that’s too low or too high.

Solutions:

  • Opt for high-moisture cheeses like mozzarella, Oaxaca, or Monterey Jack.
  • Cook your quesadilla over medium heat. Too high, and the cheese burns before melting; too low, and it never fully melts.

Preventing a Greasy or Oily Texture 🛠️

Ever bitten into a quesadilla and felt like you just drank a cup of oil? That’s not fun. Greasiness happens when you use high-fat cheeses or cook at improper temperatures.

Fixes:

  • Combine a high-fat cheese (like cheddar) with a low-fat option (like mozzarella).
  • Keep the heat steady and avoid overcooking.

“A perfect quesadilla is like a good relationship—it’s all about balance.”

Avoiding Cheese Leakage from the Tortilla 🚨

Nobody likes cheese leaking out and burning on the pan. It’s messy and robs you of your precious cheese!

Tips:

  1. Don’t overfill your quesadilla. Less is more when it comes to stuffing.
  2. Leave a small border of tortilla without cheese to act as a seal.
  3. Press gently with a spatula while cooking to keep everything contained.

Choosing the Right Cheese Based on Preferences 🧀❤️

The “best” cheese depends on what you’re craving. Here’s a quick guide to help you decide:

For Creamy and Mild: Monterey Jack and Mozzarella

If you’re all about that smooth, creamy texture without overpowering flavors, Monterey Jack and mozzarella are your dream team. They’re perfect for picky eaters and kids who like to keep things simple.

For Authenticity: Oaxaca and Queso Asadero 🇲🇽

Want your quesadilla to taste like it came straight from a Mexican kitchen? Stick with Oaxaca or Queso Asadero. They’re traditional, flavorful, and melt like a dream.

For Bold Flavor: Cheddar and Pepper Jack

Looking for a punch of flavor? Cheddar and Pepper Jack add personality to your quesadilla. They’re ideal for adventurous eaters who love rich, tangy, or spicy notes.

Get ready for Part 3, where we’ll explore creative cheese alternatives, pro tips for perfect quesadillas, and wrap it all up with a cheesy conclusion! 🌟

Alternatives to Traditional Cheese for Quesadillas 🧀✨

What if you’re dairy-free, vegan, or simply looking to try something different? Don’t worry—you can still enjoy melty, delicious quesadillas without traditional cheese. Here’s how!

Vegan Cheese Options for Melting 🌱

Vegan cheeses have come a long way, and many brands now offer fantastic melting options. Look for varieties made with coconut oil, cashews, or almonds—they mimic the creaminess of dairy-based cheeses.

Top Picks:

  • Daiya Mozzarella-Style Shreds: Great stretch and neutral flavor.
  • Violife Cheddar: Adds a bold, tangy taste.
  • Miyoko’s Creamery Vegan Mozzarella: Perfect for that authentic cheesy pull.

Non-Dairy Alternatives for Dietary Restrictions

If vegan cheese isn’t your thing, you can also use:

  • Nutritional Yeast: Sprinkle this for a cheesy flavor without the melt.
  • Hummus or Cashew Cream: While not traditional, these add creaminess and richness.

“Going dairy-free doesn’t mean giving up on the cheesy goodness—you just have to get creative!”

Tips for Preparing the Perfect Quesadilla 👩‍🍳🌮

Making a quesadilla might seem simple, but there’s an art to getting it just right. Follow these tips, and you’ll be a quesadilla master in no time!

Selecting the Right Tortilla for Your Cheese

Quesadilla platter with sides like avocado, tortilla chips, and salsa.

The tortilla is the foundation of your quesadilla. It needs to be sturdy enough to hold all that gooey cheese but flexible enough to fold or flip.

Pro Tips:

  • Use flour tortillas for a softer, more pliable texture.
  • If you prefer a crunchier quesadilla, go for corn tortillas, but handle with care—they’re more fragile.

Cooking Techniques for Even Melting 🔥

To get that perfect melt, the way you cook your quesadilla matters. Here’s a foolproof method:

  1. Preheat a non-stick skillet or griddle over medium heat.
  2. Add a tiny bit of butter or oil for extra flavor and to prevent sticking.
  3. Place your tortilla on the pan and add cheese (and other fillings, if desired).
  4. Fold it over or top with another tortilla.
  5. Cook for 2-3 minutes on each side, pressing gently with a spatula, until golden brown and the cheese is fully melted.

Bonus Tips for Extra Flavor

  • Add herbs and spices: Sprinkle a little garlic powder, smoked paprika, or even a dash of cumin for extra flavor.
  • Use flavored tortillas: Spinach or tomato tortillas can add a fun twist.

“Cooking a quesadilla is like creating a love letter to cheese—take your time, and let the magic happen.”

Conclusion: Finding Your Perfect Cheese Match 🧀✨

At the end of the day, the best melting cheese for quesadillas for quesadillas is the one that makes you happy. Whether you stick to classics like mozzarella or explore bold flavors with Pepper Jack, there’s no wrong choice. Experiment with blends, try new alternatives, and make your quesadillas your own.

Exploring Your Preferences Through Experimentation

Think of your kitchen as a lab and cheese as your experiment. Try mixing and matching, adjusting ratios, or even inventing your own signature blend.

In the end, the best melting cheese for quesadillas depends on your taste preferences—experiment with blends to find your perfect match.

Embracing Variety in Quesadilla Recipes 🌮❤️

Remember, quesadillas are endlessly versatile. They’re a blank canvas waiting for your creative touch. So, grab your favorite cheese, fire up the skillet, and let the cheesy goodness begin!

Looking to take your quesadilla game to the next level? Pair the perfect cheese with an equally stunning filling by exploring What Kind of Steak is Good for Quesadillas?.

“Life is too short for boring quesadillas. Find your cheese, and make it melt!” 🧀🔥

Quesadillas with salsa, guacamole, and chips.

What Kind of Steak is Good for Quesadillas?

Crispy steak quesadillas served with guacamole and salsa.

Introduction:

When it comes to comfort food that combines simplicity with deliciousness, quesadillas undoubtedly top the list. This beloved Mexican dish, known for its gooey cheese and crispy tortilla, becomes even more irresistible when paired with a perfectly cooked steak. But with so many types of steak available, which one is the best for quesadillas?

The right steak can elevate your quesadilla from a quick snack to a gourmet experience, offering a perfect balance of flavor, tenderness, and texture. In this article, we’ll explore the best steak options, tips for preparation, and creative ideas to make your steak quesadillas a culinary masterpiece.

Understanding Quesadillas:

Origins and Popularity of Quesadillas

Quesadillas trace their roots to Mexico, where the combination of tortillas and cheese has been a staple for centuries. Traditionally cooked on a griddle (comal), this dish has evolved into countless variations, including fillings like vegetables, chicken, and, of course, steak. Today, quesadillas are enjoyed worldwide for their versatility and ease of preparation.

Essential Ingredients and Role of Steak

At its core, a quesadilla requires just three ingredients: tortillas, cheese, and a filling. While the tortilla provides structure and the cheese adds richness, the filling is where creativity shines. Steak, with its robust flavor and satisfying texture, is a standout choice that pairs exceptionally well with melted cheese and toasted tortillas.

Why Steak is a Great Choice:

Flavor Profile of Steak in Quesadillas

Steak brings a smoky, savory flavor that contrasts beautifully with the creamy cheese and crispy tortillas. When seasoned and cooked properly, it enhances the overall taste, making each bite more flavorful and satisfying.

Nutritional Benefits of Steak in Quesadillas

In addition to taste, steak adds a boost of protein, iron, and essential nutrients to your meal. It’s a wholesome way to make quesadillas more filling and nutritious, turning them into a well-rounded dish perfect for lunch, dinner, or even a hearty snack.

Best Types of Steak for Quesadillas:

Skirt Steak

Known for its bold flavor and loose texture, skirt steak absorbs marinades beautifully and is ideal for slicing thinly against the grain. It’s a top pick for authentic quesadillas, providing a robust taste that pairs perfectly with cheese and tortillas.
Check out the ultimate steak quesadilla recipe for a detailed guide on creating mouthwatering quesadillas.

Flank Steak

Flank steak is lean yet flavorful, making it another excellent choice. Its slightly firm texture is best tenderized through marination. Try pairing it with vibrant flavors like citrus or spicy marinades.
Explore more about what kind of steak Chipotle uses for carne asada for insights on flavor-packed steak options.

Ribeye Steak

For a rich and buttery experience, ribeye steak is a luxurious option. Its marbling adds juiciness, creating a melt-in-your-mouth quality perfect for quesadillas. Pair it with smoky marinades for a decadent treat.

Sirloin Steak

Sirloin steak offers a balance between tenderness and affordability. It’s a versatile cut that works well in quesadillas, especially when seasoned with spices like cumin, paprika, or chili powder.

Marinades for Steak in Quesadillas:

Marinated steak with fresh ingredients.

Classic Marinades

A classic marinade often includes ingredients like olive oil, garlic, salt, pepper, and a splash of vinegar. This simple blend enhances the steak’s natural flavor without overpowering it, making it perfect for those who prefer a subtle taste.

Citrus-Based Marinades

Citrus-based marinades, featuring lime or orange juice, are popular in Mexican cuisine. The acidity of the citrus helps tenderize the steak while adding a refreshing tang. Combine citrus juice with ingredients like garlic, chili powder, and cumin for an authentic touch.

Spicy and Smoky Marinades

For a bolder flavor, opt for a spicy and smoky marinade. Use ingredients like chipotle peppers, smoked paprika, and adobo sauce. These elements add depth to the steak, making it a standout feature in your quesadillas.

Cooking Methods for Steak Quesadillas:

Grilling

Grilling is a top choice for cooking steak for quesadillas. It adds a smoky, charred flavor that enhances the meat’s richness. Preheat the grill, cook the steak to medium-rare or medium, and let it rest before slicing thinly.

Pan-Searing

If you don’t have a grill, pan-searing is a convenient option. Heat a cast-iron skillet over high heat, add a bit of oil, and cook the steak to your preferred doneness. Pan-searing ensures a nice crust while keeping the inside juicy.

Sous Vide and Finishing Touches

Sous vide is an excellent method for achieving perfectly cooked steak every time. Cook the steak in a vacuum-sealed bag at a precise temperature, then finish with a quick sear in a hot skillet for added texture and flavor.

Want to explore similar techniques? Check out this chopped steak recipe for inspiration on creating tender and flavorful beef dishes.

Tips for Preparing Steak Quesadillas:

How to Slice Steak for Quesadillas

Proper slicing is crucial for tender, bite-sized pieces. Always slice the steak against the grain, which shortens the muscle fibers and makes the meat easier to chew.

Choosing Cheese and Tortillas

Opt for cheese varieties like Monterey Jack, cheddar, or Oaxaca cheese for optimal melting and flavor. For tortillas, both flour and corn work well, but flour tortillas offer a softer texture that pairs seamlessly with steak.

Adding Complementary Ingredients

Enhance your quesadillas with additional ingredients like sautéed onions, bell peppers, or jalapeños. Fresh cilantro, pico de gallo, or avocado slices can also add vibrant flavors and textures to the dish.

Skirt Steak: The Perfect Choice:

Why Skirt Steak Works Well

Skirt steak is a standout option for quesadillas due to its bold flavor and tender texture when prepared correctly. Its ability to absorb marinades makes it highly versatile, and its loose muscle structure ensures it pairs beautifully with melted cheese and crispy tortillas.

Recipe Example for Skirt Steak Quesadillas

Ingredients:

  • 1 lb skirt steak
  • 2 tbsp olive oil
  • Juice of 2 limes
  • 2 cloves garlic (minced)
  • 1 tsp chili powder
  • 1 tsp cumin
  • 1 cup shredded Monterey Jack cheese
  • 4 large flour tortillas
  • Optional: sautéed onions, bell peppers, sour cream, and salsa

Instructions:

  1. Marinate the Steak: Combine olive oil, lime juice, garlic, chili powder, and cumin in a bowl. Add the skirt steak, coating it evenly. Marinate for at least 30 minutes (or overnight for maximum flavor).
  2. Cook the Steak: Grill or pan-sear the steak for about 3-4 minutes on each side until medium-rare. Let it rest for 5 minutes, then slice thinly against the grain.
  3. Assemble the Quesadilla: Place a tortilla on a heated skillet. Add a layer of cheese, followed by sliced steak and any additional toppings. Sprinkle more cheese, then top with another tortilla.
  4. Cook the Quesadilla: Cook on medium heat for 2-3 minutes per side until the tortilla is golden brown and the cheese is melted.
  5. Serve: Slice into wedges and serve with sour cream, salsa, or guacamole.

Flank Steak for Quesadillas:

Characteristics of Flank Steak

Flank steak is lean, flavorful, and slightly firmer than skirt steak. Its rich taste makes it an excellent candidate for quesadillas, especially when marinated to enhance its tenderness.

Recipe Example for Flank Steak Quesadillas

Ingredients:

  • 1 lb flank steak
  • 3 tbsp soy sauce
  • 2 tbsp lime juice
  • 1 tbsp honey
  • 1 tsp smoked paprika
  • 1 tsp garlic powder
  • 1 cup shredded cheddar cheese
  • 4 corn tortillas
  • Optional: roasted poblano peppers, fresh cilantro

Instructions:

  1. Prepare the Marinade: Whisk together soy sauce, lime juice, honey, smoked paprika, and garlic powder. Marinate the flank steak for at least an hour.
  2. Cook the Steak: Grill or pan-sear the steak for 5-6 minutes on each side, depending on thickness. Let rest before slicing thinly against the grain.
  3. Build the Quesadilla: Spread cheese and sliced steak onto a tortilla. Add roasted poblano peppers and cilantro for extra flavor. Top with another tortilla.
  4. Cook and Serve: Heat on a skillet until golden brown on both sides. Slice and serve with your favorite sides.

Other Steak Options to Consider:

Tenderloin

Tenderloin is prized for its tenderness and mild flavor. While it’s more expensive, it provides a luxurious touch to quesadillas.

Flat Iron

Flat iron steak is well-marbled and flavorful, making it a fantastic mid-range option for quesadillas.

New York Strip

New York strip offers a balance of tenderness and fat content, creating a juicy and satisfying filling for your quesadilla.

Pairings and Sides for Steak Quesadillas:

Quesadillas with salsa, guacamole, and chips.

Best Side Dishes

  • Salsa and Guacamole: These classic sides bring freshness and a touch of acidity to balance the richness of steak quesadillas.
  • Mexican Rice: Add a hearty and flavorful accompaniment to complete the meal.
  • Refried Beans: Creamy and savory, refried beans pair beautifully with the crispy quesadilla texture.

Beverage Pairings

  • A cold cerveza (Mexican beer) or a refreshing margarita makes for a perfect drink pairing. For non-alcoholic options, consider limeade or horchata for a traditional touch.

FAQs:

1. Can I use leftover steak for quesadillas?

Absolutely! Leftover steak is an excellent option for quesadillas. Slice it thinly and reheat it gently to avoid drying it out. The flavors of seasoned steak often enhance after sitting, making it even tastier the next day.

2. What cheese pairs best with steak quesadillas?

Cheese options like Monterey Jack, cheddar, and Oaxaca cheese melt beautifully and complement the savory flavors of steak. Feel free to mix cheeses for added flavor and texture.

3. Should I season steak before or after cooking?

Seasoning the steak before cooking is recommended. A good rub or marinade ensures the flavors penetrate the meat and enhance the overall taste. Salt, pepper, and your preferred spices work well as a simple seasoning base.

4. What tortillas work best for steak quesadillas?

Both flour and corn tortillas are excellent choices. Flour tortillas are softer and easier to fold, while corn tortillas bring a traditional, slightly earthy flavor. Choose based on your preference.

5. How do I avoid soggy quesadillas?

To prevent sogginess, ensure that the skillet or grill is preheated to medium heat before adding the quesadilla. Cooking at the right temperature crisps the tortilla without over-melting the cheese or creating excess moisture.

6. Can I freeze steak quesadillas?

Yes, steak quesadillas freeze well! Assemble the quesadillas without cooking them, wrap them tightly in plastic wrap, and place them in a freezer-safe bag. When ready to eat, cook them directly from frozen in a skillet for the best results.

Conclusion:

Steak quesadillas are a crowd-pleasing dish that balances bold flavors and satisfying textures. From skirt steak to ribeye and flank steak, each cut offers unique benefits, ensuring there’s an option for every taste and budget. With tips on marinades, cooking methods, and complementary ingredients, you’re now equipped to create delicious steak quesadillas at home.

Don’t hesitate to experiment with flavors and side pairings to personalize your quesadillas. Whether you’re making them for a quick snack or a family dinner, the perfect steak quesadilla is always within reach. Grab your favorite cut of steak, fire up the skillet or grill, and enjoy this culinary delight today!

Quesadilla falling apart while flipping on a pan.

The Ultimate Steak Quesadilla Recipe: Tips, Tricks, and Delicious Variations

Looking for the ultimate steak quesadilla recipe to elevate your cooking game? You’re in for a treat! This guide will teach you how to make a steak quesadilla that’s crispy, cheesy, and bursting with flavor. Whether you’re hosting a party or preparing a quick weeknight meal, this recipe is sure to impress. Quesadillas are loved by everyone, but a steak quesadilla recipe takes this classic dish to the next level. With perfectly cooked steak, gooey melted cheese, and a golden tortilla, it’s comfort food at its finest. Ready to dive into the world of cheesy deliciousness? Let’s get started! 😋

Introduction:

If you’ve never tried a steak quesadilla recipe, you’re missing out! This Mexican-inspired dish is simple to make, but it delivers big on flavor. The combination of juicy steak, melted cheese, and a crispy tortilla is what makes it irresistible.

Golden steak quesadilla on a skillet with cheese oozing out, served with guacamole and salsa.

Why are steak quesadilla recipes such a hit? It’s all about versatility and simplicity. You can customize them with your favorite ingredients, from spicy jalapeños to fresh cilantro. Plus, they’re perfect for any occasion, whether it’s a casual snack or a full-blown dinner. A steak quesadilla recipe is more than just food—it’s an experience that brings people together.

“Steak quesadillas are like a warm hug on a plate—simple yet satisfying every single time.”

Ingredients for the Perfect Steak Quesadilla:

Fresh ingredients for steak quesadilla on a wooden board.

To master the ultimate steak quesadilla recipe, you need to start with quality ingredients. Each component plays a crucial role in creating a dish that’s bursting with flavor.

Choosing the Best Steak for Quesadillas

The foundation of any great steak quesadilla recipe is, of course, the steak. Opt for cuts like sirloin, flank steak, or ribeye for the best results. These cuts are tender, flavorful, and easy to cook to perfection.

Essential Cheese Options for Maximum Flavor

Cheese is what makes quesadillas gooey and delicious. Opt for cheeses that melt beautifully, like Monterey Jack, cheddar, or even a Mexican blend. Feeling adventurous? Try adding a little crumbled feta or blue cheese for an unexpected twist.

Must-Have Seasonings and Add-Ons

Here’s where you can get creative. Add a sprinkle of paprika, chili powder, or garlic powder to your steak for extra zing. Love spice? Throw in some sliced jalapeños or a drizzle of hot sauce. For a touch of freshness, diced onions, tomatoes, and cilantro work wonders.

Step-by-Step Guide to Making a Steak Quesadilla:

Now that you’ve gathered all your ingredients, it’s time to bring everything together. Follow these steps, and you’ll have a steak quesadilla that’s golden, crispy, and absolutely irresistible.

Preparing the Steak: Marination and Cooking Tips

Steak is the heart of this recipe, so let’s make it shine. Start by marinating your steak to boost its flavor and tenderness. Here’s a simple marinade recipe:

  • Ingredients for Marinade:
  • 2 tablespoons olive oil
  • Juice of 1 lime
  • 2 teaspoons garlic powder
  • 1 teaspoon chili powder
  • Salt and pepper to taste
  1. Mix all the marinade ingredients in a bowl.
  2. Coat the steak thoroughly with the mixture, cover it, and let it sit in the fridge for at least 30 minutes. (The longer, the better!)
  3. When ready to cook, heat a skillet or grill pan over medium-high heat. Add a splash of oil and cook the steak for 3-5 minutes per side, depending on your preferred doneness.
  4. Let the steak rest for a few minutes before slicing it into thin strips or bite-sized pieces.

“Resting the steak after cooking is like letting it take a breather—it locks in all those amazing juices!”

Assembling Your Quesadilla: Layering for Perfection

Here’s where the magic happens. Grab your tortillas and start layering like a pro:

  1. Place a tortilla on a flat surface or a skillet.
  2. Sprinkle a generous layer of cheese on one half of the tortilla. This will act as the glue that holds everything together.
  3. Add a layer of your cooked steak strips.
  4. Toss in any extras you love—sautéed onions, jalapeños, or even a handful of fresh cilantro.
  5. Top it off with another layer of cheese before folding the tortilla in half.

Cooking Techniques: Pan, Griddle, or Oven?

You’ve got options here, and each method has its perks.

  • Using a Skillet or Griddle: Heat a non-stick skillet or griddle over medium heat. Cook the quesadilla for about 2-3 minutes on each side until the tortilla turns golden brown and crispy.
  • In the Oven: Preheat your oven to 375°F (190°C). Place the quesadilla on a baking sheet and bake for about 8-10 minutes, flipping halfway through.
  • On the Grill: If you’re feeling adventurous, grill the quesadilla for a smoky, charred flavor.

Whichever method you choose, make sure the cheese is fully melted and the tortilla has that perfect crunch.

Common Problems and Solutions for Steak Quesadillas:

Quesadilla falling apart while flipping on a pan.

Even the best recipes come with challenges, but don’t worry—I’ve got your back! Here are some common quesadilla problems and how to fix them.

Why Does My Quesadilla Fall Apart? Fix It Fast

Ever tried flipping a quesadilla only to have it break apart? This happens when it’s overstuffed or not folded properly.

Solution:

  • Don’t overfill your quesadilla. Less is more! Aim for an even layer of ingredients without overcrowding.
  • Use a spatula to press down gently as it cooks. This helps the cheese bind everything together.

How to Avoid Soggy or Undercooked Tortillas

Nobody likes a soggy quesadilla, right? This issue usually comes from using low heat or not preheating the pan.

Solution:

  • Cook on medium-high heat to ensure the tortilla gets crispy and golden.
  • Avoid using too much oil—it can make the tortilla greasy.

Troubleshooting Uneven Cheese Melting

If the cheese isn’t melting evenly, it’s likely because the heat isn’t distributed properly.

Solution:

  • Shred your cheese finely. The smaller pieces melt faster and more evenly.
  • Cover the pan with a lid for a minute or two to trap heat and encourage melting.

Delicious Variations of Steak Quesadillas:

Feeling creative? Steak quesadillas are a fantastic base for experimenting with different flavors. Here are some mouthwatering variations to try:

Spicy Jalapeño and Steak Quesadilla

Add sliced jalapeños, a dash of hot sauce, and some pepper jack cheese for a quesadilla with a fiery kick.

Mushroom and Steak Fusion Quesadilla

Sauté mushrooms with garlic and butter, then layer them with steak and mozzarella for a rich, savory twist.

Low-Carb Steak Quesadilla for Health Enthusiasts

Swap the traditional tortilla for a low-carb option like a spinach or almond-flour wrap. You’ll still get all the flavors without the extra carbs.

Pairing Ideas: What Goes Well with Steak Quesadillas?

Every great quesadilla deserves a sidekick. Here are some pairing ideas to complete your meal:

Classic Dips: Guacamole, Salsa, and Sour Cream

No quesadilla is complete without a dip. Whip up some fresh guacamole, spicy salsa, or creamy sour cream for dunking.

Refreshing Drinks to Complement the Flavors

Pair your quesadilla with a chilled margarita, a fruity sangria, or even a simple iced tea. The flavors will complement each other beautifully.

Making Steak Quesadillas Ahead of Time:

One of the best things about steak quesadillas is their flexibility. You can easily make them ahead of time and enjoy them whenever the craving strikes. Here’s how to store and reheat them like a pro.

Tips for Enhancing Your Steak Quesadilla

Planning a party or meal prep for the week? Quesadillas are a lifesaver. Here’s what to do:

  1. Selecting the Steak: Discover the secrets behind selecting the perfect steak by exploring What Kind of Steak Does Chipotle Use for Carne Asada?.
  2. Perfect Seasoning: Get inspired by this Chipotle Steak Recipe for achieving a flavor-packed steak every time.
  3. Alternative Fillings: For a creative twist, learn about Chopped Steak and see how it could inspire new quesadilla combinations.

“Reheating quesadillas in a skillet brings back the crunch, like magic!”

How to Freeze Steak Quesadillas for Later Use

Want to make a big batch? Freezing quesadillas is a fantastic option:

  1. Assemble and cook the quesadillas as usual.
  2. Let them cool completely, then wrap each one individually in plastic wrap or aluminum foil.
  3. Place the wrapped quesadillas in a freezer-safe bag. They’ll stay fresh for up to 2 months.
  4. When ready to eat, reheat directly from frozen in a skillet, oven, or air fryer. No thawing needed!

FAQs About Steak Quesadilla Recipes:

Got questions? Here are some of the most common ones people ask about steak quesadillas.

Can I Use Leftover Steak for Quesadillas?

Absolutely! Leftover steak works beautifully in quesadillas. Just slice it thin and warm it up before adding it to the tortilla. It’s a great way to breathe new life into yesterday’s dinner.

What Are the Best Gluten-Free Alternatives?

If you’re avoiding gluten, no worries. Swap regular tortillas for gluten-free ones made from almond flour, corn, or even cauliflower. The result is just as delicious!

H3: Is It Possible to Make a Vegan Steak Quesadilla?

Yes, it is! Use plant-based steak alternatives and dairy-free cheese. Brands like Beyond Meat and Daiya are excellent options for replicating the flavors and textures.

Conclusion: Perfect Your Steak Quesadilla Skills Today

And there you have it—the ultimate guide to making steak quesadillas! Whether you’re whipping up a quick snack, preparing for a party, or experimenting with new flavors, this recipe has you covered. Remember, the key is to start with quality ingredients, take your time with the layering, and cook it to golden perfection.

So, grab your skillet and get ready to impress your family and friends with the best steak quesadillas they’ve ever tasted. Trust me, once you master this recipe, it’ll become a staple in your kitchen. Happy cooking! 🎉

Simmering pot of oxtail stew seasoned to perfection with spices.

What Is Oxtail Seasoning? An Ultimate Guide

Rich oxtail stew garnished with thyme and surrounded by seasoning spices.

Oxtail seasoning is like the secret sauce behind those melt-in-your-mouth oxtail dishes you’ve either heard of or can’t get enough of. But wait, what exactly is it? Essentially, it’s a blend of spices and herbs that bring out the rich, hearty flavors of oxtail, a cut of meat that’s all about comfort and indulgence. Whether you’re a pro in the kitchen or a newbie, understanding this seasoning can be a game-changer.

Introduction:

Oxtail seasoning isn’t just about throwing a few spices together. It’s an art form, a dance of flavors that transforms a humble cut of meat into a culinary masterpiece. The seasoning has its roots in Caribbean, African, and even some European cuisines, where oxtail has long been a staple. But let’s be real—without the right seasoning, oxtail can fall flat. Think of it as the paintbrush to your canvas, the fuel to your fire. You get the idea. 😉

What Is Oxtail?

Before diving into the seasoning, let’s talk about the star of the show: oxtail. Originally, it came from—you guessed it—oxen. Today, it’s more commonly from cattle. This gelatin-rich, bony cut is perfect for slow cooking. It’s not just about the meat; the bones bring out a depth of flavor that’s unparalleled. If you’ve never tried it, imagine the most tender, flavorful beef stew you’ve ever had, and then double that.

The Importance of Seasoning in Oxtail Recipes

Seasoning is to oxtail what a good script is to a blockbuster movie—it makes or breaks the experience. Oxtail has a bold, beefy flavor, but it needs seasoning to shine. Without it, the dish can feel one-dimensional. The right blend doesn’t just enhance the natural taste; it adds layers of complexity. Sweet, spicy, savory, earthy—good oxtail seasoning hits all the notes. And let’s not forget the aroma. One whiff, and you’ll be hooked!

“Seasoning isn’t just a step in the recipe—it’s the soul of the dish.” 🌟

The Key Ingredients of Oxtail Seasoning:

Key spices for oxtail seasoning on a wooden board with mortar and pestle.

Now, let’s break down the magic. What exactly goes into oxtail seasoning? While recipes vary by region and personal taste, there are some core ingredients you’ll find in almost every blend.

Common Spices and Herbs Used in Oxtail Seasoning

  1. Allspice: Known as the “king of Caribbean spices,” allspice adds a warm, slightly sweet kick.
  2. Garlic Powder: Because who doesn’t love garlic? It’s a flavor booster.
  3. Onion Powder: Adds depth and a subtle sweetness.
  4. Paprika: For a hint of smokiness and color.
  5. Thyme: Earthy and aromatic, thyme is a must.
  6. Scotch Bonnet Peppers: Want heat? This is your go-to. 🌶️
  7. Salt and Pepper: The basics that tie it all together.

Traditional vs. Modern Oxtail Seasoning Ingredients

Traditional blends stick to the basics: allspice, thyme, and a touch of heat. But modern versions? They’ve got a little more flair. You’ll find ingredients like soy sauce, ginger, and even nutmeg making an appearance. It’s all about experimenting and finding what works for you. Traditional or modern, the goal is the same: to enhance the natural richness of oxtail.

“Oxtail seasoning is like jazz—it thrives on improvisation.” 🎷

Regional Variations in Oxtail Seasoning

One of the coolest things about oxtail seasoning is how it changes based on where you are. In the Caribbean, it’s all about bold flavors—think jerk spices with a kick. In African cuisines, you’ll find earthy, smoky notes often paired with tomatoes and onions. European versions might lean more toward wine-based stews with subtle seasoning. It’s a global flavor fest!

How to Make Oxtail Seasoning at Home:

Blending spices for homemade oxtail seasoning in a mortar and pestle.

Ready to try your hand at creating your own blend? Making oxtail seasoning at home is easier than you think. Plus, it gives you control over the flavors.

Step-by-Step Guide to Blending Your Own Oxtail Seasoning

  1. Gather Your Ingredients: Start with allspice, thyme, garlic powder, onion powder, paprika, salt, and pepper. Add optional extras like nutmeg or ginger for a twist.
  2. Mix and Match: Adjust quantities based on your taste. Like it spicy? Add more Scotch bonnet or cayenne.
  3. Grind It Up: Use a spice grinder or mortar and pestle for a fine blend.
  4. Store It Right: Keep it in an airtight container to preserve freshness.

Tips for Storing Homemade Seasoning Blends

  • Cool and Dry: Heat and humidity are your enemies here. Store your blend in a cool, dry place.
  • Label It: Trust me, you don’t want to mix up your oxtail seasoning with cinnamon sugar! 😅
  • Use It Fresh: Seasonings are best within six months for maximum flavor.

Common Mistakes to Avoid When Seasoning Oxtail:

Even the best cooks make mistakes. Here are some pitfalls to avoid when working with oxtail seasoning.

Over-Seasoning or Under-Seasoning

Too much seasoning can overpower the dish, while too little leaves it bland. The key? Taste as you go and balance your flavors.

Using Incorrect Proportions of Ingredients

Some spices are strong—looking at you, allspice! Use them sparingly and in balance with other ingredients.

Benefits of Using Oxtail Seasoning in Your Dishes:

Using oxtail seasoning is like unlocking the full potential of your cooking. It’s more than just flavor—it’s about enhancing every aspect of the dish. Let’s break down why this seasoning is a kitchen essential.

Enhancing Flavor and Aroma

Oxtail seasoning is a symphony of flavors. Imagine your kitchen filled with the enticing aroma of garlic, thyme, and paprika. It doesn’t just make the dish smell heavenly; it also creates a depth of flavor that brings out the best in oxtail’s natural richness. Without it, the dish might feel incomplete, like a story missing its final chapter.

“The right seasoning doesn’t just flavor the dish—it tells a story of tradition and taste.” 🌿

Improving Nutritional Value

Did you know some of the spices in oxtail seasoning come with health benefits? Take allspice, for example—it’s packed with antioxidants. Garlic and onion powders? Great for boosting immunity. And let’s not forget thyme, which is known for its anti-inflammatory properties. Adding oxtail seasoning isn’t just about taste; it’s also a subtle way to make your meal a little healthier.

Oxtail seasoning isn’t just for oxtail stew. Its versatility means you can use it in a variety of dishes. Let’s look at some of the classics and how seasoning takes them to the next level.

Traditional Caribbean Oxtail Stew

Simmering pot of oxtail stew seasoned to perfection with spices.

Ah, the Caribbean classic! This dish is a staple in Jamaican households, and the seasoning blend is what makes it unforgettable. The spices are slow-cooked with the oxtail, creating a tender, flavorful dish that’s both comforting and indulgent. Add some rice and peas on the side, and you’re golden.

African Oxtail Soups and Curries

In many African cuisines, oxtail is used in hearty soups and curries. The seasoning here leans toward earthy flavors with a touch of heat. Tomatoes, onions, and spices like cumin and coriander are often added, creating a dish that’s as rich in flavor as it is in tradition.

Fusion Dishes with Oxtail Seasoning

Who says you have to stick to tradition? Oxtail seasoning is finding its way into fusion dishes like oxtail tacos and even pasta. The bold spices complement a variety of cuisines, proving that this seasoning is as versatile as it is delicious.

“Fusion cooking is like jazz—improvisation turns good dishes into masterpieces.” 🎶

Store-Bought vs. Homemade Oxtail Seasoning:

Now, let’s talk about a big debate: store-bought or homemade? Both have their pros and cons, and your choice might depend on your cooking style.

Pros and Cons of Pre-Made Seasoning Blends

Pros:

  • Convenience: Ready to use, no measuring required.
  • Consistency: Each batch tastes the same.

Cons:

  • Less Customization: You can’t tweak the flavors.
  • Additives: Some blends include preservatives or fillers.

Selecting the Best Store-Bought Option

If you’re going the store-bought route, read the labels carefully. Look for blends with natural ingredients and minimal additives. Brands with good reviews or that cater to Caribbean or African cuisines are usually a safe bet.

Frequently Asked Questions About Oxtail Seasoning:

When it comes to oxtail seasoning, people often have a lot of questions. Here are some of the most common ones, answered.

Can Oxtail spice mix Be Used on Other Meats?

Absolutely! Oxtail spice mix works wonders on beef, chicken, lamb, and even tofu. The rich blend of spices complements a variety of proteins, so don’t be afraid to get creative.

How to Adjust Spice Levels in Oxtail Seasoning?

If you’re not a fan of too much heat, cut back on the Scotch bonnet peppers or cayenne. Want more spice? Add them back in. The beauty of Oxtail spice mix is that it’s completely customizable.

Common Mistakes to Avoid When Oxtail spice mix:

Even the most seasoned (pun intended 😄) cooks can make a few missteps when working with Oxtail spice mix. Let’s tackle some of the most common mistakes and how to fix them.

Over-Seasoning or Under-Seasoning

Finding the perfect balance is key. Too much seasoning can overpower the natural flavors of oxtail, while too little leaves the dish tasting bland. The trick? Start small and taste as you go. Remember, you can always add more, but you can’t take it out once it’s in.

Using Incorrect Proportions of Ingredients

Every spice in oxtail seasoning has a unique role to play. Adding too much of a strong spice like allspice can dominate the dish, while skimping on others like thyme can leave it lacking depth. A balanced mix is your best bet—don’t let one spice hog the spotlight!

Solutions to Common Oxtail Seasoning Problems:

Cooking isn’t just about following a recipe—it’s about adapting and learning. Here are some quick fixes for when things go wrong.

How to Fix an Over-Seasoned Dish

Oops, went heavy on the spices? Don’t worry—it happens to the best of us. Try these solutions:

  • Dilute It: Add more liquid like broth or water to tone down the intensity.
  • Balance It Out: If it’s too salty, a pinch of sugar can help. Too spicy? Add a dollop of yogurt or cream.

Dealing with Blandness

If your dish tastes flat, it might need a flavor boost. Sprinkle in more seasoning, focusing on bold flavors like garlic powder or Scotch bonnet peppers. Just don’t go overboard—taste after each addition.

“Cooking is like life—mistakes are just opportunities to get creative.” 🍳

Conclusion: Mastering the Art of Oxtail Seasoning:

So, what have we learned? Oxtail seasoning is more than just a blend of spices; it’s a passport to rich, hearty flavors that can elevate any dish. Whether you’re simmering a traditional Caribbean stew or experimenting with fusion recipes, the right seasoning makes all the difference.

The beauty of oxtail seasoning lies in its versatility. You can go traditional, modern, or even create your own unique blend. And don’t stress over mistakes—they’re part of the journey. The key is to have fun, trust your taste buds, and let the spices guide you.

“Cooking with oxtail seasoning is an adventure—one that takes you from the heart of the Caribbean to the corners of your own creativity.” 🌍

Ready to Take the Leap?

If you haven’t tried making oxtail yet, now’s the time! Gather your ingredients, whip up a seasoning blend, and let your kitchen fill with the tantalizing aroma of thyme, garlic, and allspice. Trust me, your taste buds will thank you.

Oh, and don’t forget to share your creations! Whether you nail it on the first try or tweak it along the way, you’re building a culinary skill that’s as satisfying as the dish itself. Happy cooking! 🍖✨

A steaming bowl of oxtail soup with carrots, potatoes, and parsley served on a rustic table.

Does Oxtail Taste Like Short Ribs?

Introduction:

Raw oxtail and short ribs on a wooden cutting board with herbs.

Does oxtail taste like short ribs? This is a question that often comes up among food enthusiasts and chefs alike. Both cuts of meat are known for their deep, beefy flavors and suitability for slow cooking, but are they truly interchangeable? While they share some similarities, oxtail and short ribs have unique characteristics that make each one special.

In this article, we will explore the flavor, texture, and cooking methods of both cuts to answer the pressing question: Does oxtail taste like short ribs? By the end, you’ll understand the key differences and when to choose each for your recipes.

What is Oxtail?

A steaming bowl of oxtail soup with carrots, potatoes, and parsley served on a rustic table.

Definition and Origin

Oxtail is the tail of a cow, a flavorful cut that’s celebrated for its high collagen content. This cut was traditionally used in “nose-to-tail” cooking practices. But does oxtail taste like short ribs? Not quite, as oxtail has a more gelatinous texture and a deeper richness that sets it apart.

Flavor Profile of Oxtail

If you’re wondering, “Does oxtail taste like short ribs?” the answer lies in their flavor profiles. Oxtail has an earthy, intensely beefy flavor, enhanced by its marrow-filled bones. Slow cooking unlocks its full potential, creating dishes with a silky texture and robust taste.

Cooking Methods for Oxtail

Oxtail shines in slow-cooked recipes that allow its collagen to melt and infuse the dish. Popular cooking methods include:

  • Braising: Often paired with aromatic vegetables, herbs, and wine.
  • Stewing: A common approach in Caribbean and Asian cuisines.
  • Soups and Stocks: The bones in oxtail add depth to broths and soups.

What are Short Ribs?

Braised short ribs with mashed potatoes and green beans

Definition and Types

Short ribs are cut from the lower ribcage of a cow and come in two main styles: English-cut and flanken-cut. Does oxtail taste like short ribs? Not exactly, as short ribs are meatier and have a firmer texture.

Flavor Profile of Short Ribs

Short ribs offer a rich, beefy taste with a touch of sweetness due to their high-fat content. When cooked properly, they become juicy, tender, and slightly smoky if grilled or seared. The flavor is hearty and satisfying, complementing bold spices and sauces.

Cooking Methods for Short Ribs

Short ribs can be prepared using a variety of techniques, including:

  • Braising: A classic method that enhances the meat’s tenderness and flavor.
  • Grilling: Common in Korean cuisine, where they are marinated and quickly seared.
  • Smoking: Imparts a bold, smoky flavor, popular in barbecue recipes.

Comparing Oxtail and Short Ribs:

Texture Differences

One of the primary distinctions between oxtail and short ribs lies in their texture. Oxtail is exceptionally gelatinous due to its high collagen content, which breaks down during cooking to create a silky, almost buttery texture. This makes oxtail ideal for soups and stews, as it adds a rich, luxurious mouthfeel to the dish.

Short ribs, on the other hand, are meatier and less gelatinous than oxtail. While they also contain a good amount of collagen, their texture is firmer, with a more traditional “beefy” bite. When slow-cooked, short ribs become tender and pull apart easily, offering a hearty texture that stands up well to bold flavors and sauces.

Flavor Similarities

Both oxtail and short ribs boast a deep, beef-forward flavor, but they are not identical. Oxtail has a slightly more pronounced richness due to its marrow and connective tissues, which dissolve during cooking. The result is a complex taste that enhances dishes like oxtail soup or braised oxtail.

Short ribs, with their higher fat content, have a slightly sweeter, buttery flavor. When prepared with caramelizing techniques like grilling or roasting, they develop a savory crust that complements their tender interior. Both cuts benefit from slow cooking to draw out their full depth of flavor.

Cooking Styles

While both cuts are often prepared using similar slow-cooking techniques, there are subtle differences in their preparation:

  • Oxtail: Typically used in recipes where its gelatinous texture is a key component, such as Caribbean-style stews or Korean soups. Oxtail is less commonly grilled or roasted due to its structure and high connective tissue content.
  • Short Ribs: More versatile in terms of cooking styles, short ribs can be braised, grilled (as in Korean galbi), or smoked in a barbecue setting. They are often paired with robust marinades or glazes to enhance their flavor.

Nutritional Comparison:

Protein and Fat Content

Oxtail and short ribs are both excellent sources of protein, though their fat content varies. Oxtail contains a higher percentage of connective tissue and less lean meat compared to short ribs, which results in a slightly lower protein yield per serving. However, the gelatin in oxtail offers additional benefits for joint and skin health.

Short ribs, being meatier, have a higher proportion of fat and lean meat, making them more calorie-dense than oxtail. Their marbling contributes to their rich flavor but also increases their fat content, which can be a consideration for those monitoring their dietary fat intake.

Vitamins and Minerals

Both oxtail and short ribs are rich in essential nutrients such as iron, zinc, and B vitamins. Oxtail, with its bone content, also provides a significant amount of calcium and phosphorus, which are beneficial for bone health. The collagen in oxtail can support skin elasticity and joint function, making it a popular choice for those seeking these specific health benefits.

Culinary Versatility:

Oxtail in Global Cuisines

Oxtail features prominently in a variety of cuisines, where it is often the star ingredient in rich, flavorful dishes. Some notable examples include:

  • Caribbean Cuisine: Oxtail stew is a staple, featuring slow-cooked oxtail with spices, beans, and vegetables.
  • Korean Cuisine: Used in soups like gomtang, which is prized for its nourishing qualities.
  • European Cuisine: Often braised in red wine with root vegetables for a classic French preparation.

Short Ribs in Global Cuisines

Short ribs are equally versatile and are a favorite in numerous global dishes, such as:

  • Korean Cuisine: Flanken-cut short ribs (galbi) are marinated in a sweet and savory sauce before grilling.
  • American Cuisine: Braised short ribs are a popular comfort food, often served with mashed potatoes or polenta.
  • Mexican Cuisine: Short ribs are sometimes used in barbacoa-style preparations, cooked slowly until tender and flavorful.

Tips for Choosing Between Oxtail and Short Ribs:

When to Use Oxtail

Oxtail is the ideal choice when you’re aiming to create dishes with a rich, silky texture and deep flavor. It shines in recipes where long, slow cooking can break down its connective tissues, making it perfect for:

  • Soups and Stews: Oxtail’s gelatin transforms broths into luscious, velvety bases.
  • Traditional Comfort Foods: Dishes like Jamaican oxtail stew or Korean gomtang.
  • Bone-Based Stocks: Oxtail is a go-to for nutrient-rich, flavorful stocks.

If you’re planning to make a meal that emphasizes the richness of a dish rather than large portions of meat, oxtail is the better choice.

When to Use Short Ribs

Short ribs are a versatile option that works well in dishes requiring hearty, meat-focused ingredients. Opt for short ribs when preparing:

  • Braised Dishes: They hold their shape and soak up the flavors of sauces and marinades.
  • Grilled or Smoked Recipes: Perfect for BBQs, especially with a flavorful rub or marinade.
  • Comfort Meals: Like braised short ribs served with sides such as mashed potatoes or roasted vegetables.

If you’re looking for a meatier and more versatile cut, short ribs are an excellent choice.

Frequently Asked Questions (FAQs):

Does oxtail taste gamey?

No, oxtail does not taste gamey. Its flavor is deeply beefy and robust, with a slight earthiness due to its high collagen and bone content. When cooked properly, it develops a rich, savory taste that enhances soups, stews, and braised dishes.

Are oxtail and short ribs interchangeable in recipes?

While oxtail and short ribs can be substituted in some recipes, it’s essential to consider the texture and flavor differences. Oxtail is more gelatinous and best suited for dishes where its unique texture can shine. Short ribs, being meatier, work better in recipes that require more substantial, fork-tender pieces of meat.

Is oxtail more expensive than short ribs?

The cost of oxtail versus short ribs can vary based on availability and regional demand. Oxtail is often more expensive per pound due to its smaller size and labor-intensive preparation. Short ribs, being more abundant, are generally more affordable in some markets but can still command a premium price, especially for high-quality cuts.

Which is more tender: oxtail or short ribs?

Both oxtail and short ribs become tender when cooked slowly, but their textures differ. Oxtail has a softer, almost melt-in-your-mouth quality due to its high collagen content. Short ribs are tender yet retain a slightly firmer, meatier bite, making them distinct in texture.

Are there vegetarian substitutes for oxtail and short ribs?

Yes, there are vegetarian substitutes that mimic the rich flavor and texture of these meats. For oxtail, mushrooms, jackfruit, or plant-based gelatin can replicate the richness and silkiness. For short ribs, seitan or tempeh, combined with bold marinades, can offer a hearty alternative.

What’s the best way to cook oxtail and short ribs?

The best way to cook oxtail is through slow braising or stewing to allow the collagen to break down and enrich the dish. Short ribs are also well-suited to braising but can be grilled or smoked for a slightly different texture and flavor profile.

Conclusion:

Oxtail and short ribs are both exceptional cuts of beef that offer unique textures and flavors, making them cherished ingredients in cuisines around the world. While they share similarities, such as their suitability for slow cooking and their deep, beefy taste, they also have distinct characteristics. Oxtail is renowned for its rich, gelatinous quality that enhances soups and stews, while short ribs are prized for their meaty texture and versatility in various cooking styles.

Choosing between oxtail and short ribs ultimately depends on the dish you want to create. If you’re aiming for a silky, luxurious broth or stew, oxtail is the way to go. For hearty, meat-focused meals with bold flavors, short ribs are an excellent choice. By understanding their differences, you can elevate your cooking and create dishes that showcase the best of these flavorful cuts.

A dish of braised oxtails and short ribs in rich sauce garnished with parsley.

Can Oxtails and Short Ribs Be Cooked Together? A Complete Guide

Introduction:

A dish of braised oxtails and short ribs in rich sauce garnished with parsley.

Cooking is all about exploration, right? When it comes to combining unique ingredients, a common question arises: can oxtails and short ribs be cooked together? The answer is a resounding yes! Both cuts of meat are packed with flavor, and when cooked correctly, they create a rich, hearty dish. This guide will walk you through the steps of combining these two beloved ingredients for a show-stopping meal.

Why Combine Oxtails and Short Ribs?

Ever heard of “the more, the merrier”? This phrase rings true when it comes to oxtails and short ribs. Both cuts are packed with bold flavors, and when you cook them together, they complement each other in the most delightful way. Oxtails bring a deep, gelatinous richness, while short ribs add a tender, beefy goodness. It’s like a duet where both singers hit all the right notes. 🎵

The Unique Flavors of Oxtails and Short Ribs

Oxtails and short ribs each have distinct personalities. Oxtails offer a melt-in-your-mouth texture with a slight chewiness, thanks to their high collagen content. On the other hand, short ribs are all about tenderness and a classic beefy flavor that pairs beautifully with robust seasonings. When these two come together, you’re in for a dish that’s rich, hearty, and utterly comforting.

“Combining oxtails and short ribs is like pairing a fine wine with a gourmet meal—they bring out the best in each other!”

Understanding Oxtails and Short Ribs:

Raw oxtails and short ribs on a butcher’s board with fresh herbs.

Before we jump into the nitty-gritty of cooking these two cuts together, let’s take a moment to understand what makes them special.

What Are Oxtails?

Oxtails, as the name suggests, come from the tail of the cow. Don’t let their humble origin fool you—they’re a delicacy in many cuisines worldwide. Packed with bones, cartilage, and connective tissue, oxtails are a flavor powerhouse. When slow-cooked, they release gelatin, which gives dishes a luxurious, velvety texture. If you love rich, hearty meals, oxtails are your best friend.

What Are Short Ribs?

Short ribs come from the lower part of the cow’s ribcage and are known for their marbled fat and juicy meat. They’re versatile, making their way into dishes like Korean BBQ, hearty stews, and braised delicacies. Short ribs are prized for their ability to absorb flavors and retain their tender, juicy texture when cooked low and slow.

Differences and Similarities Between Oxtails and Short Ribs

So, how are these two different? While oxtails are gelatin-rich and come from the tail, short ribs are meatier and come from the ribs. But here’s the kicker—they both require slow cooking to unlock their full potential, and their flavors blend beautifully when paired together.

“Think of oxtails and short ribs as cousins at a family reunion—different but connected in all the right ways.”

Can They Be Cooked Together?

Can oxtails and short ribs be cooked together? Absolutely! While they have different textures and cooking times, with the right approach, you can create a dish that highlights the best of both worlds. The gelatin from the oxtails enriches the sauce, while the short ribs add tender, meaty bites. To ensure success, understanding how to balance their flavors and cooking times is key.

Compatibility of Cooking Times

One of the first challenges is their cooking times. Oxtails, with their tough connective tissue, often take longer to tenderize. Short ribs, being meatier, usually cook a bit faster. The solution? Cook them together at a low temperature but keep an eye on the short ribs so they don’t overcook. Alternatively, start the oxtails earlier and add the short ribs later.

Balancing Flavors

Balancing the bold flavors of oxtails and short ribs is key. Since both cuts are rich, you’ll want to use herbs, spices, and acidic ingredients like tomatoes or vinegar to brighten the dish. Trust me, your taste buds will thank you. 🥰

How Cooking Together Enhances the Dish

When oxtails and short ribs simmer together, the result is pure magic. The gelatin from the oxtails enriches the broth, while the meatiness of the short ribs adds depth. The flavors meld beautifully, creating a dish that’s hearty, satisfying, and unforgettable.

Most Common Problems When Cooking Oxtails and Short Ribs Together:

Cooking oxtails and short ribs together can be a match made in culinary heaven, but it’s not without its challenges. Let’s tackle the common issues you might face and how to overcome them.

Overcooking or Undercooking One Protein

One of the biggest hurdles is ensuring both proteins cook to perfection. Since oxtails need more time to tenderize, short ribs might end up overcooked and fall apart into mush if you’re not careful. Nobody wants that, right?

Flavor Dominance of One Ingredient

Have you ever had a dish where one flavor takes over the whole thing? Oxtails have a strong, gelatinous flavor, while short ribs bring that classic beefiness. If not balanced correctly, one can easily overshadow the other.

Maintaining Texture in Both Ingredients

The textures of these cuts are as important as their flavors. Oxtails are all about that soft, chewy texture, while short ribs should be fork-tender but still hold their shape. Striking that balance is the key to a dish that wows.

“Cooking these two cuts together can feel like juggling fire and water, but when you get it right, it’s absolutely worth it!”

Solutions to Common Problems:

Oxtails and short ribs simmering in a tomato-based broth with vegetables.

Now that we’ve identified the potential pitfalls, let’s solve them like the culinary pros we aspire to be. 💡

Adjusting Cooking Times for Each Cut

Here’s the secret: stagger your cooking times. Start by cooking the oxtails first, giving them a head start. Once they’re halfway tender, toss in the short ribs. This way, both cuts finish cooking at the same time, ensuring maximum flavor and perfect textures.

Tips for Even Flavor Distribution

Want even flavors throughout the dish? Use a well-balanced seasoning mix, including aromatics like garlic, onions, and herbs such as thyme or rosemary. Don’t forget a splash of acidity—tomatoes, red wine, or even a bit of lemon juice can work wonders to tie everything together.

Ensuring a Balanced Texture in the Final Dish

To keep both cuts at their best, don’t overdo the heat. Slow cooking or braising at low temperatures is your best friend here. Whether it’s in a Dutch oven, crockpot, or pressure cooker, a steady, gentle heat allows the proteins to tenderize without falling apart.

Recipe Ideas:

Here are some creative answers to the question, can oxtails and short ribs be cooked together? From stews to tacos, these recipes showcase how beautifully these cuts complement each other.

1.Classic Braised Oxtail and Short Rib Stew
This dish answers the question, “can oxtails and short ribs be cooked together?” with a hearty, comforting stew.

2.Fusion Recipe: Oxtail and Short Rib Tacos
For a modern twist, try cooking oxtails and short ribs together to create a bold and flavorful taco filling.

Classic Braised Oxtail and Short Rib Stew

This hearty stew is comfort food at its finest. Start by browning the oxtails and short ribs to seal in their juices. Then, sauté onions, carrots, and celery for a flavorful base. Add beef broth, red wine, tomatoes, and a mix of herbs. Let it simmer low and slow until everything is tender and the flavors have melded beautifully.

Pro Tip: Serve with crusty bread or creamy mashed potatoes to soak up that luscious sauce. 🍞🥔

Slow-Cooked Oxtail and Short Rib Soup

For a lighter but equally satisfying option, try a slow-cooked soup. Combine oxtails, short ribs, and your favorite veggies—think leeks, turnips, and parsnips. Add bone broth and let the magic happen in a slow cooker for 6-8 hours. The result? A nourishing bowl of goodness perfect for chilly evenings.

“There’s nothing like a bowl of slow-cooked soup to warm your soul and make you feel at home.”

Fusion Recipe: Oxtail and Short Rib Tacos

Who says these cuts can’t be fun and trendy? Shred the tender meat from oxtails and short ribs, then toss it with a spicy BBQ or chipotle sauce. Pile it onto warm tortillas, top with fresh salsa, pickled onions, and a squeeze of lime. You’ve got yourself a taco night to remember! 🌮

Tips for Preparing the Perfect Oxtail and Short Rib Combination:

Cooking isn’t just about following recipes—it’s an art. To truly nail the combination of oxtails and short ribs, you’ll need some insider tips to elevate your dish to the next level. Let’s dive into the prep process.

Selecting the Right Cuts

When shopping for oxtails and short ribs, quality matters. Look for well-marbled short ribs with a good amount of fat—it’s the key to tender, juicy meat. For oxtails, pick pieces that are evenly sized to ensure consistent cooking. Trust me, starting with the best ingredients makes all the difference.

Marinating Techniques

Marinating isn’t just for grilling—it works wonders for slow-cooked dishes, too! Combine olive oil, garlic, soy sauce, and your favorite spices for a simple yet flavorful marinade. Let the oxtails and short ribs soak overnight to infuse them with flavor and tenderize the meat.

Pro Tip: A splash of vinegar or citrus juice in the marinade helps break down tough fibers, ensuring melt-in-your-mouth results. 🍋

Cooking Methods: Stove, Oven, or Pressure Cooker?

Which cooking method should you choose? It depends on your time and equipment:

  • Stovetop Braising: Ideal for a hands-on approach. Simmer on low heat for several hours to achieve rich, deep flavors.
  • Oven Braising: Great for even cooking. After browning the meat, transfer to an oven-safe pot and let it cook slowly in the oven.
  • Pressure Cooker: Perfect for busy days. You’ll achieve tender meat in a fraction of the time. Just be sure to monitor liquid levels to avoid drying out the dish.

“Think of your cooking method as a tool in your flavor arsenal—each one has its strengths, so pick what works for you!”

Serving Suggestions:

Plated oxtails and short ribs with mashed potatoes and wine.

Once your masterpiece is ready, it’s time to plate and serve. Let’s make this dish not just delicious but also visually stunning.

Pairing With Side Dishes

The richness of oxtails and short ribs calls for sides that complement without overpowering. Here are some ideas:

  • Creamy Mashed Potatoes: Perfect for soaking up all that flavorful sauce.
  • Steamed Rice: A classic choice that balances the hearty dish.
  • Roasted Veggies: Carrots, Brussels sprouts, or parsnips add a pop of color and texture.

Pro Tip: Want to go bold? Try pairing with a polenta or buttery grits for a Southern twist.

Ideal Wine and Beverage Pairings

Looking to impress your guests? Pair this dish with a robust red wine like Cabernet Sauvignon or Malbec. Prefer non-alcoholic options? A rich, spiced apple cider or sparkling water with a splash of lime does the trick. 🍷🍹

Presentation Tips for an Appealing Dish

They say you eat with your eyes first, so take a moment to plate your dish beautifully. Arrange the oxtails and short ribs on a large serving platter, drizzle with sauce, and garnish with fresh herbs like parsley or thyme. Simple touches make a big impact.

Conclusion:

Final Thoughts on Cooking Oxtails and Short Ribs Together

Cooking enthusiasts often wonder, can oxtails and short ribs be cooked together? The answer lies in creativity, patience, and technique. Combining these cuts can yield a dish that’s rich in flavor and texture, making it a must-try for anyone who loves hearty meals.

“Cooking is all about experimenting, so don’t be afraid to step out of your comfort zone and try new things!”

Encouragement to Experiment With Recipes and Techniques

Ready to take your cooking skills to the next level? Play around with spices, marinades, and side dishes to make this dish truly your own. Maybe you’ll create a family favorite that gets passed down for generations!

So, what are you waiting for? Grab those oxtails and short ribs, fire up your kitchen, and let your creativity shine. Your next culinary masterpiece is just a pot away. 🎉🍲

Spicy oxtail-seasoned beef short ribs served with garlic fried rice.

Cooking Beef Short Ribs Recipe Seasoned with Oxtail Seasoning

Introduction:

There’s something truly magical about a plate of tender, flavorful beef short ribs. Whether it’s a special occasion or just a comforting weeknight meal, beef short ribs bring richness and decadence to your table. But what if you could take this classic dish to the next level? That’s where oxtail seasoning steps in.

Oxtail seasoning, a flavorful blend of spices, transforms ordinary short ribs into a deeply savory, melt-in-your-mouth experience. The combination of herbs, spices, and a touch of heat creates a robust flavor that complements the rich meatiness of short ribs perfectly.

In this guide, we’ll dive into the step-by-step process of cooking beef short ribs with oxtail seasoning, tackle common cooking problems, explore delicious variations, and share expert tips to ensure your short ribs are nothing short of spectacular. Ready? Let’s dig in! 🍖✨

Why Use Oxtail Seasoning for Beef Short Ribs?

Juicy beef short ribs seasoned with oxtail seasoning, served with mashed potatoes and veggies.
A hearty plate of tender beef short ribs seasoned with oxtail seasoning, paired with mashed potatoes and roasted carrots.

If you’re wondering why you should swap your usual spices for oxtail seasoning, the answer lies in its bold flavor profile.

  • Flavor Depth: Oxtail seasoning combines traditional Caribbean spices like allspice, garlic, and paprika with subtle heat, adding depth to your dish.
  • Versatility: It’s not just for oxtails! This seasoning pairs beautifully with other rich cuts of meat, like short ribs.
  • Balanced Heat: The gentle kick of heat complements the fatty, tender texture of beef short ribs without overpowering the dish.

“Oxtail seasoning is like a symphony in a jar—each spice plays its part to create a dish that sings.” 🎶

Ingredients for the Perfect Beef Short Ribs Recipe:

Fresh beef short ribs, a jar of oxtail seasoning, garlic, onions, and herbs on a kitchen counter.
ssential ingredients for creating a flavorful beef short ribs recipe using oxtail seasoning.

To make this dish a success, start with high-quality ingredients. Let’s break it down:

The Star of the Dish: Beef Short Ribs

  • Bone-in vs. Boneless: Bone-in ribs add extra flavor to your dish, while boneless ribs cook faster and are easier to eat.
  • Marbling Matters: Look for ribs with good marbling, as the fat keeps the meat juicy during cooking.

All About Oxtail Seasoning: A Flavorful Blend

Oxtail seasoning is the heart of this recipe. You can find it pre-made, or you can make your own by mixing:

  • Allspice
  • Paprika
  • Garlic powder
  • Onion powder
  • Black pepper
  • Salt
  • Thyme
  • A pinch of cayenne for heat

This blend infuses the meat with earthy, slightly spicy flavors that highlight the short ribs’ natural richness.

Additional Ingredients for Enhanced Taste

To complement the oxtail seasoning and short ribs, you’ll also need:

  • Olive oil or butter: For browning the ribs.
  • Onions and garlic: These aromatic ingredients add depth to the sauce.
  • Beef broth: The liquid base for braising.
  • Tomato paste: Adds richness and slight acidity to balance the flavors.
  • Red wine (optional): Enhances the complexity of the sauce.

“The magic of this dish lies in how simple ingredients combine to create unforgettable flavors.”

Step-by-Step Guide to Cooking Beef Short Ribs with Oxtail Seasoning:

Spicy oxtail-seasoned beef short ribs served with garlic fried rice.
A bold twist on beef short ribs, seasoned with oxtail seasoning and paired with garlic fried rice.

Let’s get to the fun part—cooking! This step-by-step guide ensures your beef short ribs turn out perfectly every time.

Preparing the Short Ribs for Maximum Flavor

  1. Trim Excess Fat: While some fat is essential for flavor, trimming excess prevents the dish from becoming greasy.
  2. Pat Dry: Use paper towels to pat the ribs dry. This step helps achieve a good sear.
  3. Season Generously: Rub the short ribs with oxtail seasoning, ensuring every inch is coated for maximum flavor.

Marinating the Short Ribs with Oxtail Seasoning

For best results, marinate the ribs for at least 4–6 hours—or overnight if possible.

  • Why Marinate? Marinating allows the spices to penetrate the meat, creating a deeper, more robust flavor.
  • Quick Tip: Add a splash of olive oil or lemon juice to your marinade to help the seasoning adhere and tenderize the meat.

Slow Cooking vs. Braising: Which Method is Best?

When it comes to cooking beef short ribs, both slow cooking and braising are excellent methods. Here’s how to choose:

  • Slow Cooking: Ideal for busy days. Just toss everything into a slow cooker and let it do the work.
  • Braising: Perfect for a hands-on approach. This stovetop-to-oven method allows for rich caramelization.

Braising Instructions:

  1. Sear the Ribs: Heat a large skillet or Dutch oven over medium-high heat. Add olive oil and sear the ribs on all sides until golden brown. This locks in the juices and creates a flavorful crust.
  2. Prepare the Sauce: Remove the ribs and set aside. In the same pan, sauté onions and garlic until softened. Stir in tomato paste and oxtail seasoning.
  3. Deglaze the Pan: Pour in beef broth and optional red wine to scrape up the flavorful browned bits.
  4. Braise in the Oven: Return the ribs to the pot, cover, and bake at 325°F (160°C) for 2.5–3 hours until tender.

“Braising is like giving your short ribs a spa day—low, slow heat tenderizes them to perfection.” 🛁

Tips for Tender and Juicy Short Ribs

  1. Don’t Rush: Short ribs need time to break down and become tender. Plan for at least 2.5–3 hours of cooking time.
  2. Check Liquid Levels: Keep the braising liquid about halfway up the ribs. Add more broth or water if needed.
  3. Let Them Rest: After cooking, let the ribs rest for 10 minutes to redistribute the juices.

Common Problems When Cooking Beef Short Ribs:

Even with the best ingredients and recipe, cooking beef short ribs can come with challenges. Let’s tackle the most common problems and find solutions to ensure your dish is always a hit.

Why Are My Short Ribs Tough? How to Fix Them

One of the biggest complaints when cooking beef short ribs is toughness. This happens when the meat isn’t cooked long enough for the connective tissue to break down.

Causes:

  1. Undercooking: Short ribs are a tough cut and require low, slow cooking to tenderize.
  2. Cooking at Too High a Temperature: High heat can cause the meat to seize up, resulting in a rubbery texture.

Solutions:

  • Cook Low and Slow: Keep your oven at 325°F (160°C) or lower for braising, and let the ribs cook for 2.5–3 hours.
  • Test for Doneness: The meat should fall off the bone or be easily pierced with a fork. If it’s still tough, give it more time.

“When in doubt, cook it out. Tough short ribs are just undercooked short ribs waiting for their moment to shine.”

Avoiding Overly Salty or Bland Short Ribs

Balancing the seasoning is crucial. Sometimes, oxtail seasoning or broth can make the dish overly salty, while under-seasoning leads to bland results.

Causes of Saltiness:

  • Pre-seasoned short ribs combined with a salty broth.
  • Overuse of oxtail seasoning, which often contains salt.

Solutions:

  • Dilute the Sauce: If your dish is too salty, add more unsalted broth, water, or even a splash of cream to balance the flavor.
  • Add a Sweet Element: A touch of brown sugar or honey can counteract excessive saltiness.

For bland short ribs:

  • Add more oxtail seasoning mid-cook. It will infuse into the braising liquid for better flavor.

How to Handle Excess Fat on Short Ribs

Beef short ribs are naturally fatty, which adds flavor but can overwhelm the dish if not handled correctly.

Problems with Excess Fat:

  • Greasy sauce or broth.
  • Heavy, overly rich texture.

Solutions:

  • Trim Before Cooking: Remove excess surface fat before seasoning and cooking.
  • Skim Fat During Cooking: Use a spoon to skim off fat that rises to the surface while the ribs are braising.
  • Refrigerate the Sauce: After cooking, refrigerate the sauce for 30 minutes. The fat will harden on top, making it easy to remove.

“A little fat equals flavor, but too much can sink your dish—balance is key!”

Delicious Variations of the Recipe:

Once you’ve mastered the classic recipe, it’s time to get creative! Here are some mouthwatering variations that highlight oxtail seasoning in unique ways.

Spicy Oxtail-Seasoned Beef Short Ribs 🌶️

If you love a bit of heat, this variation brings bold, spicy flavors to the table.

What You’ll Need:

  • Add extra cayenne pepper or chili flakes to the oxtail seasoning.
  • Include fresh diced jalapeños in the braising liquid.

How to Cook:

  • Follow the original recipe but spice up the sauce with chili-infused oil or a splash of hot sauce.

“This spicy twist will warm your soul and excite your taste buds.”

Asian-Inspired Short Ribs with Oxtail Seasoning 🍜

For a fusion twist, pair the boldness of oxtail seasoning with Asian ingredients.

What You’ll Need:

  • Add soy sauce, sesame oil, and ginger to the braising liquid.
  • Include star anise and green onions for aromatic depth.

How to Cook:

  • Braise as usual but serve the ribs over jasmine rice or ramen noodles. Garnish with sesame seeds and sliced scallions.

“This fusion recipe is where Caribbean spice meets Asian umami—it’s a match made in culinary heaven!”

Low-Sodium Version for Health-Conscious Eaters 🌿

If you’re watching your sodium intake, you can still enjoy this dish by making simple tweaks.

Adjustments:

  • Use a homemade oxtail seasoning blend without added salt.
  • Opt for low-sodium beef broth or replace it with unsalted vegetable stock.
  • Brighten flavors with lemon zest or fresh herbs instead of relying on salt.

Tip: Serve with fresh steamed vegetables or a light salad to keep the meal balanced and healthy.

Pairing Beef Short Ribs with the Perfect Side Dishes:

Beef short ribs with oxtail seasoning served over creamy polenta
Tender beef short ribs with oxtail seasoning served over a rich, buttery polenta

The right side dish can elevate your beef short ribs from delicious to unforgettable. Here are some classic and creative pairing ideas.

Classic Pairings: Mashed Potatoes and Roasted Veggies

  • Mashed Potatoes: Creamy mashed potatoes balance the richness of the short ribs perfectly. Add a touch of garlic or butter for extra flavor.
  • Roasted Vegetables: Carrots, parsnips, and Brussels sprouts roasted with olive oil, salt, and pepper add texture and sweetness.

Unique Sides: Creamy Polenta or Garlic Fried Rice

  • Creamy Polenta: The soft, buttery texture of polenta makes it an ideal base for saucy short ribs. Add a sprinkle of Parmesan for an Italian touch.
  • Garlic Fried Rice: If you want something bold and hearty, garlic fried rice provides a flavorful complement to the ribs’ savory richness.

“The best sides don’t compete with the ribs—they enhance and complement them.”

FAQs About Cooking Beef Short Ribs with Oxtail Seasoning:

Curious minds often have questions about cooking beef short ribs, especially when using oxtail seasoning. Let’s clear up some common queries so you can cook with confidence.

1. Can I Use Oxtail Seasoning for Other Cuts of Meat?

Absolutely! Oxtail seasoning is incredibly versatile and works well with other rich cuts like oxtails, beef stew meat, lamb shanks, or even chicken thighs. Its bold flavor can elevate any dish that requires slow cooking.

2. Should I Brown the Short Ribs Before Cooking?

Yes, searing the ribs before braising or slow cooking is highly recommended. Browning caramelizes the surface of the meat, locking in flavor and giving the dish a rich, complex taste.

3. Can I Make This Recipe in a Slow Cooker?

Definitely! After searing the short ribs, transfer them to a slow cooker along with the braising liquid and aromatics. Cook on low for 6–8 hours or on high for 4–5 hours until the meat is tender.

4. Can I Freeze Cooked Beef Short Ribs?

Yes, beef short ribs freeze beautifully. Store the ribs in an airtight container with their sauce to keep them moist. They’ll stay good in the freezer for up to three months. To reheat, thaw overnight in the fridge and warm gently on the stovetop or in the oven.

5. What’s the Best Way to Reheat Beef Short Ribs?

Reheat short ribs in a covered dish in the oven at 300°F (150°C) for 15–20 minutes. Adding a bit of extra sauce or broth ensures they stay moist and tender.

“Reheating ribs should feel like bringing back a warm hug—not a dry handshake!”

Conclusion: Why This Recipe is a Must-Try

Cooking beef short ribs seasoned with oxtail seasoning is more than just a meal—it’s an experience. From the first savory bite to the melt-in-your-mouth tenderness, this dish offers comfort, flavor, and indulgence all in one.

Here’s why you should try it today:

  • Bold, Unique Flavor: Oxtail seasoning adds complexity and spice to an already rich cut of meat.
  • Versatility: This recipe works for family dinners, special occasions, or even meal prep.
  • Customizable: With countless variations and side options, you can tailor this dish to your tastes.

Whether you’re new to cooking short ribs or a seasoned pro, this recipe delivers stunning results every time. Pair it with creamy mashed potatoes, spicy garlic rice, or even a light salad for a memorable meal.

So, roll up your sleeves, grab your oxtail seasoning, and let the aroma of tender, slow-cooked beef short ribs fill your kitchen. Your family (and your taste buds) will thank you!

“Every dish tells a story. Let this one be a tale of bold flavors, tender textures, and heartwarming satisfaction.” 🍖✨

A golden-brown Italian frittata in a cast iron skillet with vibrant vegetables and melted cheese.

What Is the Italian Version of the Omelette?

Introduction:

Italian cuisine is all about simplicity, fresh ingredients, and timeless flavors. The Italian version of the omelette, the frittata, reflects these values perfectly. It’s a dish that turns everyday ingredients into something extraordinary.

The Italian Omelette: A Culinary Tradition:

A golden-brown Italian frittata in a cast iron skillet with vibrant vegetables and melted cheese.

What Is a Frittata?

The Italian version of the omelette, known as the frittata, isn’t just food—it’s an experience. Whether enjoyed for breakfast, lunch, or dinner, the frittata embodies the rich traditions of Italian cuisine.

Frittata vs. Omelette: What’s the Difference?

So, what sets the frittata apart from the omelette? Here’s a quick comparison:

  • Cooking Method: While omelettes are cooked quickly and folded, frittatas are cooked slowly and finished in the oven.
  • Ingredients: Omelettes are usually simple, with just one or two fillings. Frittatas, on the other hand, are a medley of ingredients, making them more robust.
  • Texture: Frittatas are thicker and fluffier, thanks to the gentle cooking process.

Think of an omelette as a quick snack, while a frittata is a full-blown meal.

“A frittata is like the Italian way of saying, ‘Why settle for less when you can have it all?'”

Historical Roots of the Frittata:

Origins in Italian Peasant Cooking

The word “frittata” comes from the Italian verb friggere, which means “to fry.” Historically, this dish was a staple among Italian peasants who needed a quick and affordable meal. They would use whatever ingredients were on hand, mix them with eggs, and cook it all in a skillet. Simple, yet genius.

Modern-Day Adaptations and Variations

Fast forward to today, and the frittata has become a beloved dish worldwide. From high-end restaurants to cozy kitchens, it’s been reimagined in countless ways. Some people add exotic cheeses, while others stick to traditional recipes passed down through generations.

Ingredients: What Makes a Frittata Special?

One reason the Italian version of the omelette has become so popular is its incredible versatility. Whether you stick to classic ingredients or experiment with modern twists, a frittata always delivers big on flavor.

Classic Frittata Ingredients

Fresh ingredients for a classic frittata including eggs, cherry tomatoes, spinach, mozzarella, and fresh herbs.

At its core, the frittata only needs a few simple ingredients: eggs, a splash of milk or cream, and a pinch of salt. But what makes it special is what you add to it. Common classic ingredients include:

  • Vegetables: Bell peppers, onions, spinach, or zucchini are great choices.
  • Cheeses: Parmesan, ricotta, or mozzarella for that creamy touch.
  • Proteins: Sausage, bacon, or even smoked salmon for a savory kick.
  • Herbs: Fresh basil, parsley, or thyme to elevate the flavor.

Feel free to let your creativity shine! A frittata is the perfect canvas for experimenting with different combinations.

Exploring Regional Variations

Italy is a country of rich culinary diversity, and each region has its own twist on the frittata. Here are a few variations:

  • Frittata di Pasta: A Neapolitan specialty using leftover pasta for a hearty meal.
  • Frittata di Cipolle: A simple onion frittata, popular in southern Italy.
  • Frittata al Forno: Baked in the oven, often with potatoes and cheese, for a thicker, casserole-like dish.

Each variation reflects the ingredients and traditions of the region, making every frittata unique.

Step-by-Step Guide to Making the Perfect Frittata:

Choosing the Right Pan

The pan you use can make or break your frittata. A non-stick skillet or a well-seasoned cast iron pan is ideal. Look for a pan that’s oven-safe, as most frittatas need a quick finish under the broiler.

“A good pan is like a trusty sidekick—without it, your frittata adventures might fall flat! 🥄”

Preparing Ingredients Like a Pro

Before you start cooking, make sure your ingredients are prepped and ready to go. Here’s how:

  1. Chop Vegetables: Dice your veggies into small, even pieces to ensure they cook evenly.
  2. Cook Proteins First: If you’re using bacon, sausage, or other proteins, cook them beforehand.
  3. Grate Cheese: Freshly grated cheese melts better and adds a richer flavor.

This preparation ensures a seamless cooking process.

Cooking Techniques for Fluffy Perfection

A frittata cooking in a non-stick skillet with vibrant vegetables and melting cheese. Title: Frittata Cooking in a Skillet with Vegetables

Now, let’s get cooking! Follow these steps for a perfect frittata:

  1. Preheat the Pan: Heat your pan over medium heat and add a drizzle of olive oil or a pat of butter.
  2. Sauté Ingredients: Start by cooking your vegetables and proteins until they’re tender.
  3. Mix the Eggs: Beat your eggs with a splash of milk or cream, then pour the mixture evenly over the cooked ingredients in the pan.
  4. Cook Slowly: Reduce the heat to low and let the eggs cook gently. This ensures a soft, fluffy texture.
  5. Finish in the Oven: Once the edges are set but the center is still jiggly, transfer the pan to a preheated oven or broiler. Cook for 5-10 minutes until the top is golden and puffy.

And voilà! You’ve just made a frittata that could rival an Italian grandma’s recipe. 🍳

Common Problems When Making Frittatas and How to Fix Them:

Have trouble perfecting the Italian version of the omelette? Don’t worry; with a few tips and tricks, you’ll be serving up frittatas like a pro in no time.

Why Does My Frittata Stick to the Pan?

Ah, the dreaded stuck frittata! This happens when:

  • The pan isn’t non-stick or well-oiled.
  • You try to flip it too soon.

Solution: Use a generous amount of oil or butter, and make sure the pan is non-stick. Also, resist the urge to move the frittata until the edges are set.

How to Avoid a Dry Frittata

Nobody likes a rubbery frittata. This usually happens if:

  • You overcook it.
  • You don’t add enough moisture to the eggs.

Solution: Add a splash of milk or cream to your egg mixture and cook the frittata over low heat. Keep a close eye on it in the oven, and remove it as soon as it’s just set.

Achieving the Right Texture and Flavor

Is your frittata too dense or bland? Here’s how to fix it:

  • Whisk your eggs thoroughly to incorporate air, which makes the frittata fluffy.
  • Don’t skimp on seasoning. Salt, pepper, and fresh herbs go a long way.

“Think of your frittata as a symphony—every ingredient should hit the right note. 🎶”

Frittata Recipes for Every Occasion:

Now that you’ve mastered the basics, it’s time to explore some mouthwatering frittata recipes. Whether you’re cooking for breakfast, lunch, dinner, or a special event, there’s a frittata for every occasion.

Breakfast Frittata with Vegetables and Cheese

Start your day on the right note with this hearty and nutritious breakfast frittata.

Ingredients:

  • 6 large eggs
  • 1/4 cup milk
  • 1 cup spinach (chopped)
  • 1/2 cup cherry tomatoes (halved)
  • 1/2 cup mozzarella cheese (shredded)
  • Salt and pepper to taste

Instructions:

  1. Preheat your oven to 375°F (190°C).
  2. In a bowl, whisk the eggs, milk, salt, and pepper.
  3. Heat a non-stick skillet over medium heat and sauté the spinach and cherry tomatoes until tender.
  4. Pour the egg mixture over the veggies and sprinkle mozzarella on top.
  5. Cook on low heat until the edges set, then transfer to the oven for 10 minutes or until the top is golden and fluffy.
  6. Serve with a slice of crusty bread. 🥖

Dinner Frittata with Sausage and Potatoes

Looking for a quick yet satisfying dinner? This frittata is loaded with hearty ingredients.

Ingredients:

  • 8 large eggs
  • 1/4 cup cream
  • 2 sausages (sliced)
  • 1 cup potatoes (diced and pre-cooked)
  • 1/4 cup Parmesan cheese (grated)
  • 1 tsp dried rosemary
  • Salt and pepper to taste

Instructions:

  1. Preheat your oven to 400°F (200°C).
  2. Sauté the sausage slices in an oven-safe skillet until browned. Add the potatoes and rosemary, cooking until fragrant.
  3. In a bowl, beat the eggs with cream, Parmesan, salt, and pepper.
  4. Pour the egg mixture into the skillet, ensuring even distribution.
  5. Cook on the stove until the edges are set, then bake for 12-15 minutes.
  6. Serve with a fresh salad on the side. 🥗

Vegan and Gluten-Free Frittata Options

For those with dietary preferences, you can still enjoy a delicious frittata using plant-based and gluten-free ingredients.

Ingredients:

  • 1 cup chickpea flour
  • 1 cup water
  • 1/2 tsp turmeric
  • 1/2 tsp garlic powder
  • 1/2 cup zucchini (grated)
  • 1/4 cup nutritional yeast
  • Salt and pepper to taste

Instructions:

  1. Preheat your oven to 375°F (190°C).
  2. Whisk the chickpea flour, water, turmeric, garlic powder, salt, and pepper to form a batter.
  3. Mix in the grated zucchini and nutritional yeast.
  4. Pour the batter into a greased oven-safe dish and bake for 20-25 minutes.
  5. Let it cool slightly before slicing. It’s a plant-based delight! 🌱

Serving and Pairing Suggestions:

A slice of golden frittata garnished with herbs, served with a fresh green salad and a glass of white wine.

A frittata can be the star of the table or a versatile side dish. Here’s how to make it shine.

How to Plate a Frittata Like an Italian Chef

Presentation matters! To serve a frittata like a pro:

  • Slice It Neatly: Use a sharp knife to cut clean wedges.
  • Garnish Generously: Sprinkle fresh herbs, a drizzle of olive oil, or grated Parmesan on top.
  • Pair It Right: Serve on a rustic wooden board or a colorful plate to enhance the visual appeal.

“A beautifully plated frittata is like art on a plate—it’s almost too pretty to eat! 🎨”

Best Side Dishes and Drinks to Accompany Frittatas

Pair your frittata with sides and beverages that complement its flavors. Here are some ideas:

  • Sides: Fresh green salad, roasted vegetables, or garlic bread.
  • Drinks: A robust espresso for breakfast, a crisp white wine for dinner, or even a sparkling lemonade for brunch.

Why the Frittata is a Symbol of Italian Comfort Food:

Cultural Significance of the Frittata

The frittata isn’t just a dish—it’s a reflection of Italian culture. It’s humble yet versatile, a meal that brings families together. In many households, frittatas are a way to use up leftovers, showcasing Italian frugality and creativity.

How It Brings People Together

Whether served at a family gathering or a casual brunch, the frittata has a magical way of uniting people. Its hearty, satisfying nature makes it the perfect dish to share.

“Food has the power to connect us, and a warm frittata on the table feels like a big Italian hug. 🤗”

Conclusion: Why You Should Try Making a Frittata Today

If you haven’t tried making a frittata yet, now’s the time! It’s simple, delicious, and endlessly customizable. Plus, it’s a great way to impress your family and friends with minimal effort. So grab your ingredients, fire up your skillet, and get ready to fall in love with the Italian version of the omelette.

A Greek omelette served with Greek salad, roasted potatoes, and pita bread, garnished with fresh parsley.

What Is a Greek Omelette Made Of?

Introduction:

A Greek omelette served with Greek salad, roasted potatoes, and pita bread, garnished with fresh parsley.

A Mediterranean Twist on a Classic Dish

An omelette might seem like an ordinary breakfast choice, but a Greek omelette is anything but ordinary. Picture this: fluffy eggs combined with the tangy kick of feta cheese, juicy tomatoes, sweet onions, and a sprinkle of aromatic herbs like oregano and parsley. It’s a dish that takes you on a culinary journey to the shores of the Mediterranean, where simplicity meets bold flavors.

“A Greek omelette is like a love letter to the Mediterranean—simple, flavorful, and utterly irresistible.” 🌞

Why Greek Omelettes Are Unique

So, what makes a Greek omelette stand out from the crowd? It’s all about the ingredients and their balance. Unlike Western-style omelettes loaded with heavy fillings like cheese and bacon, the Greek version is lighter yet incredibly satisfying. The freshness of the ingredients takes center stage, and the use of olive oil instead of butter adds a healthy, authentic touch.

Essential Ingredients of a Greek Omelette:

Ingredients for a Greek omelette, including eggs, feta cheese, tomatoes, onions, olive oil, and fresh herbs.

Let’s break down the stars of the show. If you’ve ever wondered, “What is a Greek omelette made of?” this section has all the answers.

Eggs: The Foundation of Every Omelette

Eggs are the backbone of any omelette, and it’s no different for the Greek version. Fresh, free-range eggs are best because they have a richer flavor and brighter yolks, making your omelette look and taste amazing.

Feta Cheese: The Star Ingredient

No Greek omelette is complete without feta cheese. Its tangy, slightly salty flavor perfectly complements the other ingredients. Crumbled over the eggs, it melts just enough to create creamy pockets of flavor.

Fresh Vegetables: Tomatoes, Onions, and More

Tomatoes and onions are classic staples in a Greek omelette. The tomatoes add a sweet, juicy burst, while the onions provide a mild, caramelized depth. Some variations also include bell peppers or spinach for added texture and flavor.

Olive Oil: The Mediterranean Staple

Instead of butter, a traditional Greek omelette uses olive oil for cooking. Not only is it healthier, but it also adds a subtle, fruity aroma that ties all the ingredients together.

Herbs and Spices: Oregano, Parsley, and Dill

Finally, no Greek omelette would be complete without herbs. Oregano is a must—it’s the signature herb of Greek cuisine. A sprinkle of parsley or dill adds freshness and makes the dish pop.

“Think of each ingredient in a Greek omelette as a member of a harmonious band—together, they create a symphony of flavors.” 🎶

Optional Additions to Enhance Your Omelette:

While the classic Greek omelette recipe is already fantastic, there’s always room to get creative.

Meat Options: Gyro, Ham, or Bacon

If you’re a meat lover, you can add slices of gyro meat, crispy bacon, or ham. These proteins bring a savory edge that makes the dish even heartier.

Vegetarian Add-Ins: Spinach, Zucchini, or Peppers

For a veggie-packed version, throw in some spinach or zucchini. Bell peppers add a satisfying crunch and a splash of color.

Unique Ingredients for a Personal Touch

Want to make your omelette truly your own? Add Kalamata olives for a briny kick, or sprinkle a bit of red pepper flakes for heat. A drizzle of lemon juice at the end can also brighten the dish.

“Customizing your Greek omelette is like painting on a blank canvas—add your favorite flavors and make it your masterpiece.” 🎨

The Role of Freshness in Ingredients:

One key to mastering a Greek omelette is understanding the importance of freshness.

Choosing High-Quality Eggs

Fresh eggs not only taste better but also create a fluffier texture. To check for freshness, place your egg in a bowl of water. If it sinks, it’s good to go. If it floats, toss it.

Picking the Perfect Feta Cheese

Opt for authentic Greek feta cheese if possible. It’s usually made from sheep’s milk or a blend of sheep and goat’s milk, giving it a creamier texture and more complex flavor.

Step-by-Step Process to Make a Greek Omelette:

Let’s get into the kitchen and start cooking! Making a Greek omelette is simple, but it’s the attention to detail that makes it truly amazing. Follow these steps for a foolproof recipe.

Preparing the Ingredients

Before you even turn on the stove, preparation is key.

  1. Crack the Eggs: Crack 3–4 fresh eggs into a bowl. Add a pinch of salt and pepper, and whisk until the yolks and whites are fully combined. For extra creaminess, add a splash of milk.
  2. Chop the Veggies: Dice a handful of tomatoes and thinly slice half an onion. If you’re adding extras like spinach, give them a quick rinse and chop if needed.
  3. Crumble the Feta: Use about 1/3 cup of feta cheese. Crumble it into small, bite-sized pieces for even distribution.
  4. Prepare the Herbs: Finely chop fresh parsley or dill and set aside for garnishing.

“Prepping your ingredients is like laying the foundation for a masterpiece—don’t skip this step!” 🛠️

Cooking Techniques for the Perfect Omelette

A Greek omelette cooking in a pan with golden edges and visible feta and vegetables.

Now that your ingredients are ready, it’s time to cook.

  1. Heat the Pan: Use a non-stick pan and heat a drizzle of olive oil over medium heat. Wait until the oil shimmers—it’s your cue that the pan is hot enough.
  2. Sauté the Veggies: Start with the onions. Cook them until they’re golden and slightly caramelized, about 2–3 minutes. Then, toss in the tomatoes and cook for another minute. If using spinach, add it last as it wilts quickly.
  3. Pour the Eggs: Lower the heat slightly and pour the whisked eggs evenly over the veggies. Tilt the pan to spread the mixture if needed.

Adding and Balancing Flavors

The secret to a great Greek omelette is layering flavors.

  1. Add the Feta: Sprinkle the crumbled feta cheese evenly over the eggs. As it warms, it will soften and melt slightly, creating creamy bursts of flavor.
  2. Season with Herbs: Add a pinch of dried oregano while the eggs cook, and reserve fresh parsley or dill for garnishing.
  3. Cook to Perfection: Allow the eggs to cook slowly. The edges should set while the center remains slightly soft. Use a spatula to gently loosen the edges to ensure nothing sticks.

Common Problems with Greek Omelettes:

Even the best chefs encounter challenges. Here are some common issues and how to fix them.

Why Does My Omelette Stick to the Pan?

If your omelette sticks, it’s usually due to an improperly heated pan or not enough oil. Always preheat your pan and use a generous drizzle of olive oil.

How to Prevent Overcooking or Undercooking

Overcooked eggs turn rubbery, while undercooked eggs can be unpleasant. To avoid this, use medium-low heat and watch for visual cues. When the edges set and the center looks slightly glossy, your omelette is ready.

Getting the Balance of Flavors Right

Too salty? Not salty enough? These issues often arise when using feta cheese. Start with a small amount, taste, and adjust. If you accidentally add too much salt, balance it out with a squeeze of lemon juice.

“Cooking is all about trial and error. Don’t be discouraged if your first attempt isn’t perfect—every omelette is a learning experience.” 🍳

Solutions to Greek Omelette Challenges:

Let’s troubleshoot further with some handy tips and tricks.

Tools and Tips for Omelette Success

  • Use a silicone spatula for easy flipping without breaking the omelette.
  • Stick to a non-stick or well-seasoned pan to prevent sticking.
  • For even cooking, stir the eggs gently during the first few seconds of cooking before letting them set.

Adjusting for Different Diets or Preferences

  • For a low-calorie option, replace whole eggs with egg whites and reduce the amount of feta.
  • Want a heartier meal? Add some cooked chicken or gyro meat for extra protein.
  • For a vegan twist, use tofu as an egg substitute and swap feta for a plant-based cheese alternative.

“Think of challenges as opportunities to experiment—your best omelette might come from a happy accident!” 🌟

Nutritional Benefits of a Greek Omelette:

A Greek omelette isn’t just delicious—it’s also packed with nutrients that can fuel your day. Let’s take a closer look at why this dish is as healthy as it is tasty.

High-Protein and Low-Carb Breakfast Option

Eggs are the star of the Greek omelette, providing a high-quality protein source that keeps you full for hours. This dish is naturally low in carbohydrates, making it perfect for those following a keto or low-carb diet. Add in feta cheese and veggies, and you’ve got a balanced meal that supports muscle growth and weight management.

Vitamins, Minerals, and Healthy Fats

  • Eggs contribute vitamins D, B12, and choline, which support brain health and energy levels.
  • Feta Cheese adds calcium and phosphorus, essential for strong bones.
  • Olive Oil brings in heart-healthy monounsaturated fats that are staples of the Mediterranean diet.
  • Veggies like tomatoes and onions provide antioxidants, vitamins C and A, and dietary fiber.

“Think of a Greek omelette as your delicious, nutrient-packed morning booster—it’s like health in a skillet!” 🥗

Greek omelettes are wonderfully versatile. Here are some variations to suit different tastes and dietary needs.

Classic Vegetarian Greek Omelette

This version sticks to the basics—eggs, feta, tomatoes, onions, and herbs. You can add spinach or bell peppers for extra flavor and nutrition. Perfect for vegetarians or anyone who loves a lighter meal.

Protein-Packed Meat Lover’s Greek Omelette

For those who crave a hearty breakfast, add slices of gyro meat, cooked chicken, or crispy bacon. The added protein makes this version a filling option that doubles as a lunch or dinner choice.

Low-Calorie Greek Omelette Alternatives

Looking to cut calories? Replace whole eggs with egg whites and reduce the amount of feta cheese. Load up on greens like spinach or zucchini for volume without the added calories.

“No matter your preference, there’s a Greek omelette variation that fits your lifestyle. It’s like the Swiss Army knife of breakfast dishes!” 🔪

Pairing Suggestions for a Complete Meal:

A Greek omelette can shine on its own, but pairing it with the right sides and drinks elevates the experience.

Ideal Side Dishes for a Greek Omelette

  • Greek Salad: A fresh mix of cucumbers, tomatoes, olives, and feta cheese, lightly dressed with olive oil and lemon juice.
  • Pita Bread: Warm, fluffy, and perfect for scooping up bites of omelette.
  • Roasted Potatoes: Seasoned with oregano and garlic for a Mediterranean flair.

Best Drinks to Complement the Dish

  • Greek Coffee: Strong and bold, this traditional drink pairs beautifully with the flavors of the omelette.
  • Fresh Orange Juice: Bright and refreshing, it balances the savory elements of the dish.
  • Herbal Tea: Chamomile or mint tea adds a soothing touch to your meal.

“Pairing your Greek omelette with the right sides is like completing a puzzle—it makes the whole picture come to life.” 🧩

Greek Omelette in Different Cuisines:

Greek omelettes are rooted in Mediterranean tradition, but their influence can be seen in dishes worldwide.

How Mediterranean Influence Shaped the Dish

The use of olive oil, feta cheese, and fresh herbs is a hallmark of Greek cuisine. These elements have inspired similar omelettes in other Mediterranean regions, such as Spain’s tortilla or Italy’s frittata.

Similar Dishes Around the World

  • Spanish Omelette (Tortilla Española): Made with eggs, potatoes, and onions, it’s heartier but shares the same love for simplicity.
  • French Omelette: Focused on texture, it’s softer and creamier but doesn’t have the bold flavors of a Greek omelette.

Conclusion: Why You Should Try a Greek Omelette

The Greek omelette is more than just a meal—it’s an experience. It combines the freshness of Mediterranean ingredients with the comfort of a classic breakfast dish. Whether you stick to the traditional recipe or explore creative variations, it’s a dish that adapts to your tastes and dietary needs.

So, next time you’re craving something hearty yet healthy, whip up a Greek omelette. Not only will you enjoy a delicious meal, but you’ll also get a taste of Greece right from your own kitchen. 🌍

“Every Greek omelette tells a story of flavor, culture, and creativity. What will yours say?” 🍳

Different variations of Greek omelettes, including vegetarian, low-calorie, and meat-lover versions, displayed on wooden plates.

Greek Omelette Recipe: A Complete Guide

What is a Greek Omelette?

Looking for a flavorful Mediterranean breakfast? This Greek omelette recipe is your go-to guide for a delicious, wholesome meal. Packed with feta cheese, fresh veggies, and aromatic herbs, this dish brings the authentic taste of Greece to your plate. Unlike traditional omelettes, a Greek omelette recipe celebrates simple ingredients that create extraordinary flavors. Whether you’re new to cooking or a seasoned chef, mastering this recipe will make you feel like a pro in no time.

Origins of the Greek Omelette

Greek omelettes have roots deeply tied to Mediterranean cuisine. Unlike your traditional omelette, this dish is loaded with fresh veggies, tangy feta cheese, and aromatic herbs like oregano, giving it a signature Greek flair. The dish reflects Greece’s rich culinary heritage, where simple ingredients transform into something extraordinary.

Why Greek Omelettes Are Unique

A Greek omelette recipe is a fusion of simple, fresh ingredients like eggs, feta cheese, and tomatoes. It’s a Mediterranean classic that’s easy to prepare.

Key Ingredients for a Traditional Greek Omelette:

To perfect any Greek omelette recipe, you’ll need fresh eggs, high-quality feta, and flavorful veggies like tomatoes and onions.

Essential Ingredients

Fresh ingredients for a Greek omelette, including eggs, tomatoes, feta cheese, onions, and olive oil.
Gather fresh and simple ingredients to create the perfect Greek omelette.

Here’s what you’ll need to whip up a classic Greek omelette:

  • Eggs: The base of your omelette. Go for fresh, free-range eggs for the best results.
  • Feta Cheese: The tangy star of the show. Crumbled feta adds that distinct Greek flavor.
  • Tomatoes: Cherry tomatoes or Roma tomatoes work beautifully for their natural sweetness.
  • Onions: Either red or yellow onions, finely sliced and sautéed until golden.
  • Olive Oil: A Mediterranean staple that keeps everything rich and flavorful.
  • Herbs: Dried oregano and fresh parsley for that unmistakable Greek vibe.

Optional Additions to Enhance Flavor

  • Spinach: For a pop of green and extra nutrition.
  • Kalamata Olives: To amp up the Mediterranean feel.
  • Bell Peppers: If you love a bit of crunch.
  • Meats: Like ham or gyro slices for a heartier version.

“A Greek omelette is like a canvas—simple on its own, but endless in its possibilities with a splash of creativity.” 🖌️

Tools Needed for Cooking a Perfect Omelette:

Must-Have Kitchen Tools

To create a flawless Greek omelette, you’ll need a few trusty tools:

  1. Non-stick Pan: Prevents sticking and makes flipping a breeze.
  2. Spatula: Go for silicone or wooden to avoid scratching your pan.
  3. Whisk or Fork: To beat the eggs until light and fluffy.
  4. Cutting Board and Knife: For prepping your veggies and herbs.

Alternative Tools You Can Use

No fancy tools? No problem! A cast-iron skillet can substitute for a non-stick pan, and a regular fork works just fine for whisking eggs. The goal is to use what you have while keeping it simple.

“A well-made omelette starts with the right tools, just like a painter chooses their brushes carefully.” 🎨

Step-by-Step Guide to Making a Greek Omelette:

This step-by-step guide ensures that your Greek omelette recipe turns out perfect every time, whether you’re cooking for one or hosting brunch

Preparation Steps

  1. Chop and Prep: Dice the tomatoes, slice the onions thinly, and crumble the feta cheese. If you’re adding extras like spinach or olives, get those ready too.
  2. Whisk the Eggs: Crack the eggs into a bowl, add a pinch of salt and pepper, and whisk until the yolks and whites are fully combined.

Tip: Add a splash of milk or cream to make your eggs extra creamy and fluffy. 🥚

  1. Preheat Your Pan: Heat olive oil over medium heat until it shimmers. This step is crucial for preventing sticking and ensuring even cooking.

Cooking Instructions

  1. Sauté the Veggies: Toss in the onions first, cooking until golden and fragrant. Then, add the tomatoes and cook for 2-3 minutes.
  2. Pour in the Eggs: Once the veggies are softened, pour the whisked eggs into the pan. Use a spatula to gently move the eggs around for even cooking.
  3. Add the Feta and Herbs: Sprinkle crumbled feta and oregano evenly over the top. Lower the heat and let the omelette cook until the edges are set but the center remains slightly runny.
  4. Fold and Serve: Carefully fold the omelette in half, slide it onto a plate, and garnish with fresh parsley or extra feta.

🎉 Voilà! You’ve just made a Greek omelette that could rival any Mediterranean café!

Common Problems When Making Greek Omelettes:

Cooking a Greek omelette sounds simple, right? Yet, things can go sideways sometimes. Let’s explore some common problems and how to troubleshoot them like a pro.

Omelette Sticking to the Pan

This is one of the most frustrating issues. You’ve poured your heart (and your eggs) into the pan, only to have it stubbornly cling to the surface. The culprit? Usually, it’s an old or improperly greased pan.

Solution:

  • Always use a non-stick or well-seasoned pan.
  • Heat the pan with olive oil until it’s shimmering before adding the eggs.

Overcooked or Undercooked Eggs

Nobody enjoys biting into a dry, rubbery omelette—or worse, one that’s still runny in the middle.

Solution:

  • Use medium-low heat to cook your omelette slowly and evenly.
  • Keep an eye on the edges; they should set while the center remains slightly soft.

Balancing Flavors

Too salty from the feta? Not flavorful enough? Balancing the ingredients can be tricky.

Solution:

  • Start with a small amount of feta and taste as you go. You can always add more but can’t take it out.
  • A sprinkle of lemon zest can brighten up flavors if they feel too heavy.

“The art of omelette making lies in the balance—too much of anything, and you’ll tip the scales.” ⚖️

Solutions to Common Problems:

Choosing the Right Pan

Invest in a quality non-stick pan. It’s not just for omelettes—it’s your secret weapon for pancakes, stir-fries, and more. If you prefer a sustainable option, a cast-iron skillet works wonders (just make sure it’s properly seasoned).

Tips for Perfect Egg Consistency

Whisking is key! Beat the eggs until no streaks remain, incorporating a little air. Adding a splash of milk or cream gives a luxurious texture.

Adjusting Seasoning and Ingredients

Remember, less is more when it comes to seasoning. Let the natural flavors of the ingredients shine. If you want to jazz it up, try adding a pinch of smoked paprika or a drizzle of honey for a sweet-savory twist.

Nutritional Benefits of Greek Omelettes:

Following a Greek omelette recipe means enjoying a meal that’s rich in protein, healthy fats, and essential vitamins.

High Protein Content

Eggs are one of the best sources of protein. A single omelette can keep you full and energized for hours, making it perfect for busy mornings.

Rich in Vitamins and Minerals

The veggies add essential vitamins like A, C, and K, while the feta cheese contributes calcium and phosphorus for strong bones. Olive oil, a staple in Greek cuisine, is packed with healthy fats that support heart health.

“Think of a Greek omelette as a multivitamin you can eat—and it tastes way better!” 🥗

Different variations of Greek omelettes, including vegetarian, low-calorie, and meat-lover versions, displayed on wooden plates.
Explore exciting variations of the classic Greek omelette to suit every taste.

Greek omelettes are incredibly versatile. Here are some fun variations to keep things interesting.

Vegetarian Greek Omelette

Skip the meat and load up on veggies like spinach, zucchini, and bell peppers. This version is lighter but still packed with flavor.

Low-Calorie Greek Omelette

For a calorie-conscious option, use egg whites instead of whole eggs. Add lots of greens and go easy on the cheese.

Meat-Lovers Greek Omelette

If you’re feeling indulgent, add slices of gyro meat, crispy bacon, or cooked sausage. It’s a hearty twist that turns your omelette into a complete meal.

Pairing Suggestions:

What goes with a Greek omelette? Plenty! Here are some pairing ideas to elevate your meal.

Best Side Dishes

  • Greek Salad: A mix of cucumbers, tomatoes, and olives drizzled with olive oil.
  • Pita Bread: Warm, fluffy, and perfect for scooping up the omelette.
  • Roasted Potatoes: Seasoned with oregano and garlic for a Mediterranean touch.

Ideal Beverages

  • Fresh Orange Juice: For a zesty, refreshing contrast.
  • Greek Coffee: Bold and aromatic, it’s a match made in heaven.
  • Herbal Tea: Chamomile or mint tea pairs beautifully for a calming breakfast.

“Pairing food is like finding the perfect dance partner—it makes everything flow effortlessly.” 💃

Greek Omelette Recipe for Beginners:

If you’re new to cooking or omelettes in general, don’t sweat it! This simplified guide will have you whipping up a delicious Greek omelette in no time.

Simplified Recipe Steps

  1. Crack & Whisk: Break 2-3 eggs into a bowl, add a pinch of salt and pepper, and whisk until frothy.
  2. Prep Your Pan: Heat a drizzle of olive oil in a non-stick pan over medium heat.
  3. Add Veggies: Toss in some sliced onions and diced tomatoes, cooking until they soften.
  4. Pour the Eggs: Gently pour the beaten eggs over the veggies, tilting the pan to spread them evenly.
  5. Top with Feta: Sprinkle crumbled feta cheese and a pinch of dried oregano over the eggs.
  6. Cook & Fold: Once the edges set, fold the omelette in half and slide it onto a plate. Garnish with parsley, and you’re done!

Common Beginner Mistakes

  • Overloading the Omelette: Keep it simple; too many ingredients can make flipping tricky.
  • Using High Heat: This can lead to uneven cooking or burnt edges.
  • Not Prepping Ingredients First: Have everything ready before you start cooking to avoid last-minute chaos.

“Think of your first omelette as a practice run—every chef starts somewhere!” 👩‍🍳

Advanced Tips for Cooking Like a Pro:

Ready to level up your omelette game? These tips will help you create restaurant-quality results.

Mastering the Flip

The dreaded flip can make or break your omelette. Here’s how to nail it:

  • Use a spatula to gently loosen the edges.
  • Slide the omelette halfway off the pan, then quickly tilt and fold it over with the spatula.

Still nervous? Practice with a slice of bread or tortilla to build your confidence.

Achieving the Perfect Golden Texture

For that beautiful golden finish, cook your omelette on medium-low heat and be patient. The slower you cook it, the more evenly it will brown without burning.

Playing with Presentation

Want to impress your guests? Serve your Greek omelette with a sprinkle of crumbled feta, a drizzle of olive oil, and a side of fresh greens. Presentation can make a simple dish feel gourmet.

“Cooking is like art—every detail matters, from the flip to the final garnish.” 🎨

Storing and Reheating Greek Omelettes:

Leftovers? No problem! Greek omelettes store and reheat beautifully.

Proper Storage Techniques

  • Fridge: Place the omelette in an airtight container and refrigerate for up to 3 days.
  • Freezer: Wrap individual portions tightly in plastic wrap and store in a freezer-safe bag for up to 1 month.

How to Reheat Without Losing Flavor

  • Microwave: Heat on medium power in 30-second intervals to avoid drying out.
  • Stovetop: Place the omelette in a non-stick pan over low heat, covering with a lid to retain moisture.

“Leftovers are like a second chance to enjoy the magic—just handle them with care!” 🥡

Frequently Asked Questions (FAQs):

Can I Freeze a Greek Omelette?

Absolutely! Greek omelettes freeze well. Just make sure to wrap them tightly and thaw overnight in the fridge before reheating.

What Other Cheeses Can I Use?

While feta is the traditional choice, you can experiment with goat cheese, ricotta, or even a sharp cheddar for a different twist.

Conclusion: Why You Should Try a Greek Omelette Today

A finished Greek omelette on a white plate, garnished with parsley and served with fresh salad and pita bread.
Serve your Greek omelette with a side of salad or pita for a complete Mediterranean meal.

Greek omelettes are more than just a meal—they’re an experience. Packed with fresh flavors, easy to customize, and loaded with nutrition, they’re perfect for breakfast, lunch, or even dinner. Whether you’re cooking for yourself or impressing guests, this recipe is a winner every time.

So why wait? Gather your ingredients, heat up that pan, and get cracking. You’re just a few steps away from enjoying a little slice of Greece on your plate. 🌞

“Every omelette tells a story—what will yours say?” 🥚